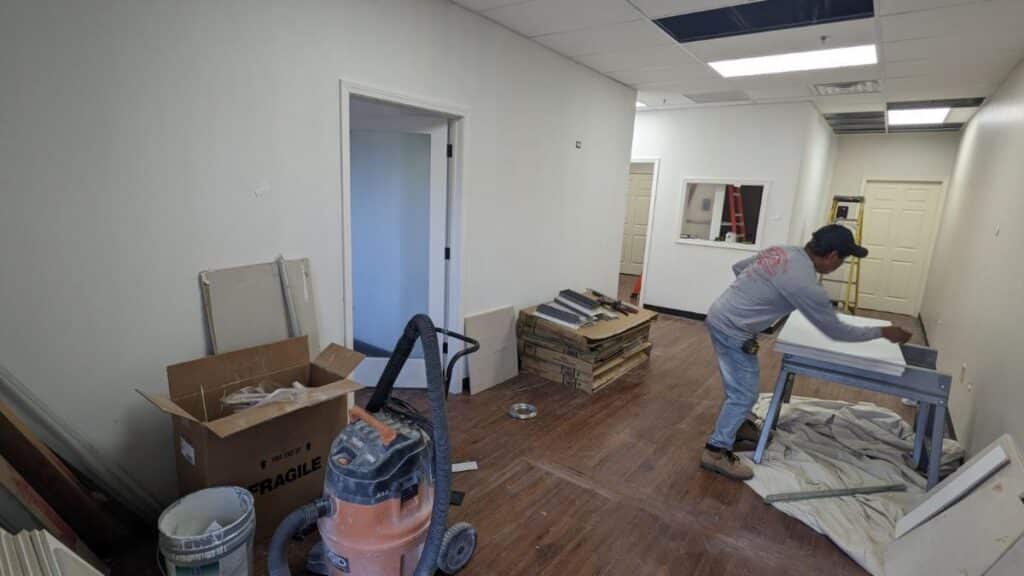
Your commercial space may be a huge complex, a retail location, a place to eat, or your office. Whatever the space we can help you with wallpaper, painting, or industrial coatings to get the most out of the space you’re in.
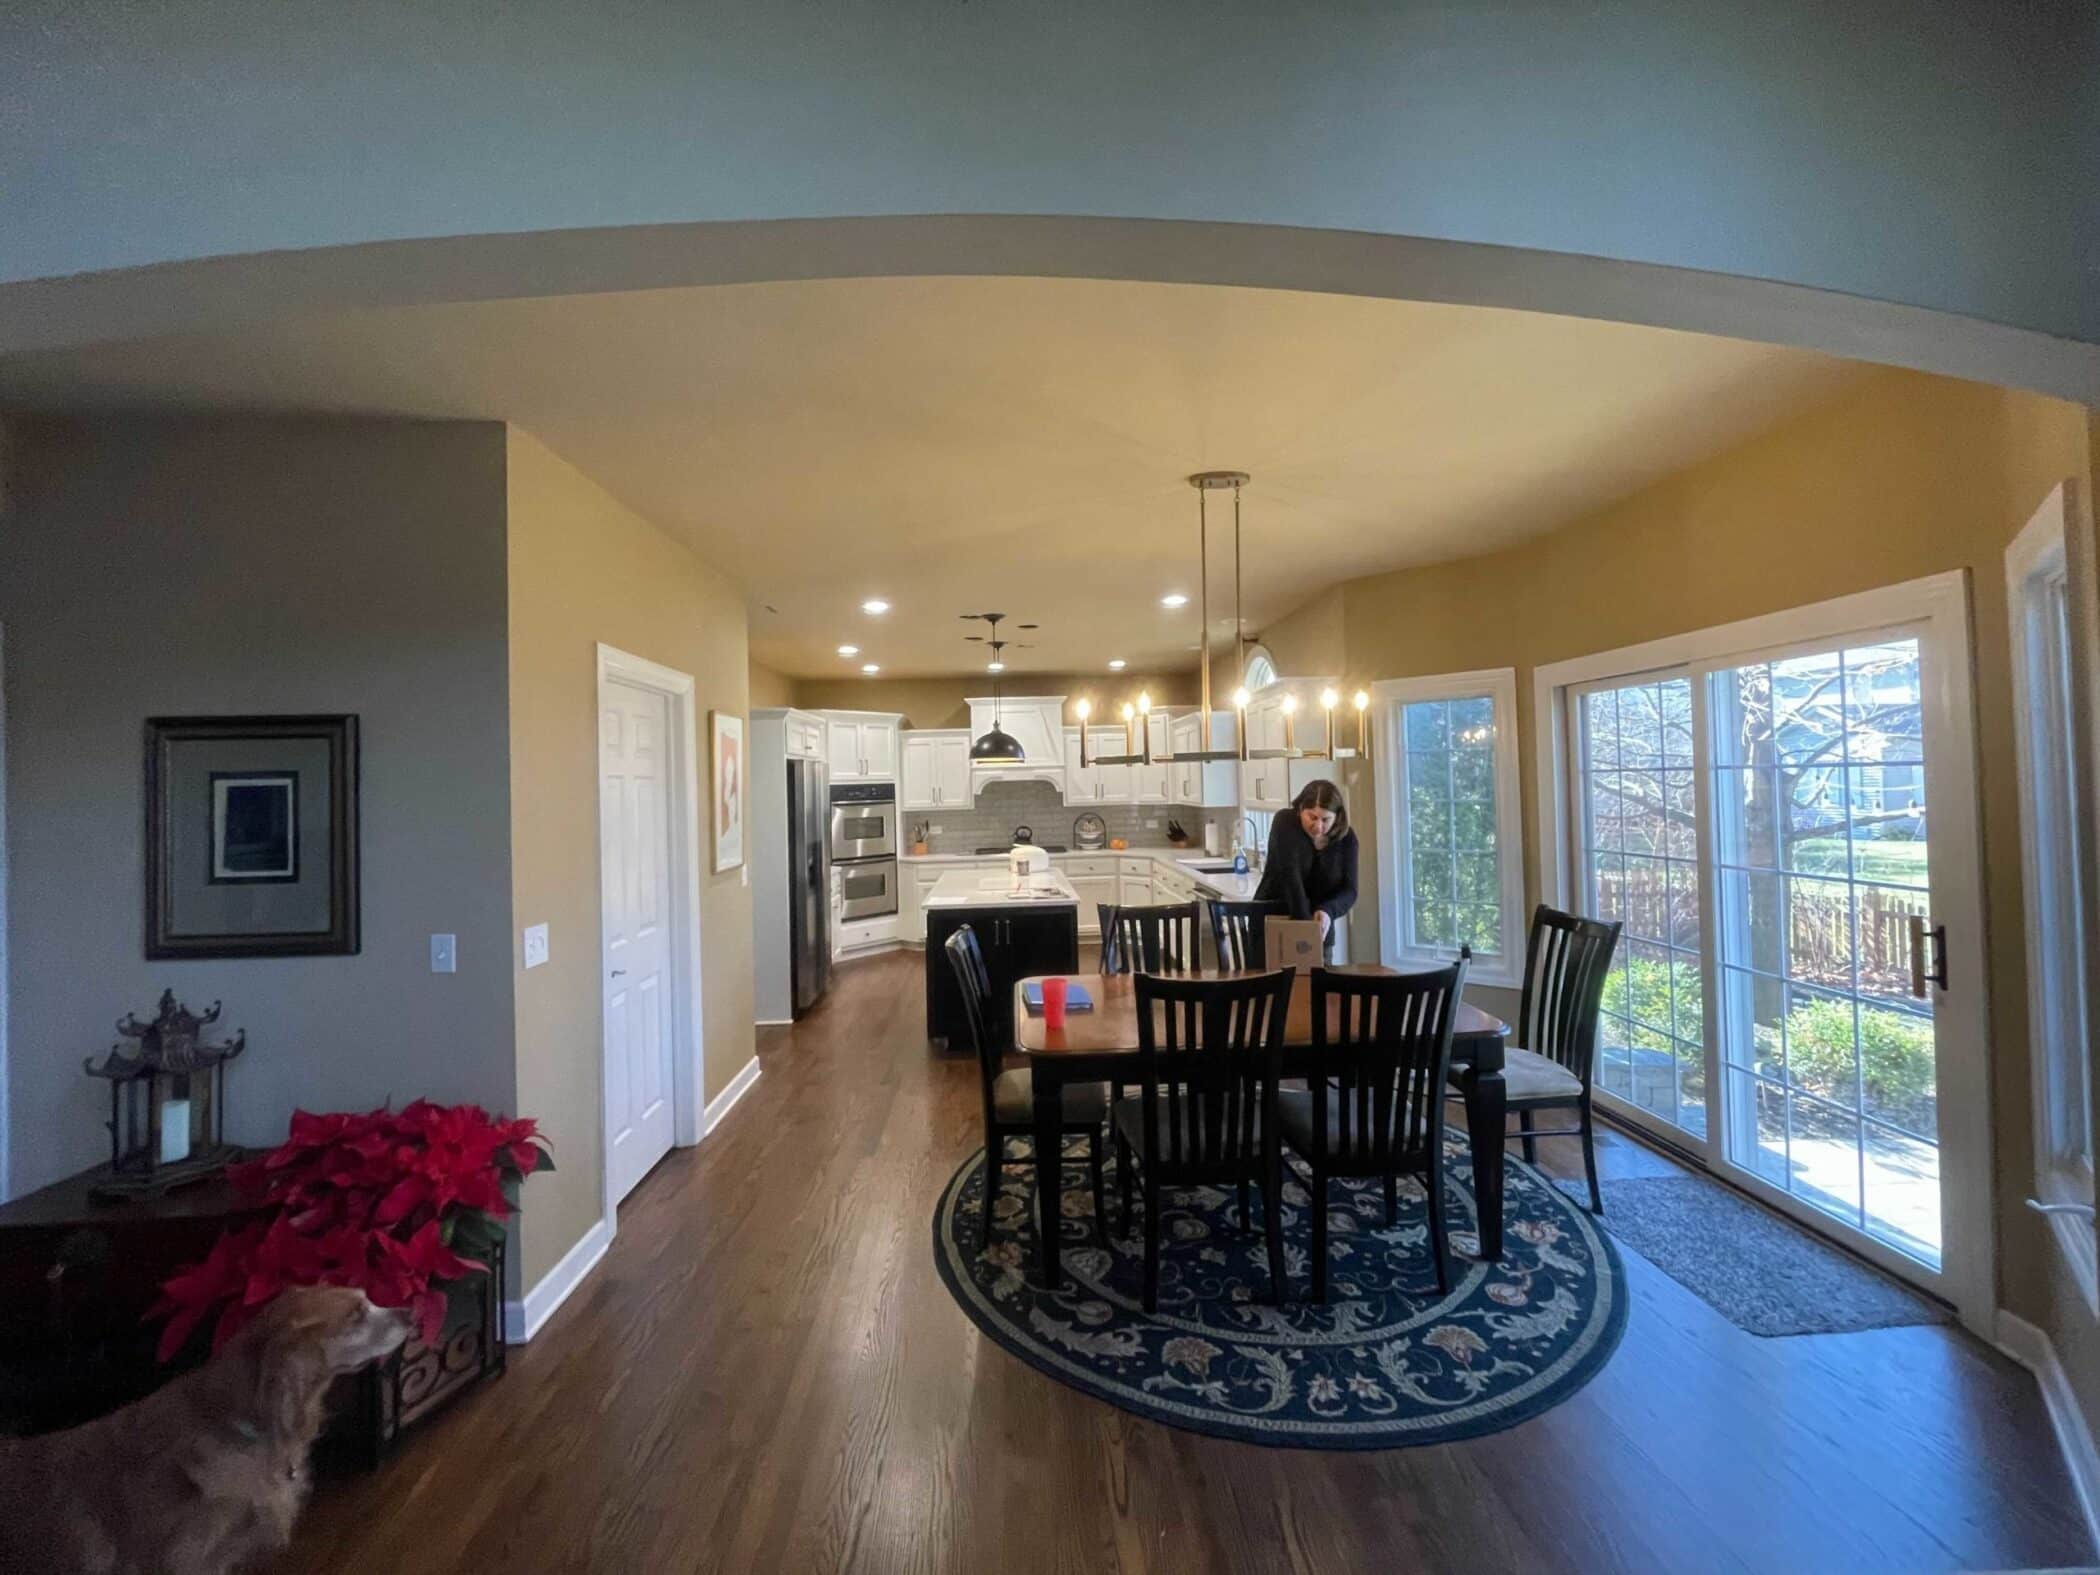
Painting your home is the number one thing you can do to improve the look, feel, and sale of your home. It is the 1st thing 90% do when they buy a home!
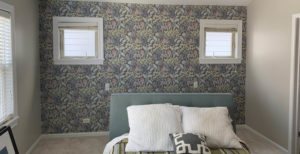
Make your house a home by putting your style, personality, flair, and unique taste on your walls with color. We will help you love the home you’re in!
If you are buying a home, or moving into a new home, then nothing beats the look and feel of your home. Painitng your walls, gives you a clean, neat, and perfect Feeliing!
Moving to a new house? Most customers want new paint colors. And since you are moving you are asking about how Painting your house before moving in can happen.
Hi, I’m David With Dfranco Painting and Wallpaper in Huntley. We serve towns like Barrington, Elgin, Crystal Lake, Pingree Grove, St. Charles, and Bartlett. Today we are discussing a call we receive frequently – painting your house before moving in. We are here to see how we can help you love the space your in by helping with your interior house painting before moving
Scheduling your painting before moving in
One of the biggest obstacles that we hear from customers is can you get the painting done on a certain date. We would love to say yes to every single one. (Here is our link to schedule an estimate for you). It has been an extremely high success rate for us because of the amount of crews, people, and resources we have access to.
Open areas help us Paint your house faster before moving in
When are you closing? This is the biggest obstacle. Closing dates are not 100% for sure, so if there is a delay, it can wreak havoc on our schedule as well as yours. So the more notice you have the better.
Working around other contractors when we paint
The next biggest issue on paint jobs is working around other trades or contractors. Painting your home before you move in usually means we need to be quick cause you don’t have much time. So we are gonna ask you some questions that week absolutely do need to know before we start your interior painting;
will you be doing any work to your cabinets?
are you having new carpet or flooring installed or removed?
is there going to be an electrician moving lights, outlets or switches?
do we need to move furniture?
do you want or take out any mirrors or vanities?
it is no fun working around other trades when we need to paint
These questions affect when we can paint. If you are getting new floors, then we don’t want to paint until old floors are out. We have painted before new floors are installed- I just don’t recommend it – it can. lead to issues later (knick/dings in walls, scrapes on trim etc)
get this type of work done before moving in!
Are there holes for new lights, if so-you must fix those holes. It is better to paint after completing all other work so that you can make the mess, clean it up, and then paint.
Knowing your colors before you move in
I would say picking paint colors is the most difficult thing to figure out. What colors do you want to paint?
We have designers we use to help! Best of all these designers are free to you! It can be tricky if your bringing in items from another house, as they have a color or tone that has to be considered in their new location. We have done a few videos on popular colors, check them out!
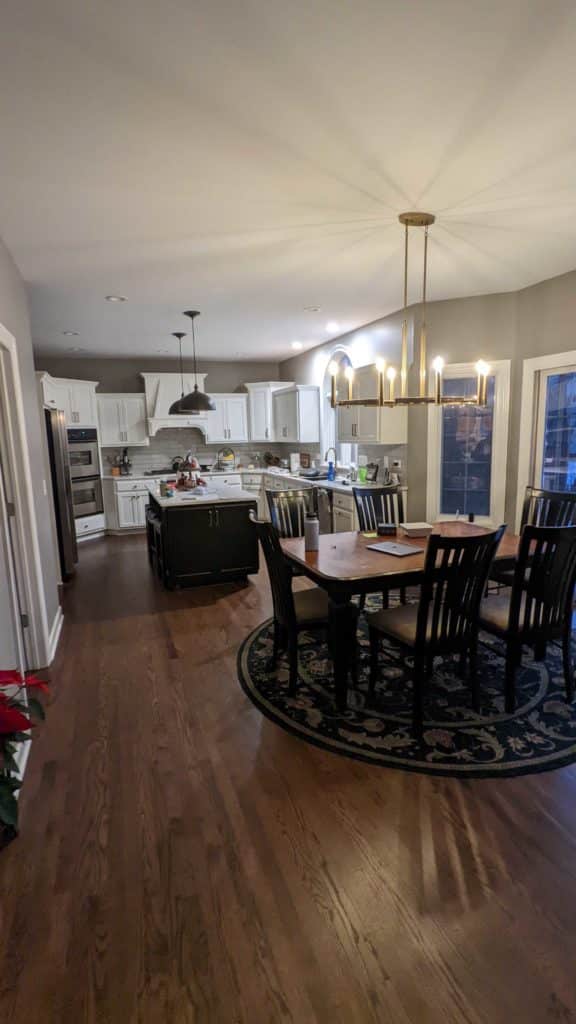
Once you have colors selected it is easy for us to come in the house, cover the floors, and start painting.
a freshly painted room before furniture is moved in
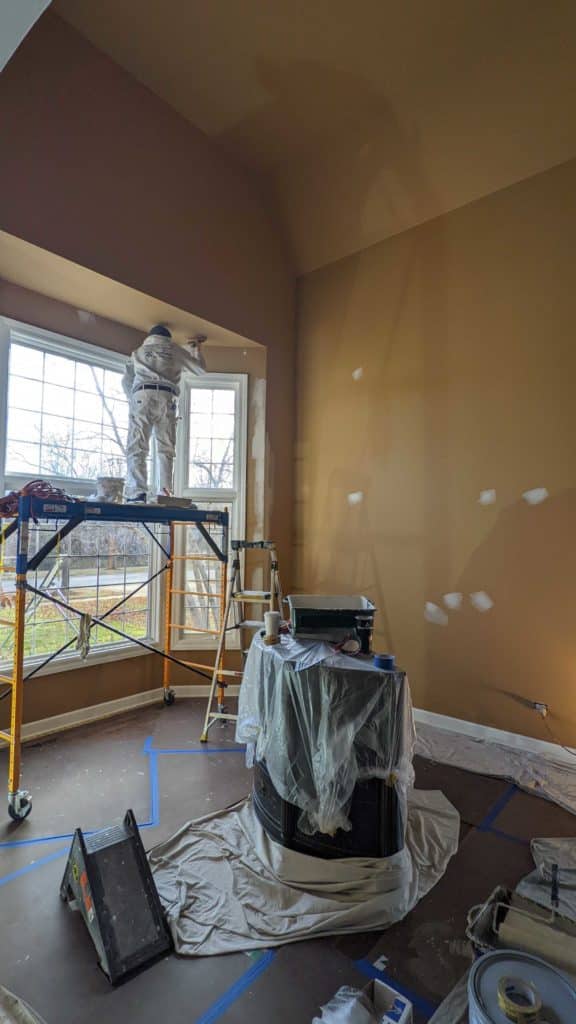
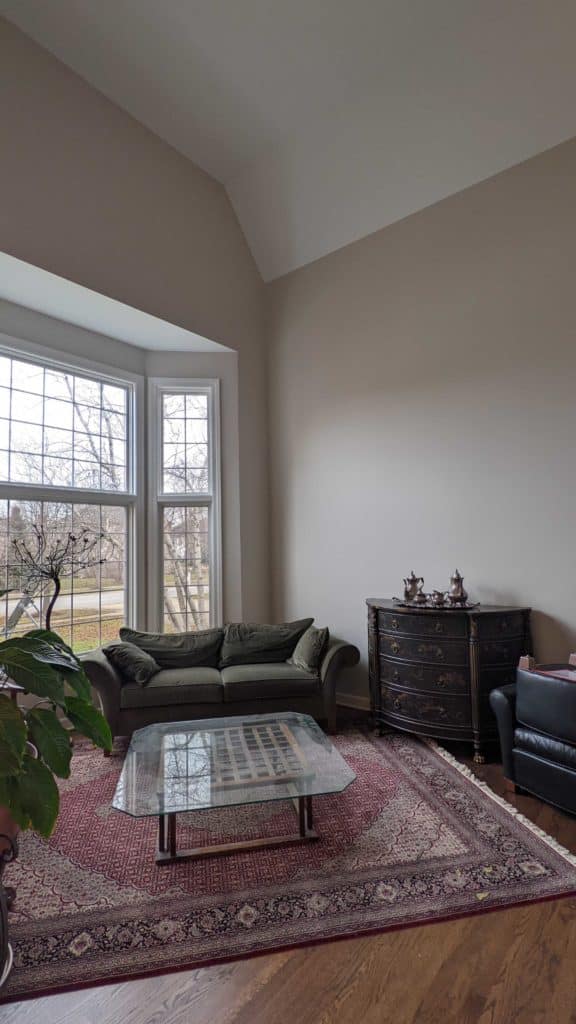
Can you paint after moving in?
Yes of course you can! We can help with that as well. It may take a bit longer, as we have to cover everything or move items out of the way. Residential re-painting after you are in the home is the norm.
Painting a furnished home
So if your moving in, moving out, repainting, or repairing- we can help with your house painting needs
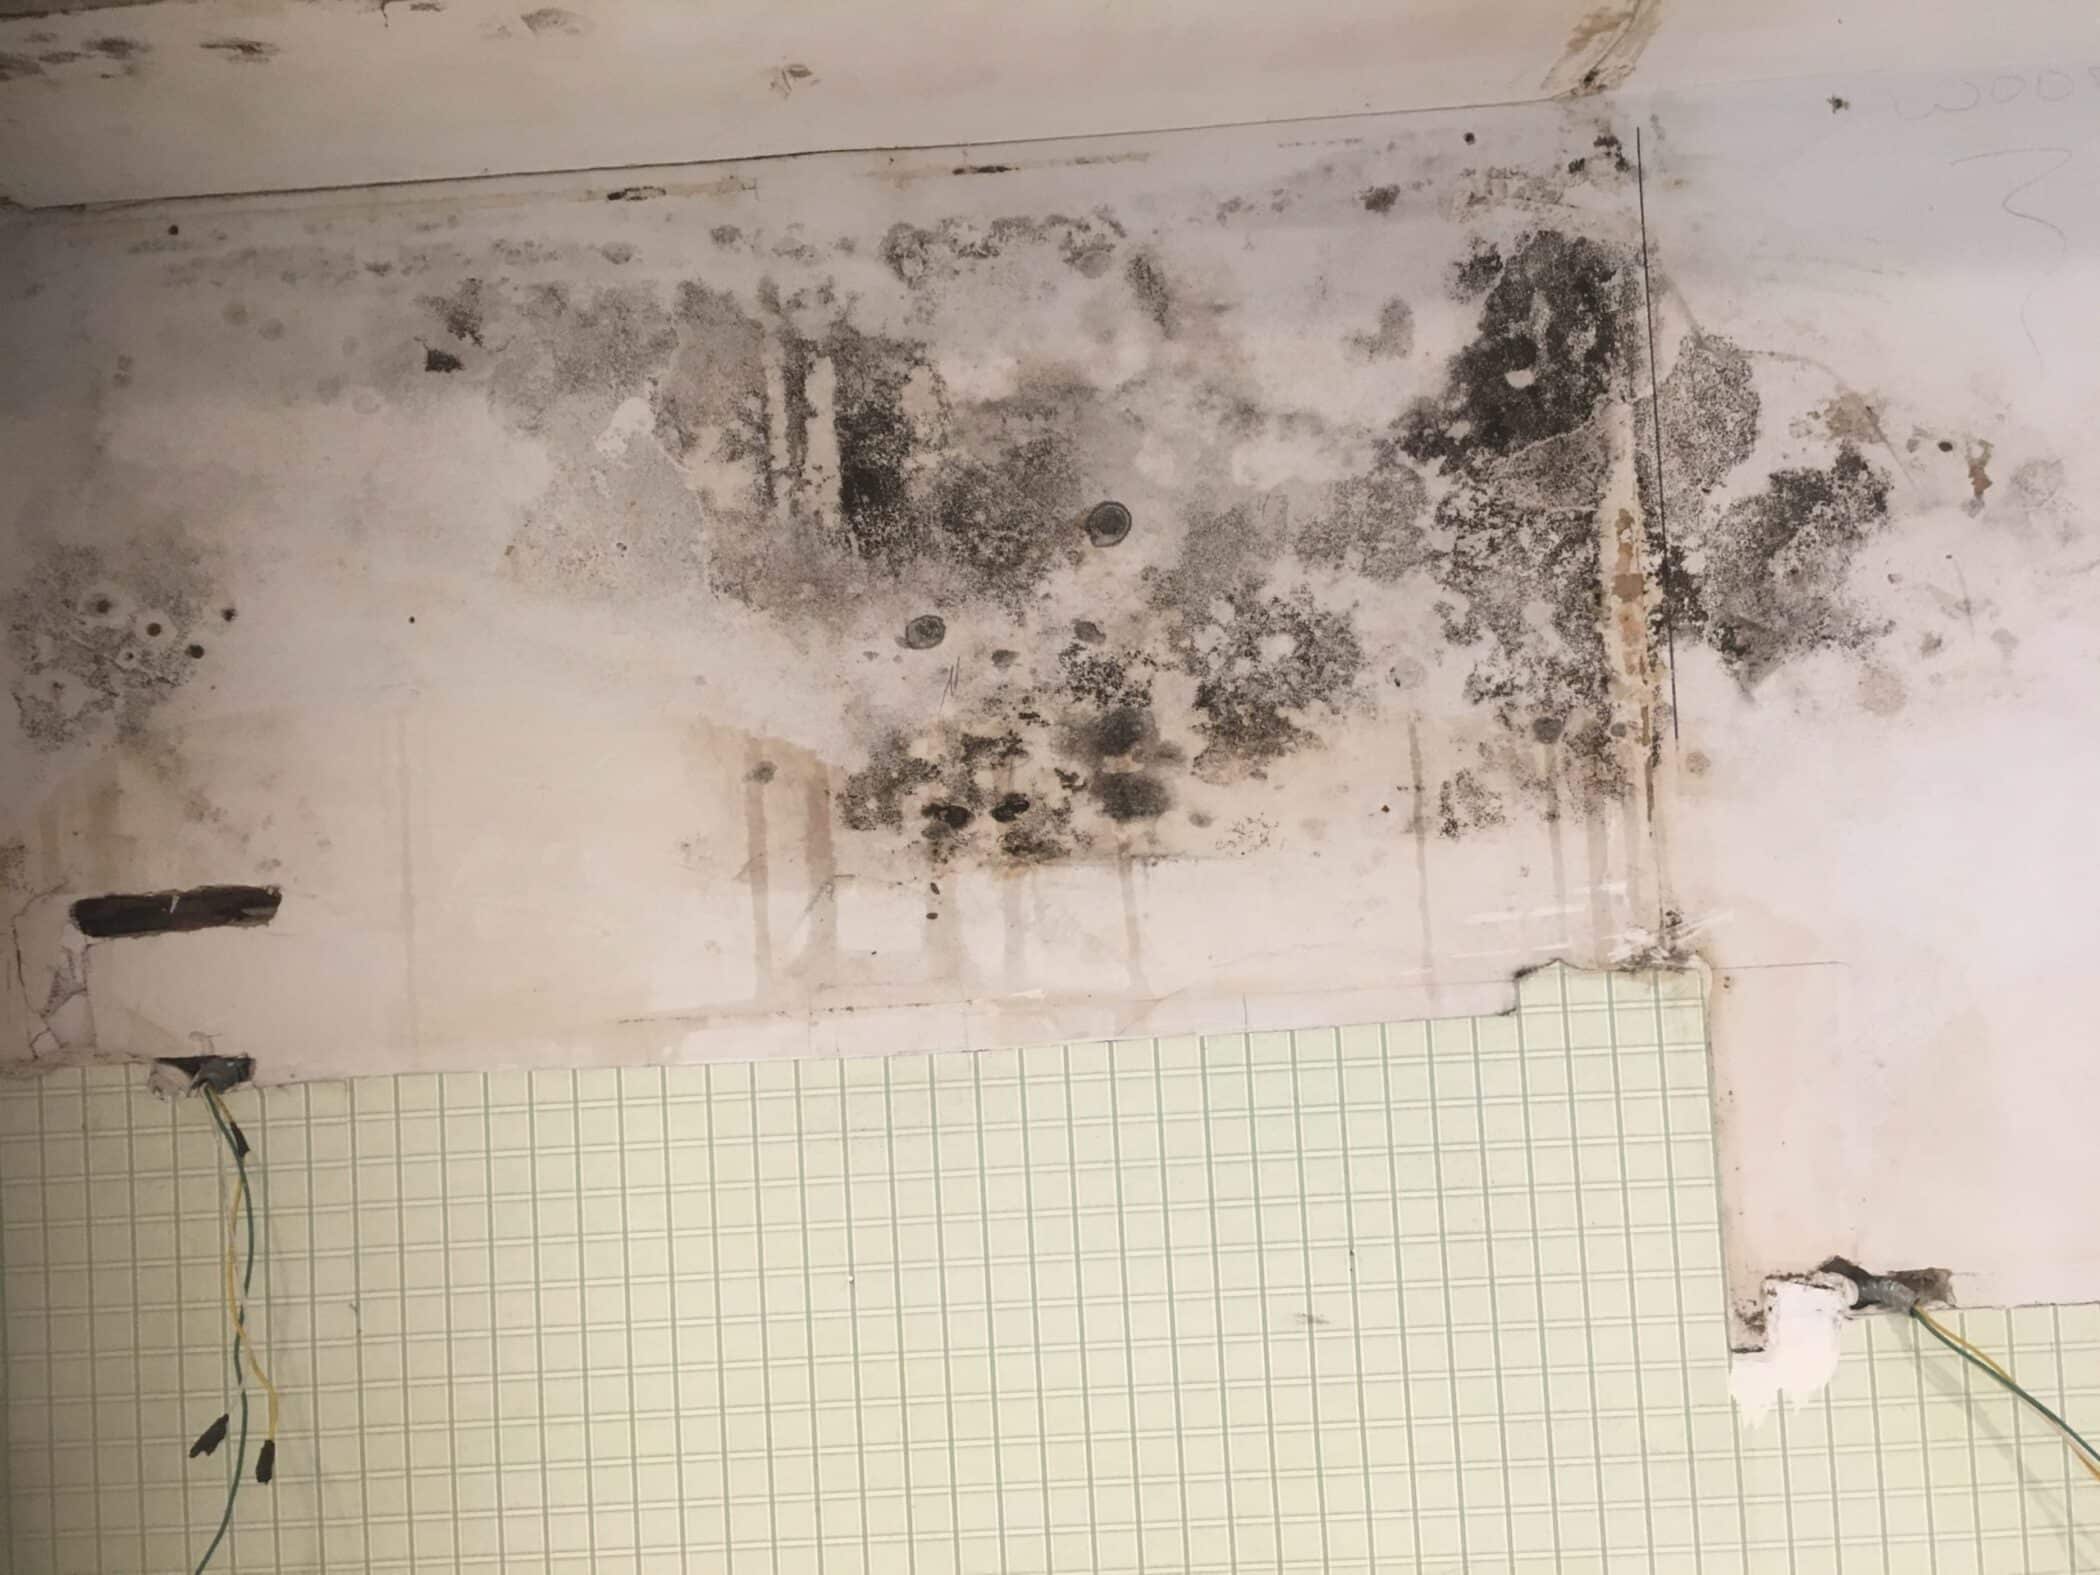
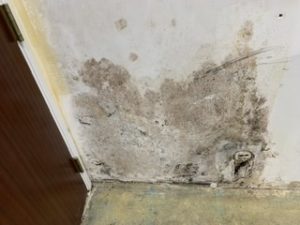
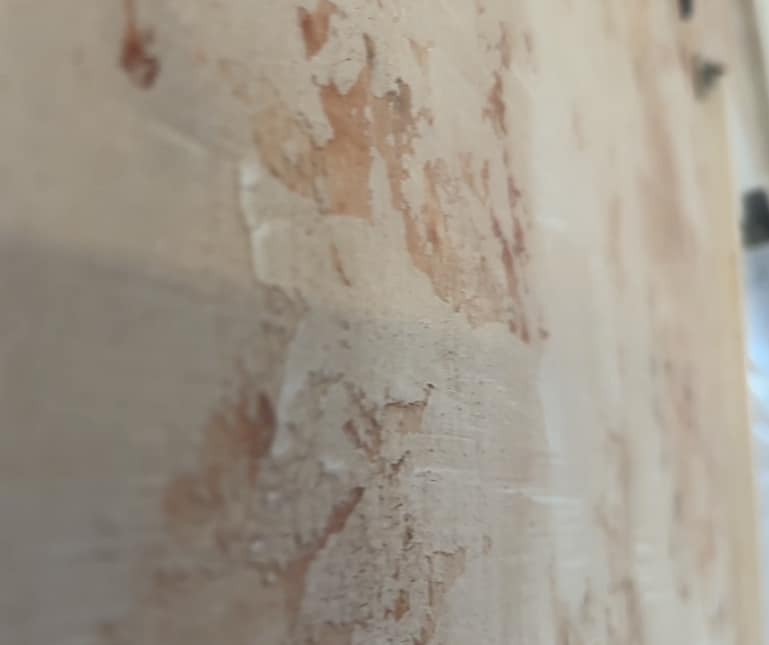
There is mold behind my wallpaper!
MOLD?! There is mold behind my wallpaper! What the heck?
This is not only gross looking, but dangerous. Hi! David Cook, owner of D’franco Painting & Wallpaper Here in Huntley, IL, with another quick blog for you with issues and questions we face when in customers’ homes and business locations.
The most common type of mold species that can readily be found under wallpaper is black mold. This mold can be either surface mold or mold that completely penetrates surfaces permeating through the drywall. Black mold is also known as Stachybotrys, and this type of mold can be very toxic to your health if left untreated.
Mold behind wallpaper.
Mold that is in your home is DANGEROUS
As you may or may not have seen or heard, toxic mold and indoor air pollution from biological sources seem to always be in the news. This is due to several factors, there is awareness of how much mold, especially toxic mold, can affect your health.
Roughly 35-40% of buildings have some form of mold. These dangerous mold spores are in over 25% of residential homes!
Mycotoxins that are released by mold are more problematic than pesticides or heavy metals because they can affect a more diverse range of biological systems than pesticides and dangerous heavy metals.
The mold most often on walls behind wallpaper (Stachybotrys) emits trichothecene. Concentrations of this dangerous mycotoxin has the ability to inhibit protein synthesis and affect every single organ of your body.
It’s also worth considering that fungi like mold also have a high rate of mutation. This means it is possible for mold to produce novel species that is capable of evading your immune system.
One nasty mold that can be very hazardous is the type of mold known as Cryptococcus. It actually has a mortality rate that’s estimated as high as 30% for those who become infected.
Most indoor mold problems are related to construction defects or home maintenance issues that allow for water intrusion. However, things like localized flooding and certain lifestyle habits can also greatly introduce the chances of mold invading your home to establish a long-term presence.
Don’t blame yourself- it’s not your fault there is mold.
People will always ask- what did I do wrong to get mold? The answer is always the same- you didn’t do anything wrong. So there must be something wrong with the wallpaper!
Walls that were not insulated. Moisture getting in behind the wallpaper through the insulation.
Contaminates. Sometimes wallpaper adhesive could have been exposed to mold contaminates.
Mold was already on or in the wall before wallpaper was installed.
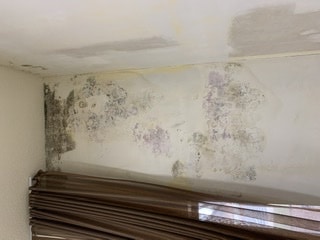
Moldy Walls, Elgin, IL
If you are living in the North West Suburbs of Chicagoland such as Elgin, Schaumburg, St. Charles, Crystal Lake, or Bartlett, Mold can also happen because of improper ventilation, condensation, and of course water leaks from water pipes or toilets. These calls or mold issues are the most common calls we receive too get help with.
Moldy wall behind wallpaper, Schaumburg IL
Removing Moldy Wallpaper
If you see that the wallpaper in your home has mold growth, you should remove it. If the problem is significant, you may have to have a professional mold remediation service with the right tools, training, and experience to effectively eliminate the presence of mold from the home or building. Here are the steps you should take to do it safely and effectively:
Step 1:
Wear old clothes that you plan to discard. Wear a respirator mask that is rated for to screen out microbes. Protective eye-wear is also a very good idea, as are latex gloves. Some types of mold can cause severe skin irritation. It’s also a good idea to cover all furniture with plastic in the room and keep the door shut.
Step 2:
Peel away a small strip of wallpaper. Take a close look for signs of mold on the wall or the back of the paper. It might look black, red, orange, grainy, splotchy, or discolored.
Step 3:
Carefully remove all the wallpaper from around the affected area. There are several different types of wallpaper stripper sold in stores. Renting a wallpaper steamer might also be worth the time and money.
Step 4:
Mix 4 parts dimethyl ammonium chloride with 1 part of water in a bucket. Brush the solution over the mold. Then be followed by applying a solution of 3 parts disodium octaborate tetrahydrate with two parts of glycol. Sounds fun, right?
Using these solutions in tandem has proven to be highly effective for killing mold on wallboards. The combination is particularly effective on mold on wallboards. Still, it is best to do multiple applications!
Step 5:
Allow the treated area to thoroughly dry before cleaning it with soap and water to remove the dead mold.
Step 6:
Shower and clean yourself thoroughly. Make sure to bag all the clothes you wore and discard them immediately.
So, what’s next?
Now that the walls are clean, it’s time to let the walls dry out. Use some fans and a dehumidifier. Once dry, use mold killing primer. Block it out, seal the walls. Once the walls are dry and primer is out, you have a fresh slate.
Are you getting ready to paint bathrooms for the 1st time or repainting your bathroom a new color or remodeling. Knowing the right paint for a bathroom will save you a lot of headaches down the road. There are several brands of paint for bathrooms. For today, we are only looking at two, Sherwin Williams and Benjamin Moore. So – what is the Best Paint for bathrooms?
Hey Everyone, David with Dfranco Painting and Wallpaper, here in Huntley, IL. This week, we had 2 people ask the same question, the subject of today’s blog post, what is the best paint for bathrooms. Then we had similar questions as to what to difference is between bathroom paints. So I gigured we better answer the question!
Does it matter what paint you use in a bathroom?
Absolutely! Bathrooms are a unique area of the home. Every home is unique. Painting homes is Elgin, IL can be fun for sure as they have a huge variation in age. With age comes a wide array of builders, materials used, and substrates we have to paint over. But as the bathroom is the room most often visited outside of the kitchen, it needs to be painted right! With that, a bathroom has special needs to keep it looking great for years to come.
Bathrooms- those with bathtubs or showers especially, need the right paint. The paint needs to be able to withstand moisture that comes from steam or water that comes from the sink areas from hand washing.
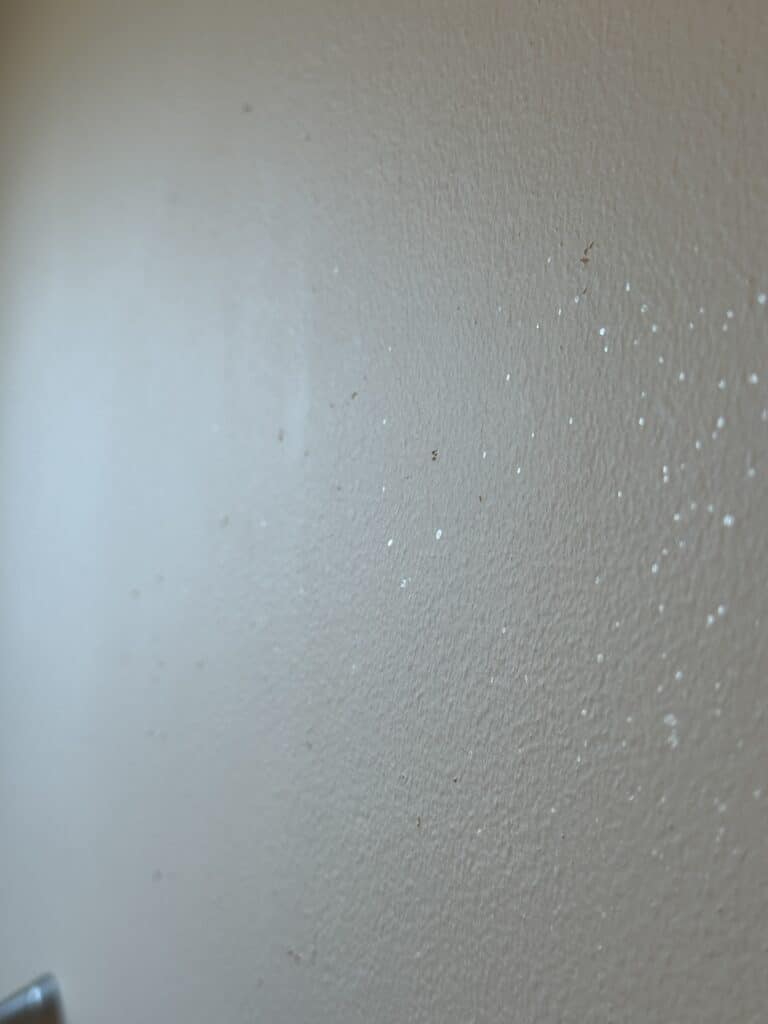
Washability is also another concern for bath paint. MOst batrhooms are used to get redy for the day. In getting ready there are certain products that are problematic for paint. The biggest problem product is hairspray! Hairspray has silicates in it. These silicates make it absolutely a nightmare for painting. Silicates, in general, are waterproof or water-resistant. So they may be great for makeup, hair care etc, but when it comes to painting a bathroom, hairspray on the surface of walls and cabinets is a huge- as Donald trump would say HUGE, Big, im talking out of this world big..lol.
hairspray residue on bathroom wall paint
We won’t get into how we get over silicate issues to paint. We are talking about the right paint for bathrooms, so you can have the right paint so you avoid problems.
Does sheen matter when painting a bathroom?
Yeah buddy! Every home is different in some ways For example older plaster homes have different issues than new construction. However- one things is constant, water penetrates. If you add soap the equation then water penetrates even more.
When we are painting a bathroom, we recommend eggshell or satin as the minimum sheen to use for the walls and ceilings. These sheens have a built-in water moisture repellance due to the sheen. The higher the sheen the more water will bead or repel from the surface.
Think like a car- those shiney cars have water beads whenever they come in contact with water. I would not want that for the walls of my house, but you get the idea.
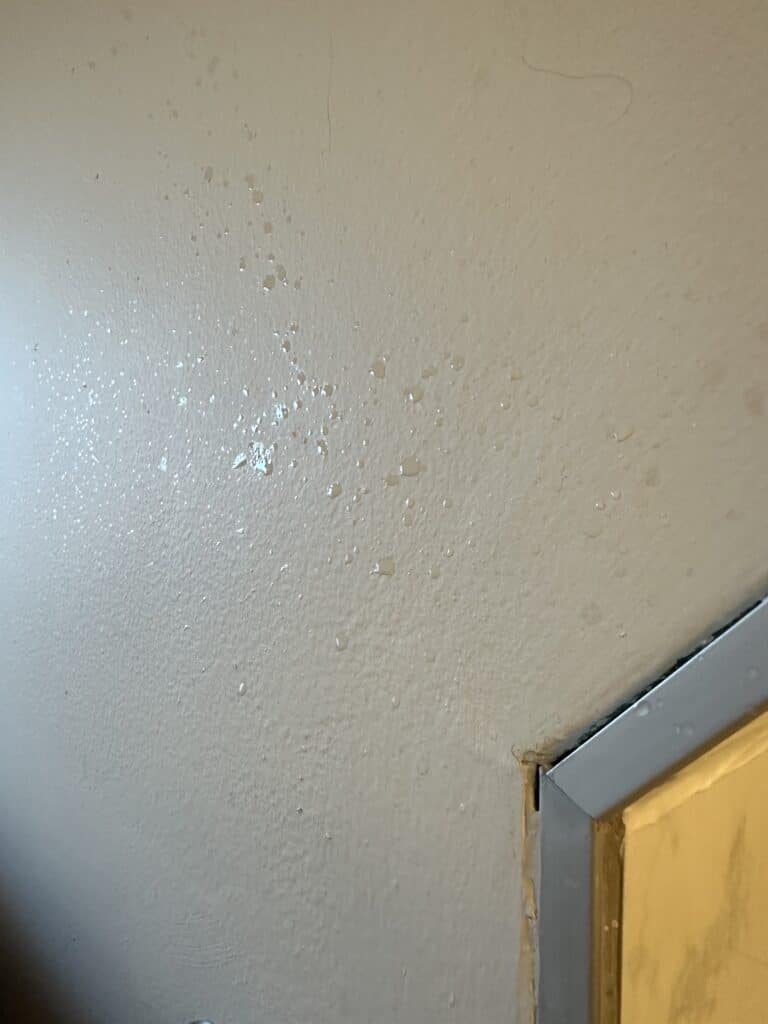
Can you use flat paint in a bathroom- yes, but flat paint is very absorbent. Extra moisture from shower or water will be absorbed into the paint which then is absorbed into the walls. For some homes it may not matter. But it is something to be aware of.
water absorbing into flat paint
Sherwin Williams Duration Paint
For us, we have turned to Sherwin Williams for most of our paint use. Customer service, warranty claims, on-site visits, and price have been the reasons we made that choice. As it relates to bathrooms- Duration is their product of choice and recommendation.
Now I am not gonna get into the tech that can lead you down a rabbit hole, I am just discussing what i think the best paint for bathrooms – based on our experiences in your homes.
Duration, is fast drying, 1 hour to the touch, 4 hours to recoat, and about 8 hours you COULD take a shower. The label shows Moisture vapor tech- no clue what that means lol. What I do know is that those claims have been tested and found pretty true. And to date, we have had no issues.
No matter what paint you choose- I would still suggest waiting 24 hours for it to dry before using the bathroom after painting.
Benjamin Moore Aura Bath and Spa Paint
Until 2 years ago, we used this product on every bathroom we painted. Overall- we have no problem with it, if you select certain colors – you have no choice but to use it, as the colors cannot be matched in other brands.
Bath and spa paint goes on nice, has a great sheen look appearance and feel. Their product also is dry to the touch in 1 hour, but claims it can be recoated in 1 hour. They also recommend 24 before using the area.
We have not found that to be true, we had two failures in a row, both were recoated in under 4 hours. We do not know how soon the owner waited to shower, but we left at 1pm. So, we assumed it was later in the day that the shower was used. But- but both jobs had us called back within 3 days.
running complaints in a bathroom
Both rooms had severe “running” the moisture rand down the wall and left stains. We do not know why. After having to repaint two baths for the same issue, we just made the choice to stop using this product. I know there are people that use it ever day with no issues, and I am happy for them. We have just had a different experience.
Duration Vs Aura BAth and Spa paint
I am not a huge fan of the VS conversations or comparisons. Most of the time, there is an agenda to sell a specific product. We are here to give you our field use what we use. Giving the facts of our situations. We cannot control what happens when we leave a house. So when there is a product failure like we had, we have to find out how to avoid it again.
It is very possible that the Spa paint was exposed to shower moisture sooner than the suggested 24 hours. These homes were also built in the same 90’s time frame. So there could have been an issue with the vent fan. The house could have been too “tight” not allowing fresh air to circulate in the home. We just dont know.
So- again these are our results, based on the homes we paint everyday, and the product we use everyday. Im sure you will find other people who will say something different. However we warranty what we do. Which means we solve problems- not make them. If a product we use fails, we fix it. It would be great if the manufacturer would stand behind what they sell, but we know that doesn’t always work. So we at D’franco Painting, have to be ready to stand by our work.
If you have questions- let us know- we would love to help!
Skim Coating Walls
If you’re not familiar with skim coating walls, then GOOD! That is why we are writing this. We do not do skim coating work, but it is needed as part of being a paint contractor.
What is Skim Coating Walls?
You can see in these two videos we have done recently that we had to do some skim coating on walls that had wallpaper removed; the other is skim coating over a rough texture plaster.
Here is a rough textured faux finish wall:
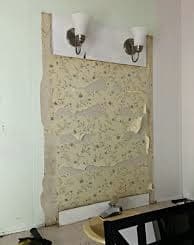
The wallpaper that we removed took the drywall off with it, so it is a mess!
The other one we are working on is a Faux Finish- texture plaster applied to the walls about nine years ago. Faux finishes can be awesome…until it is time to get rid of them. In this case, we are power sanding walls to get to some smoothness; then, we will have to skim coat the walls to fill in all the uneven surfaces.
How to skim coat
There are a few methods to skim coat a wall.
The first is calling a drywall company. It is staggering how fast they are!
Skim Coating Tools
If you are doing it yourself, then we have several tools you need:
drywall mud pan
45 min Durabond
pre mix a 4-gallon bucket of Durabond
drywall knives
pole sander
vacuum
respirator
fan
drop cloths
When we are skim coating, we typically use a pre-mix bucket. The areas are large, making it easier vs. mixing up 2-3 cups at a time. The powder form is great for small areas.
We start with covering areas/floors. Then, we hang plastic so no dust reaches the rest of the house. Pole sand the walls to remove any burrs etc. from the wall. Next, just grab some mud in the pan and use a drywall knife to apply it to the wall. Smaller, thinner applications work best. The more you can “scrape” the wall at a 40-degree angle, the better, as it will leave smaller amounts, which dry faster and sand smoother.
After the first coat, allow it to dry, then sand smooth. Apply as many coats as you need to get the wall smooth and ready for paint!
Other things to know regarding Skimming your walls
Drywall work is messy!! The dust gets everywhere. We use Festool sanders to ensure the dust is contained as much as possible.
Make sure that the drywall mud is as dry as possible before sanding!!
You will have to prime the repairs before painting. Do NOT just use ceiling paint to prime these areas. Use a drywall sealer. That will ensure that the primer will penetrate the surface, creating a uniform, harder surface to allow sanding to ensure that if a piece of tape is applied, the tape won’t pull away the paint! (SO frustrating!!)
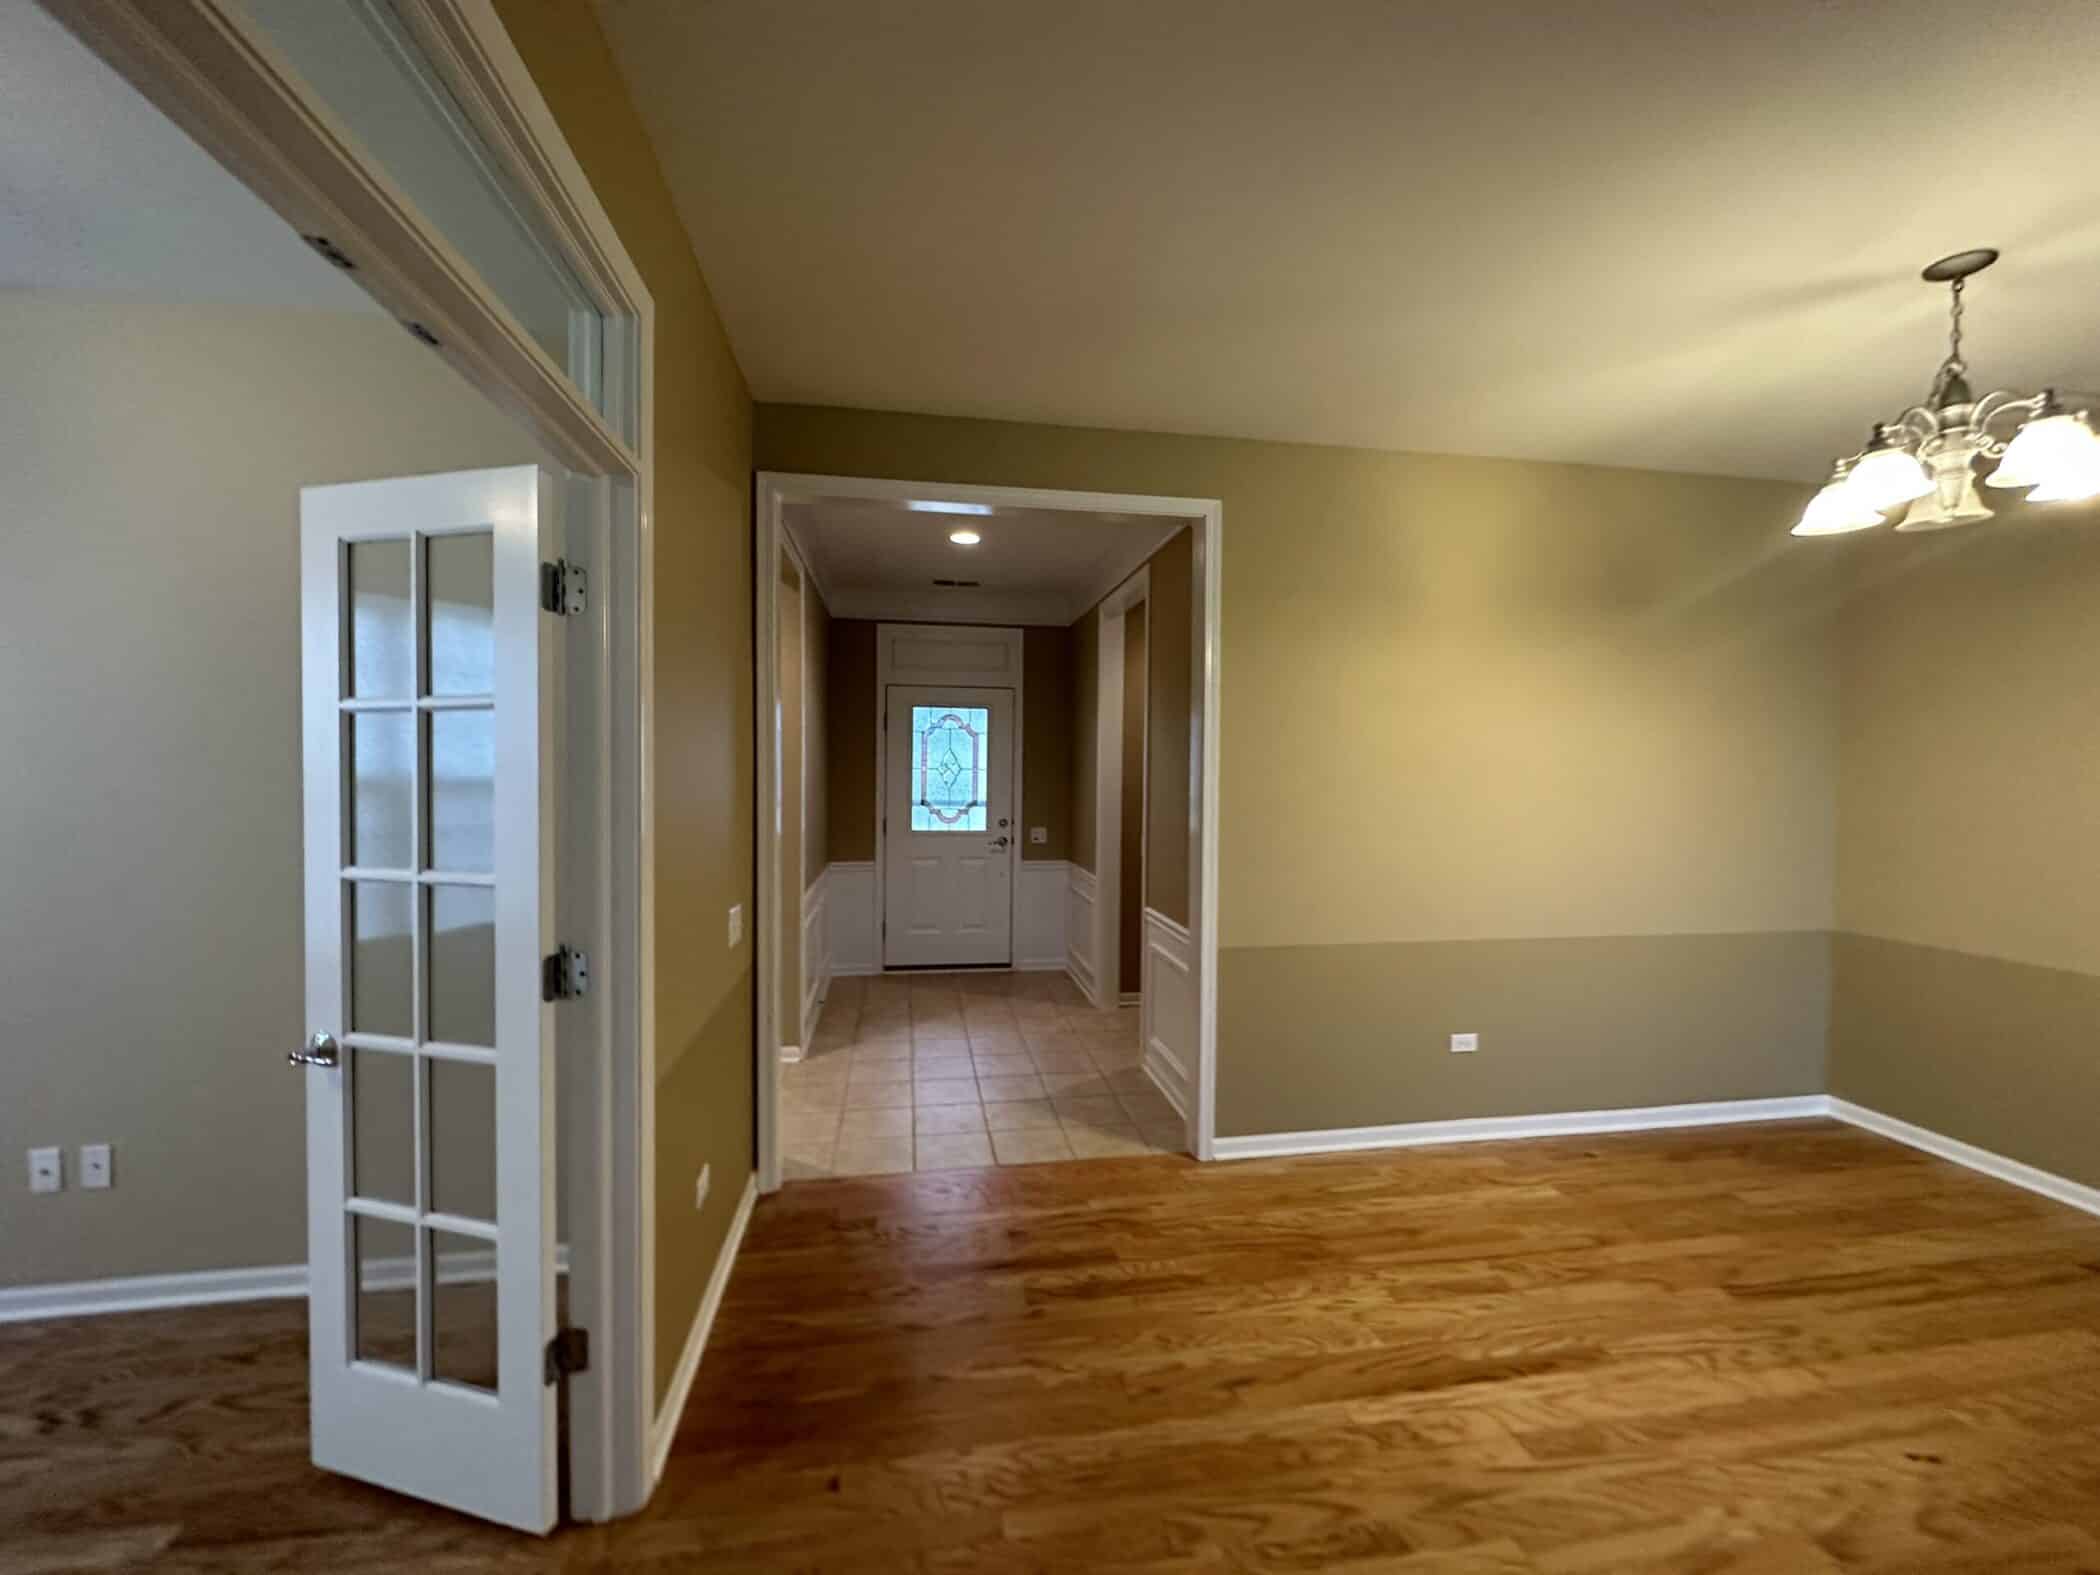
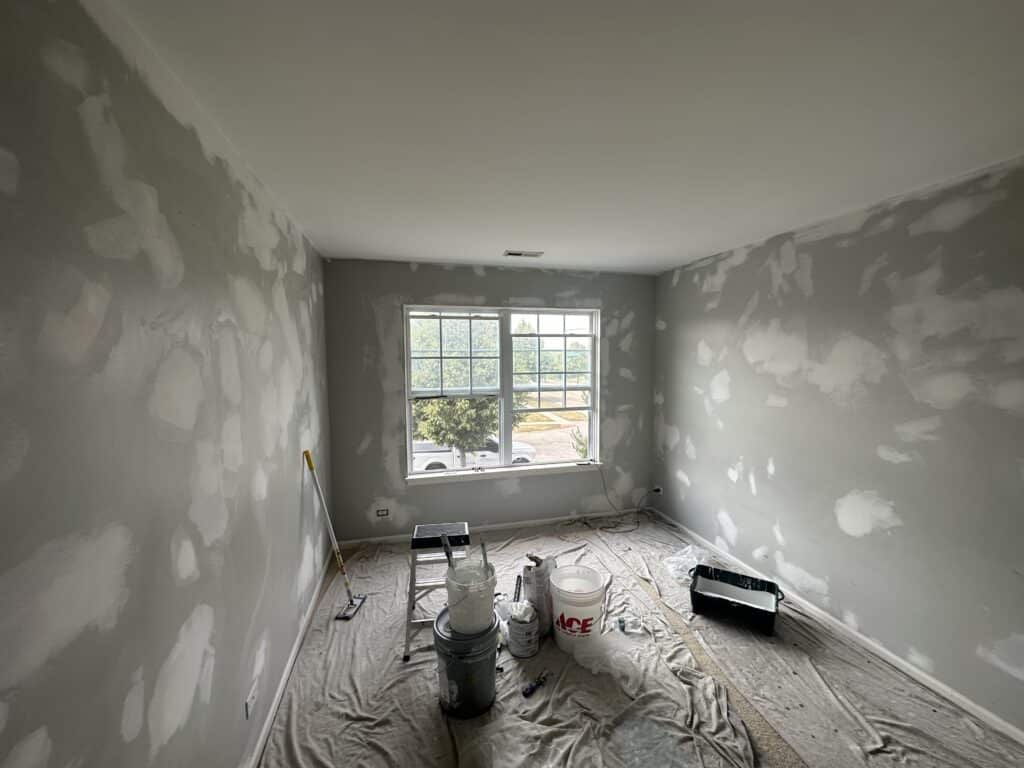
Repainting your entire home
Have you just bought a new home? Or have you been in your home for some time and ready for a refresher? In either case, we thought we would do a quick blog post to show what repainting your entire home may look like.
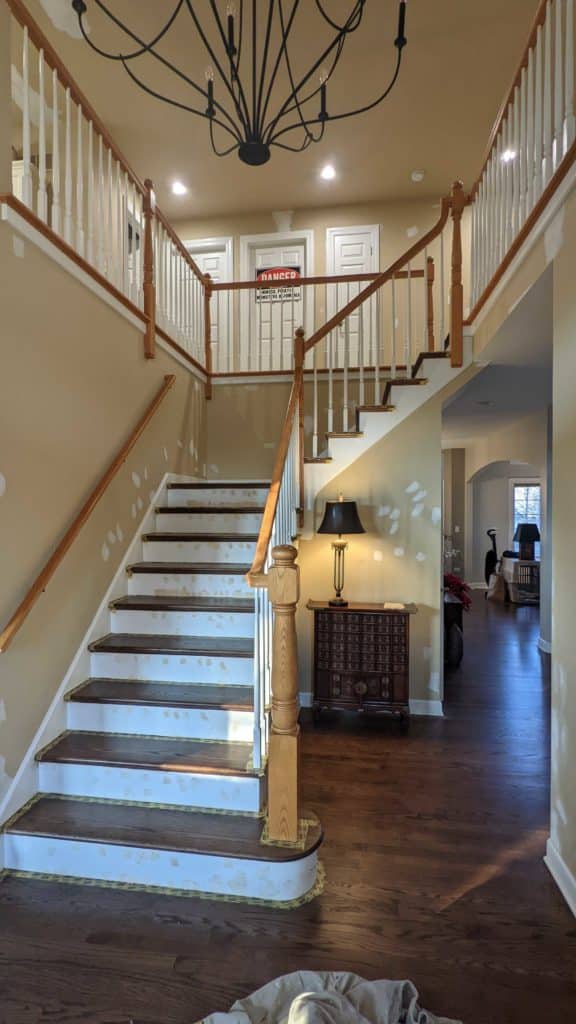
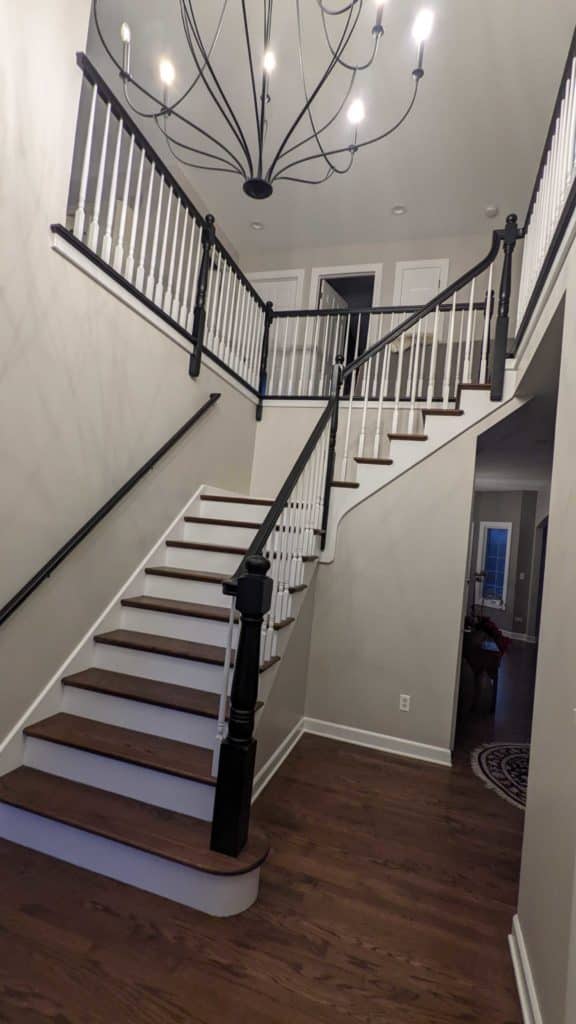
Repainting handrails in your home
One of the most popular things to do is refinish or repaint oak spindles and handrails. The number one color is black handrails and newel posts with white risers and spindles.
Here are traditional oak handrails
Here is the after of oak handrails being painted black
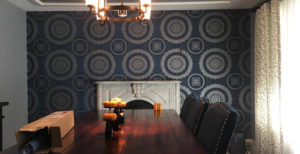
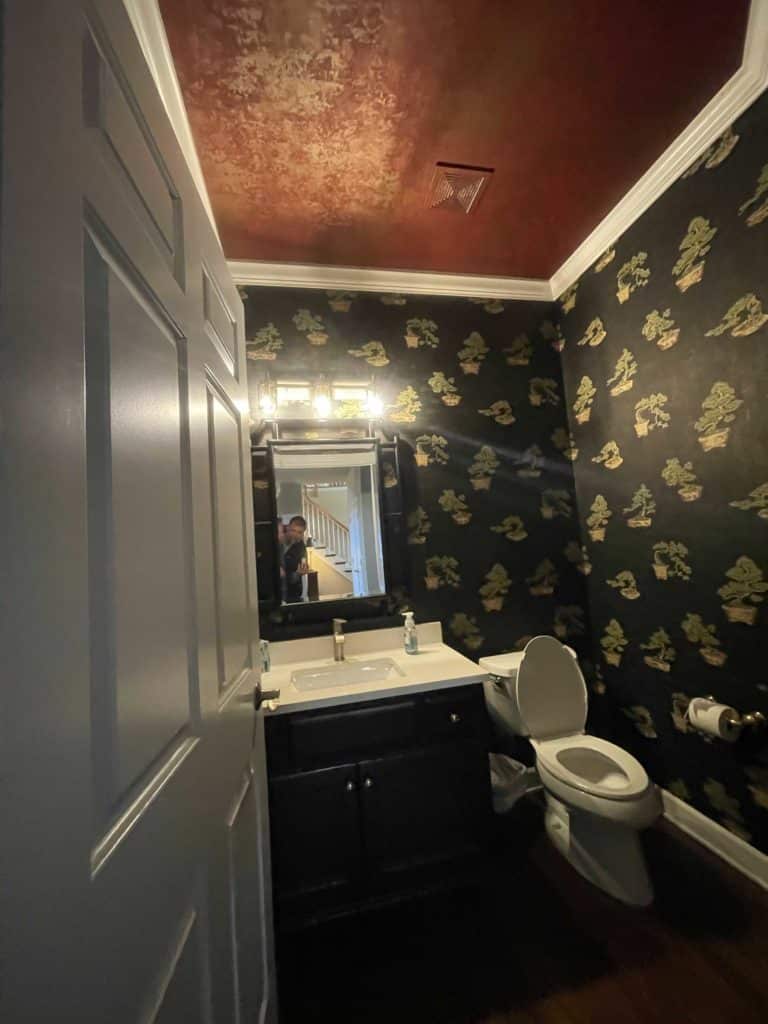
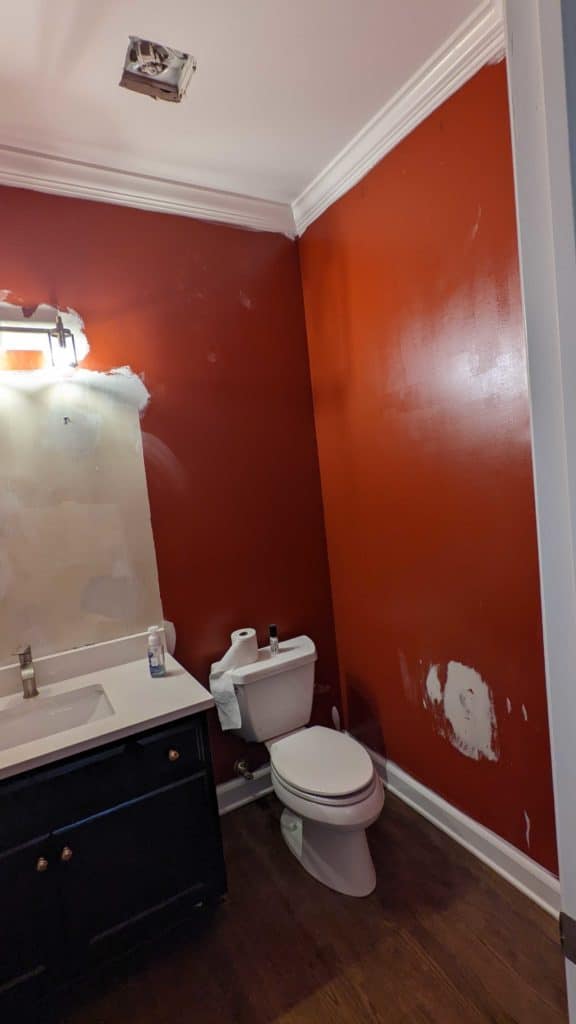
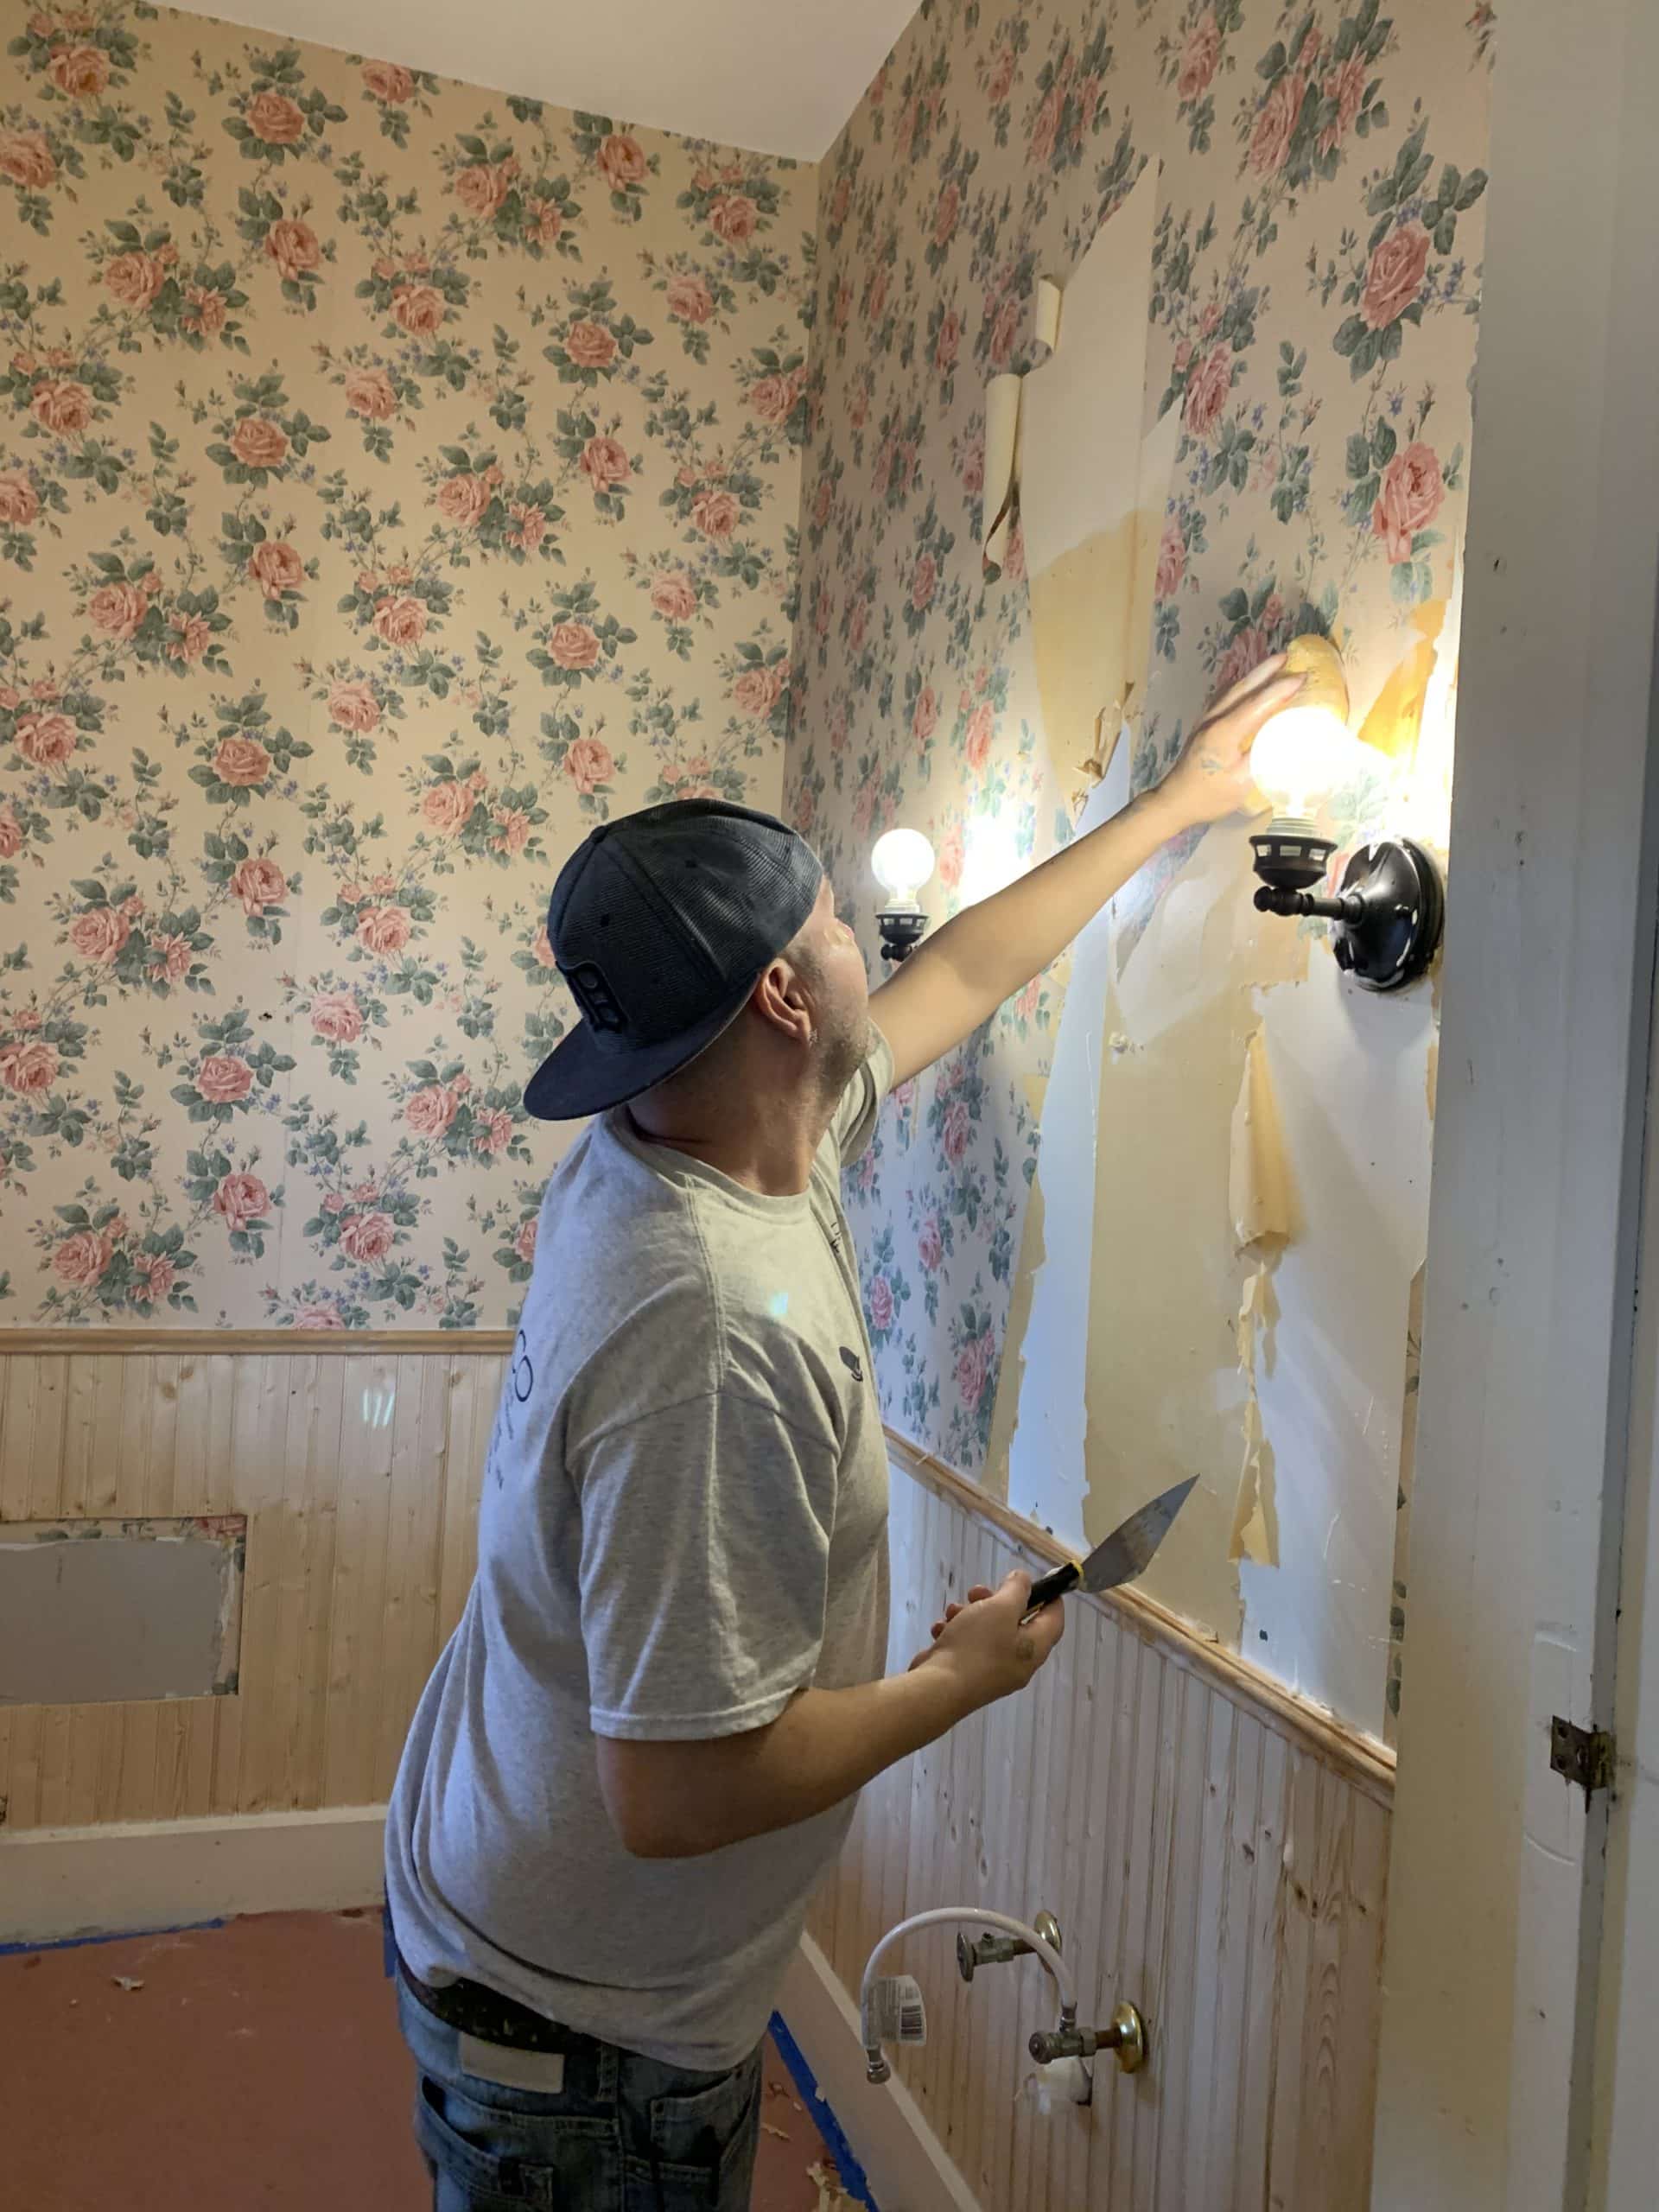
Removing or stripping wallpaper in your home
Removing or stripping wallpaper accounts for quite a bit of the work we do. Most of the time, we are removing the wallpaper to replace it with something new and modern. In this home, that was the case. Their wallpaper selections were a few months back-ordered, so we just stripped the wallpaper so the walls were ready when the wallpaper arrived.
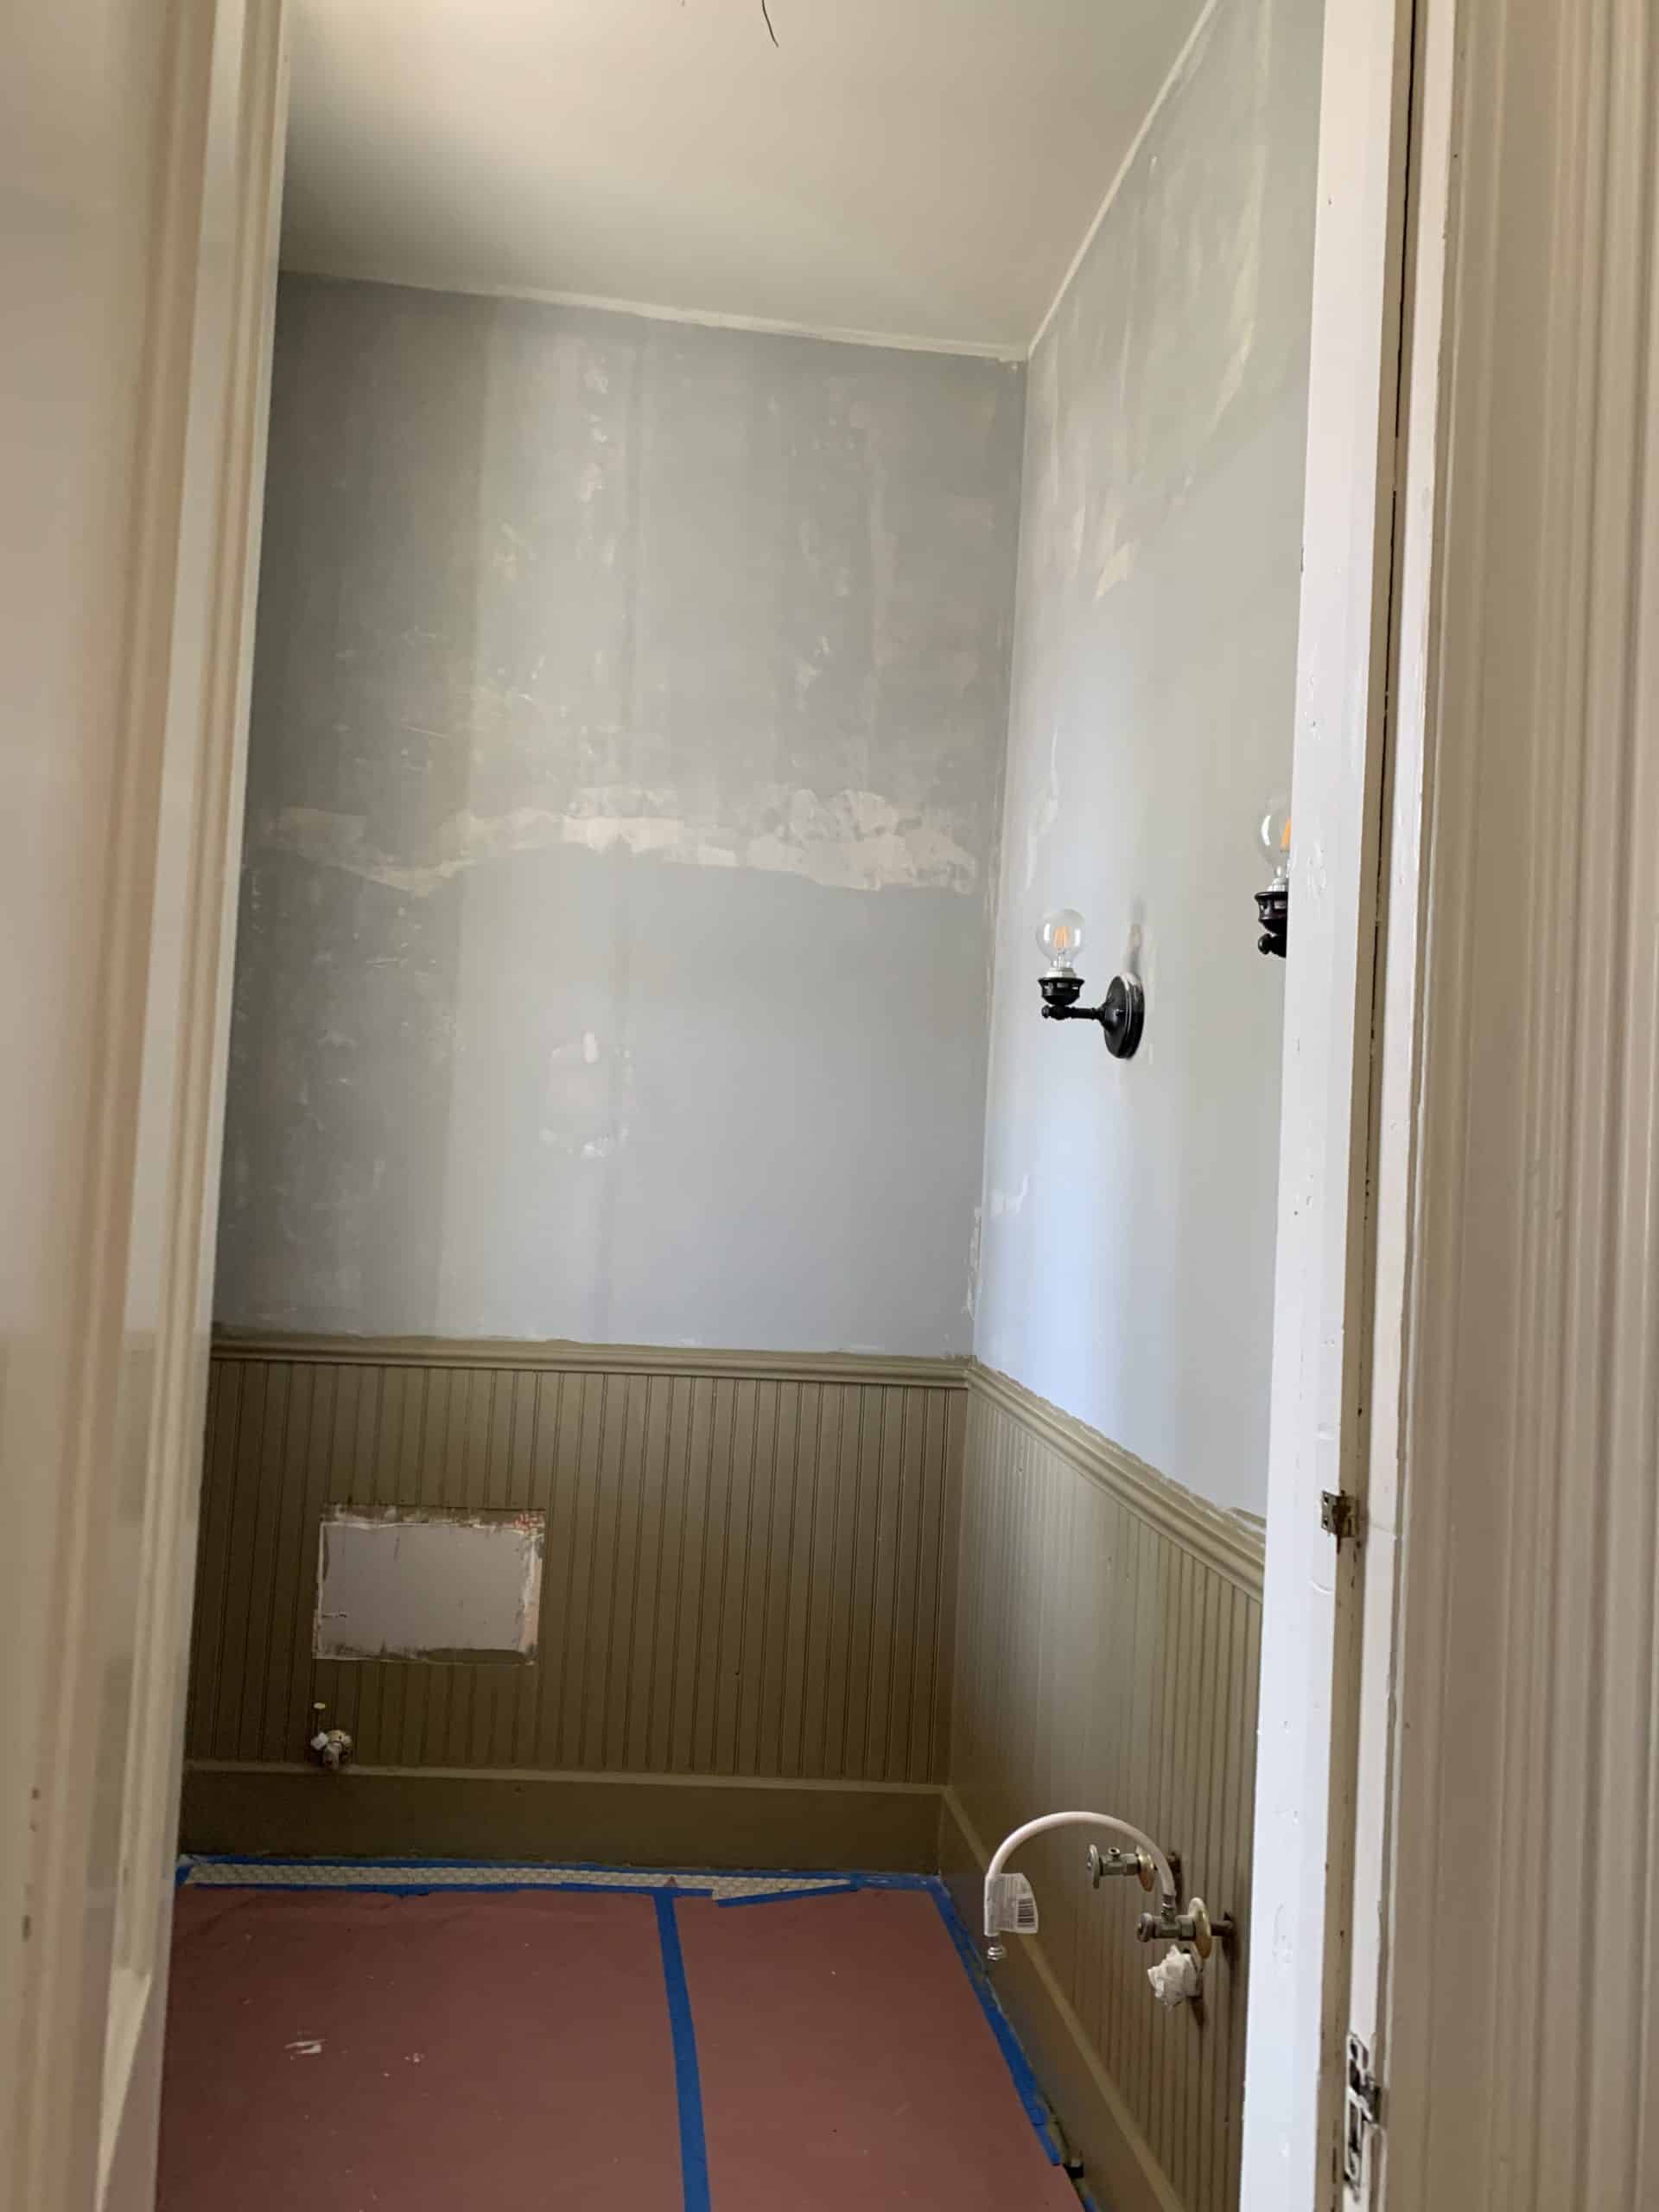
A bathroom getting ready to be stripped of wallpaper
Bathroom stripped of wallpaper
In this bathroom, we removed the wallpaper, then had to skim coat the ceiling as the paper was a little difficult to remove because the previous installer did not prime the ceiling before installing the wallpaper. The ceiling will just be painted this time. We also repainted the trim in the room, and the homeowner will repaint the vanity.
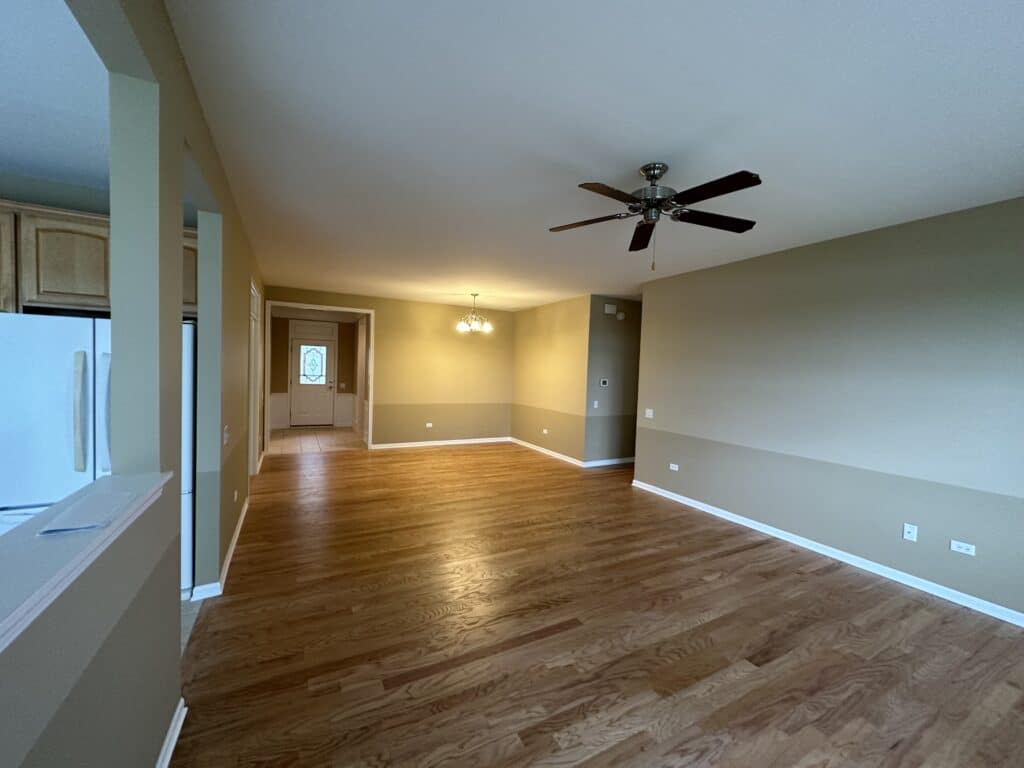
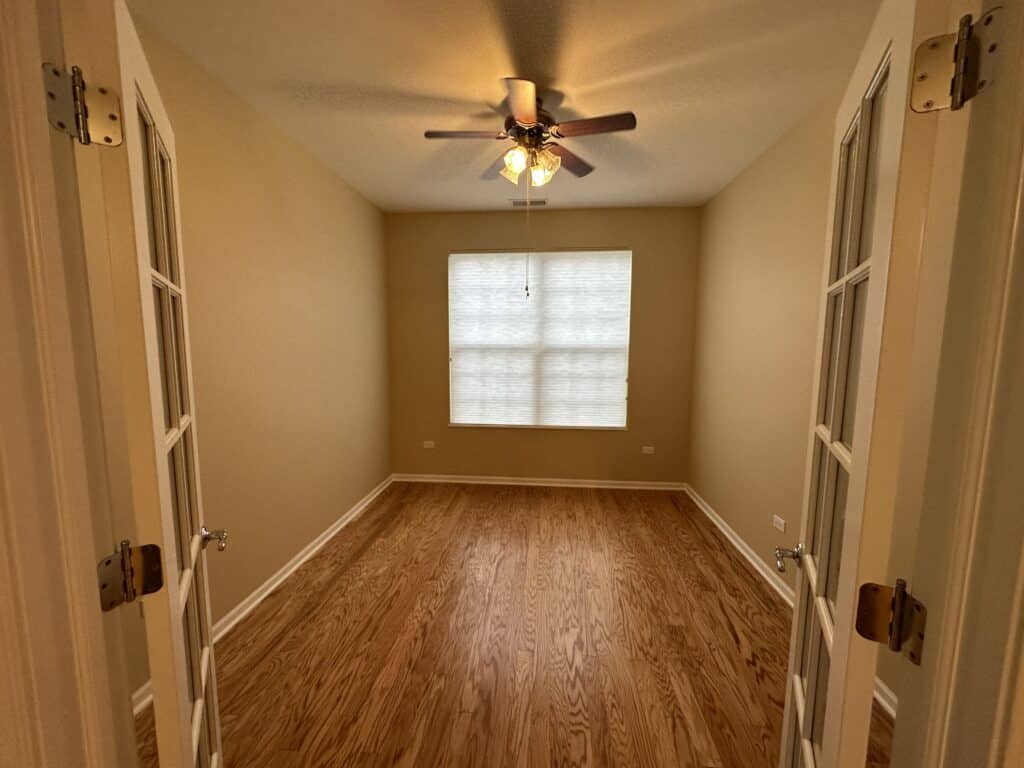
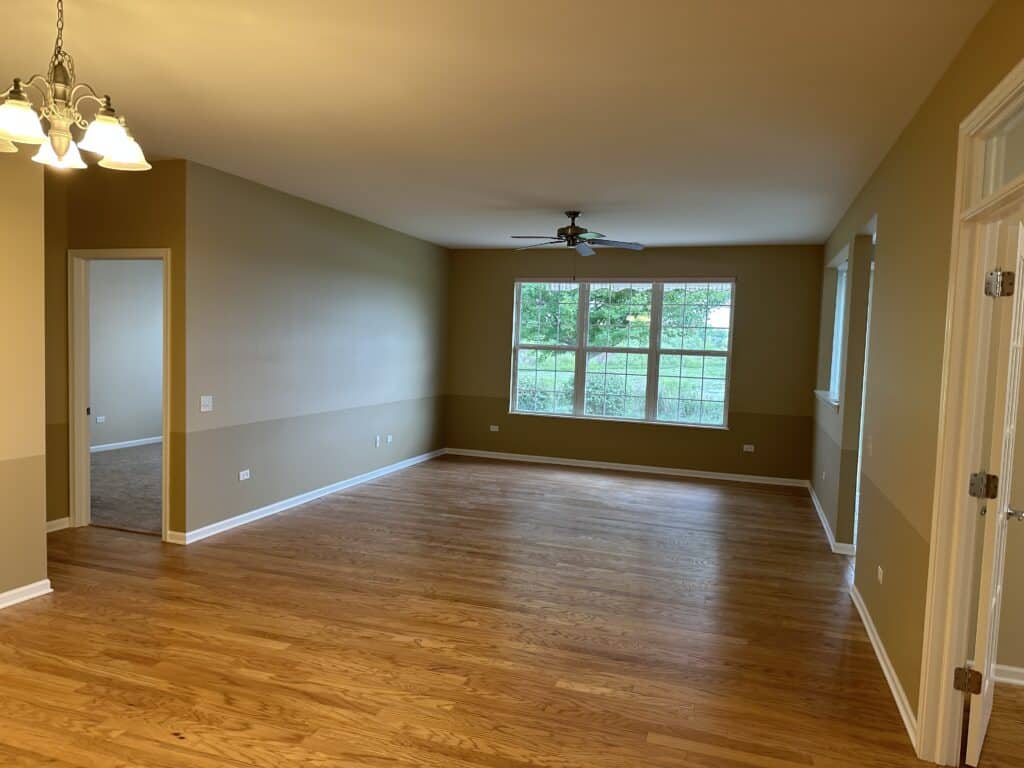
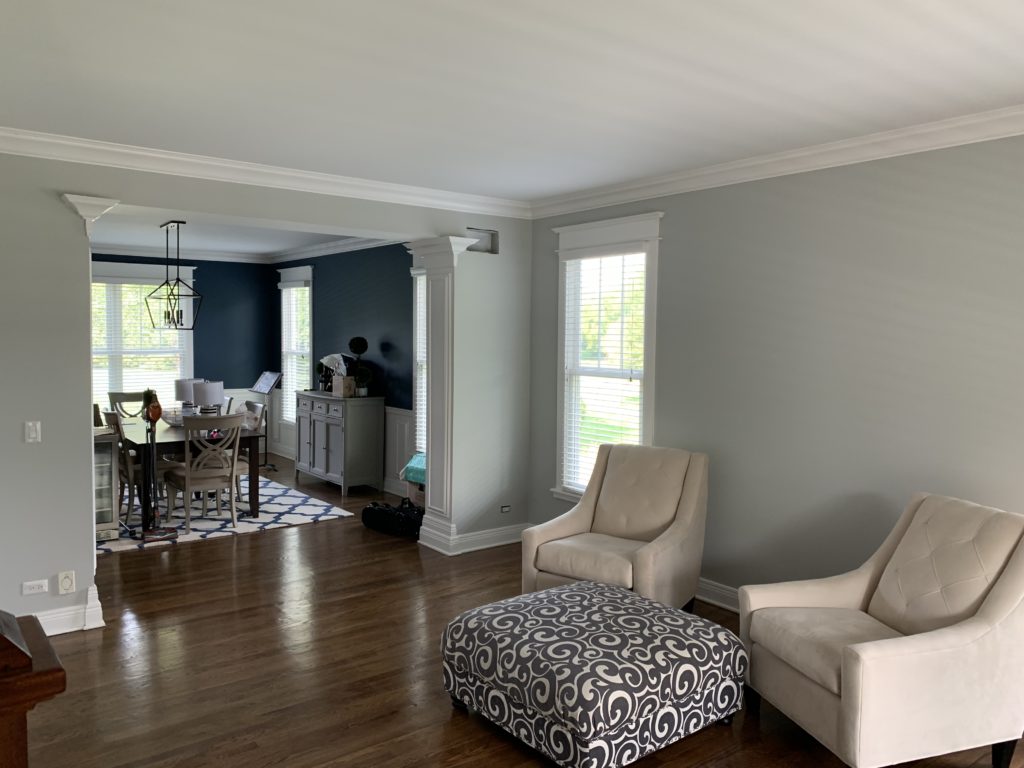
Repainting ceilings and walls in your home
For this home, we repainted walls, ceilings, and trim. The older color of an off brown, was about 15 years old. So we updated the trim to a new brighter white, painted the ceilings a flat pure white, then painted the walls Agreeable Grey. I think it was a huge transformation.
Before we started painting…
Repainted walls, ceilings, and trim
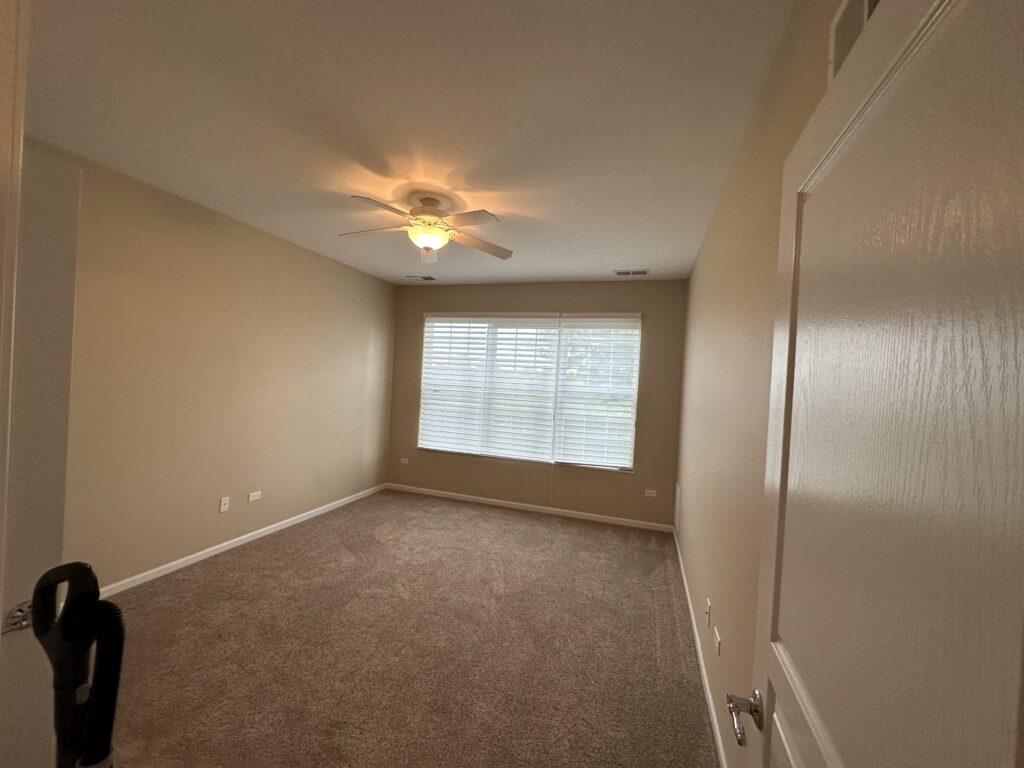
Rooms being prepped for paint
Painting Kitchen Walls
Kitchen before we painted
Kitchen after we painted
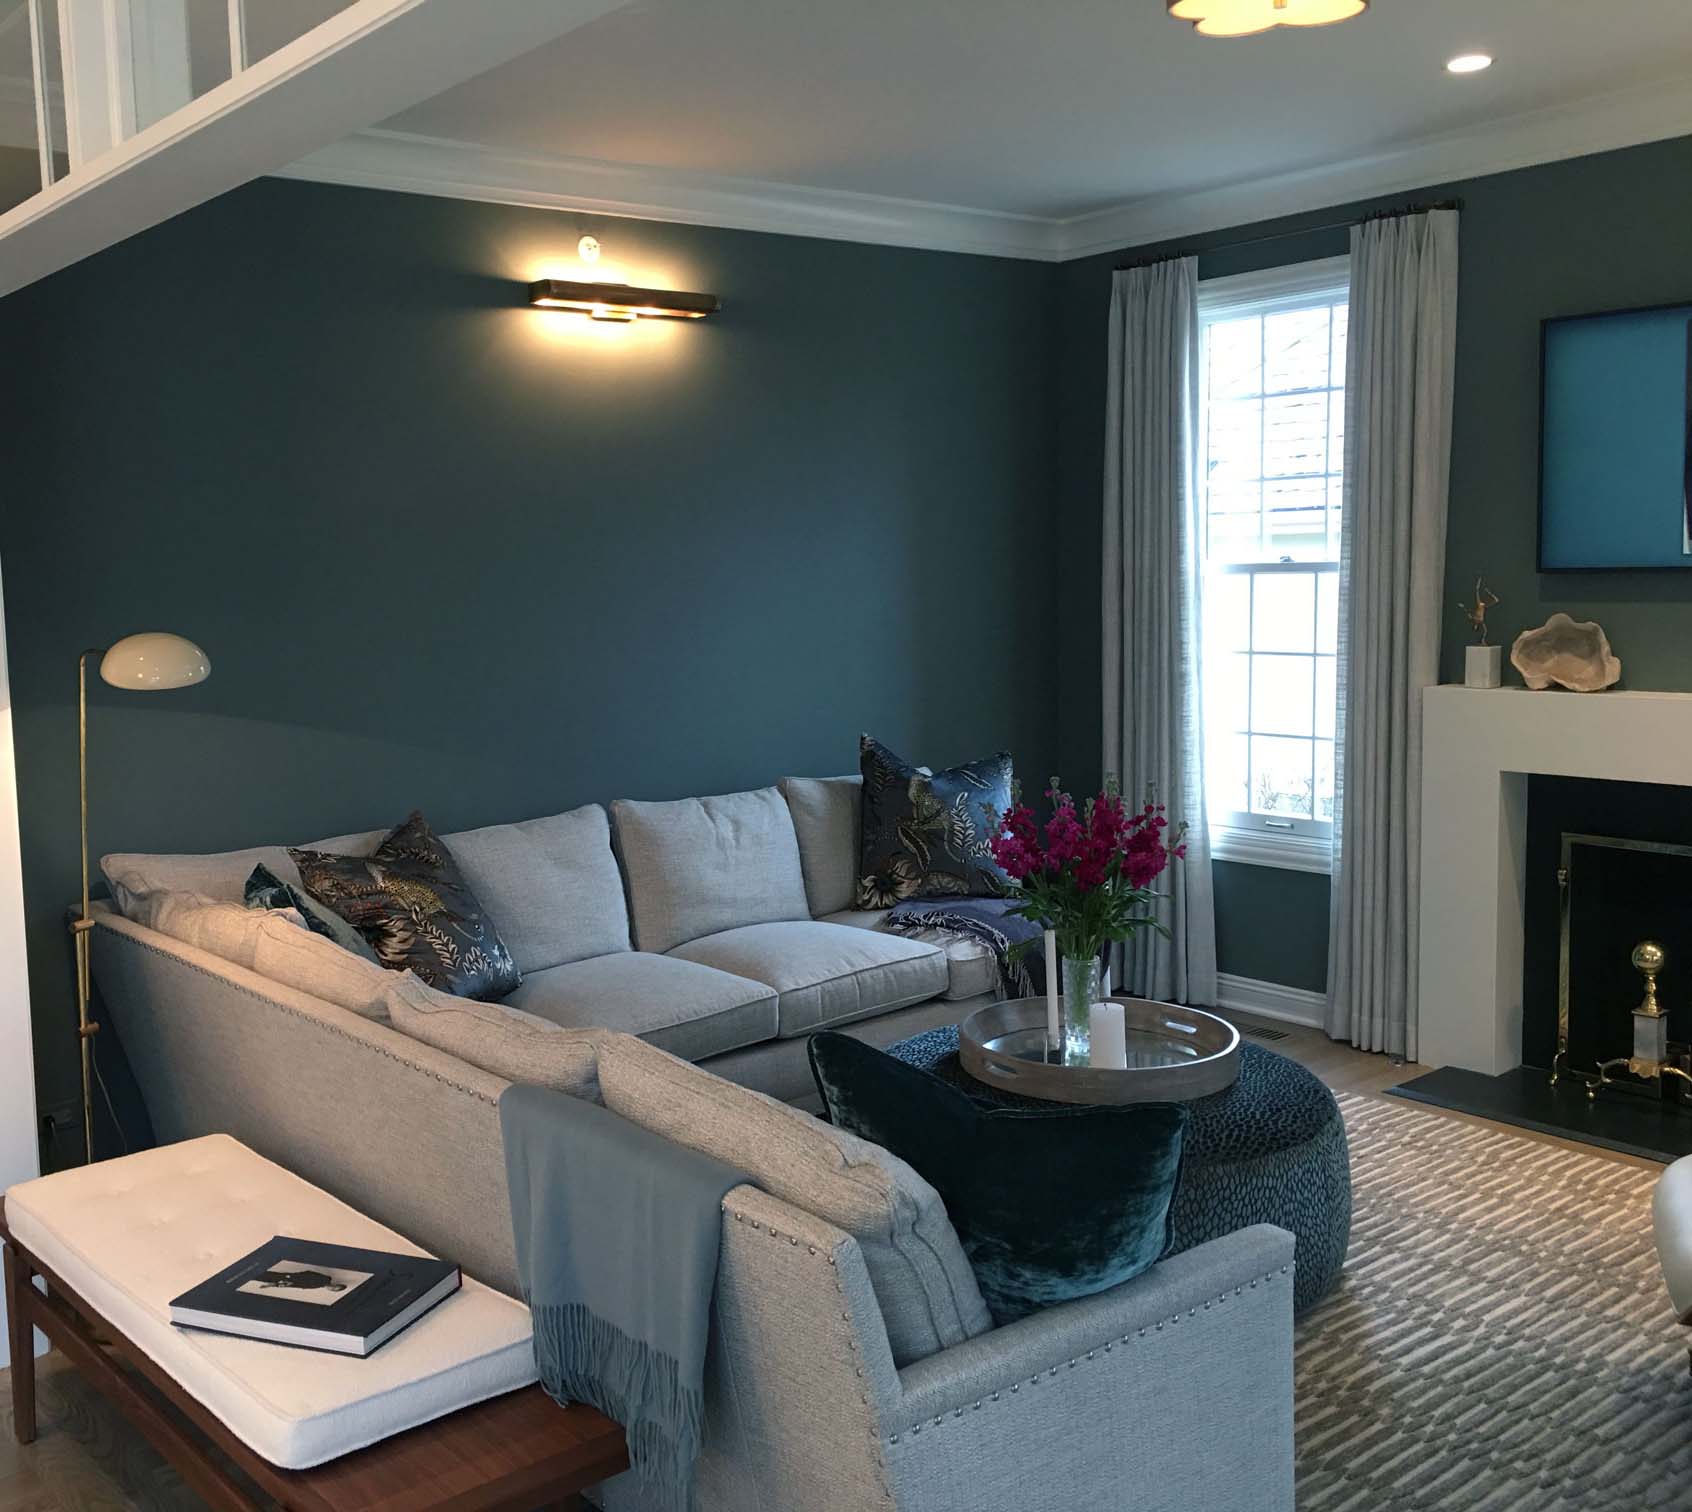
Painting a Living Room or Family Room
Family room before we painted
Family room with ceiling, walls, and trim all repainted
Repainting your entire home is never without drywall repairs
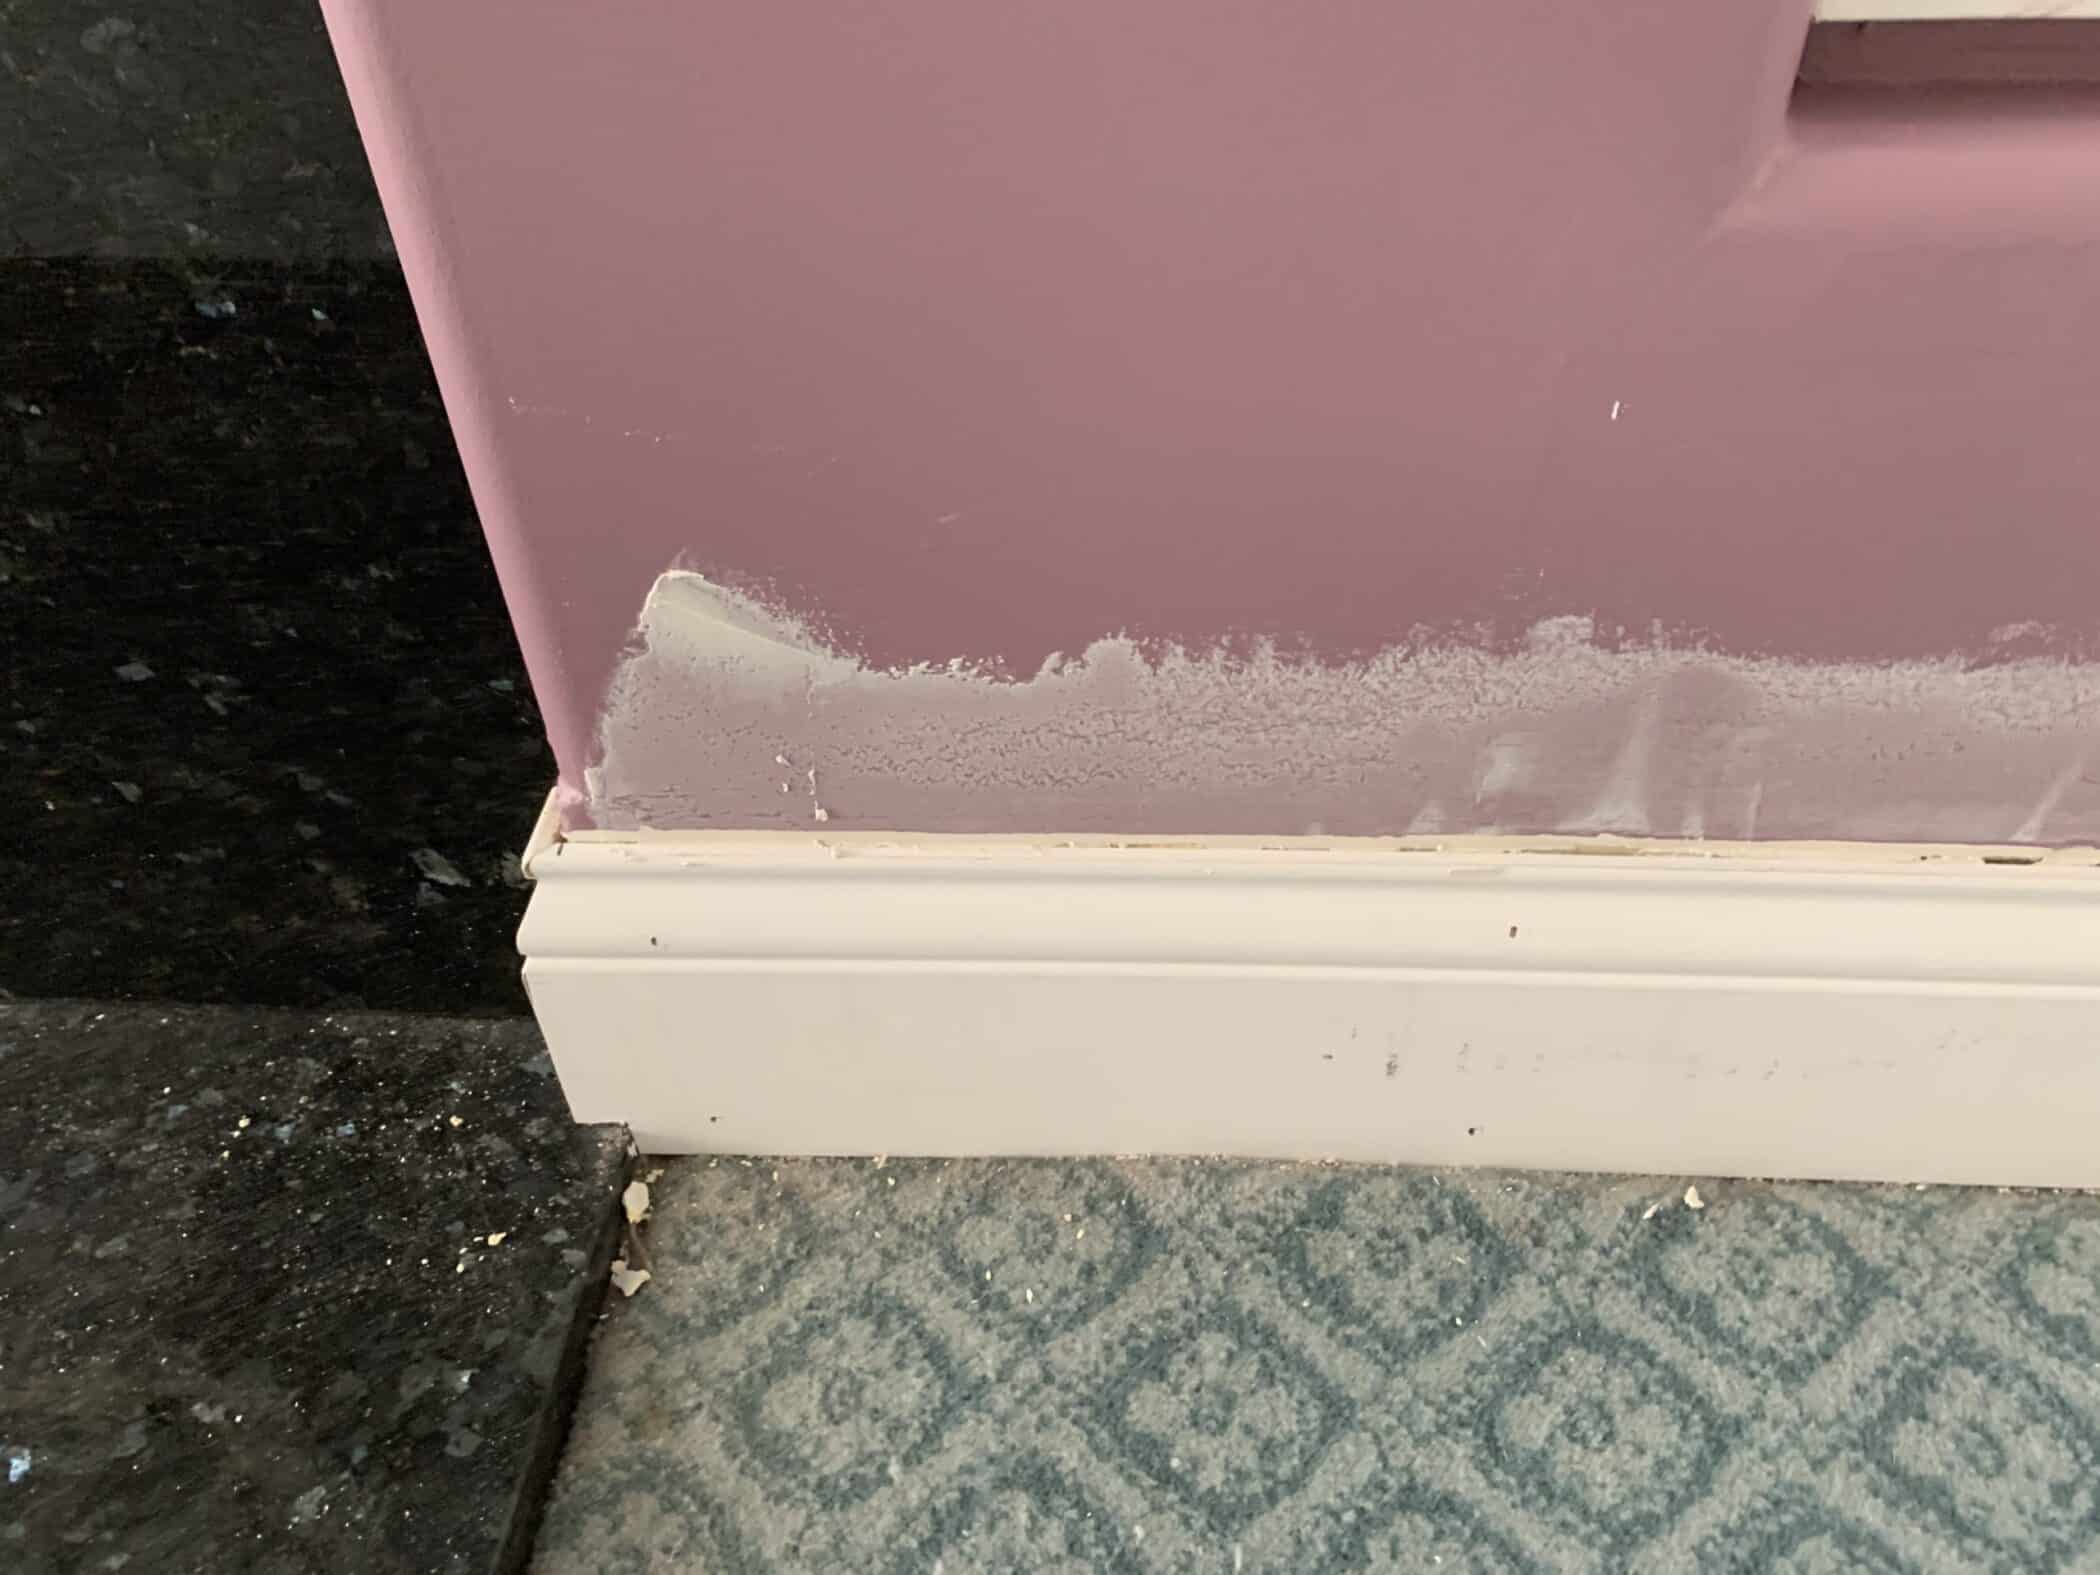
As in any repainting job, this home was not without the drywall repairs. Many of them were as simple as filling in holes from older pics. But some were a little more.
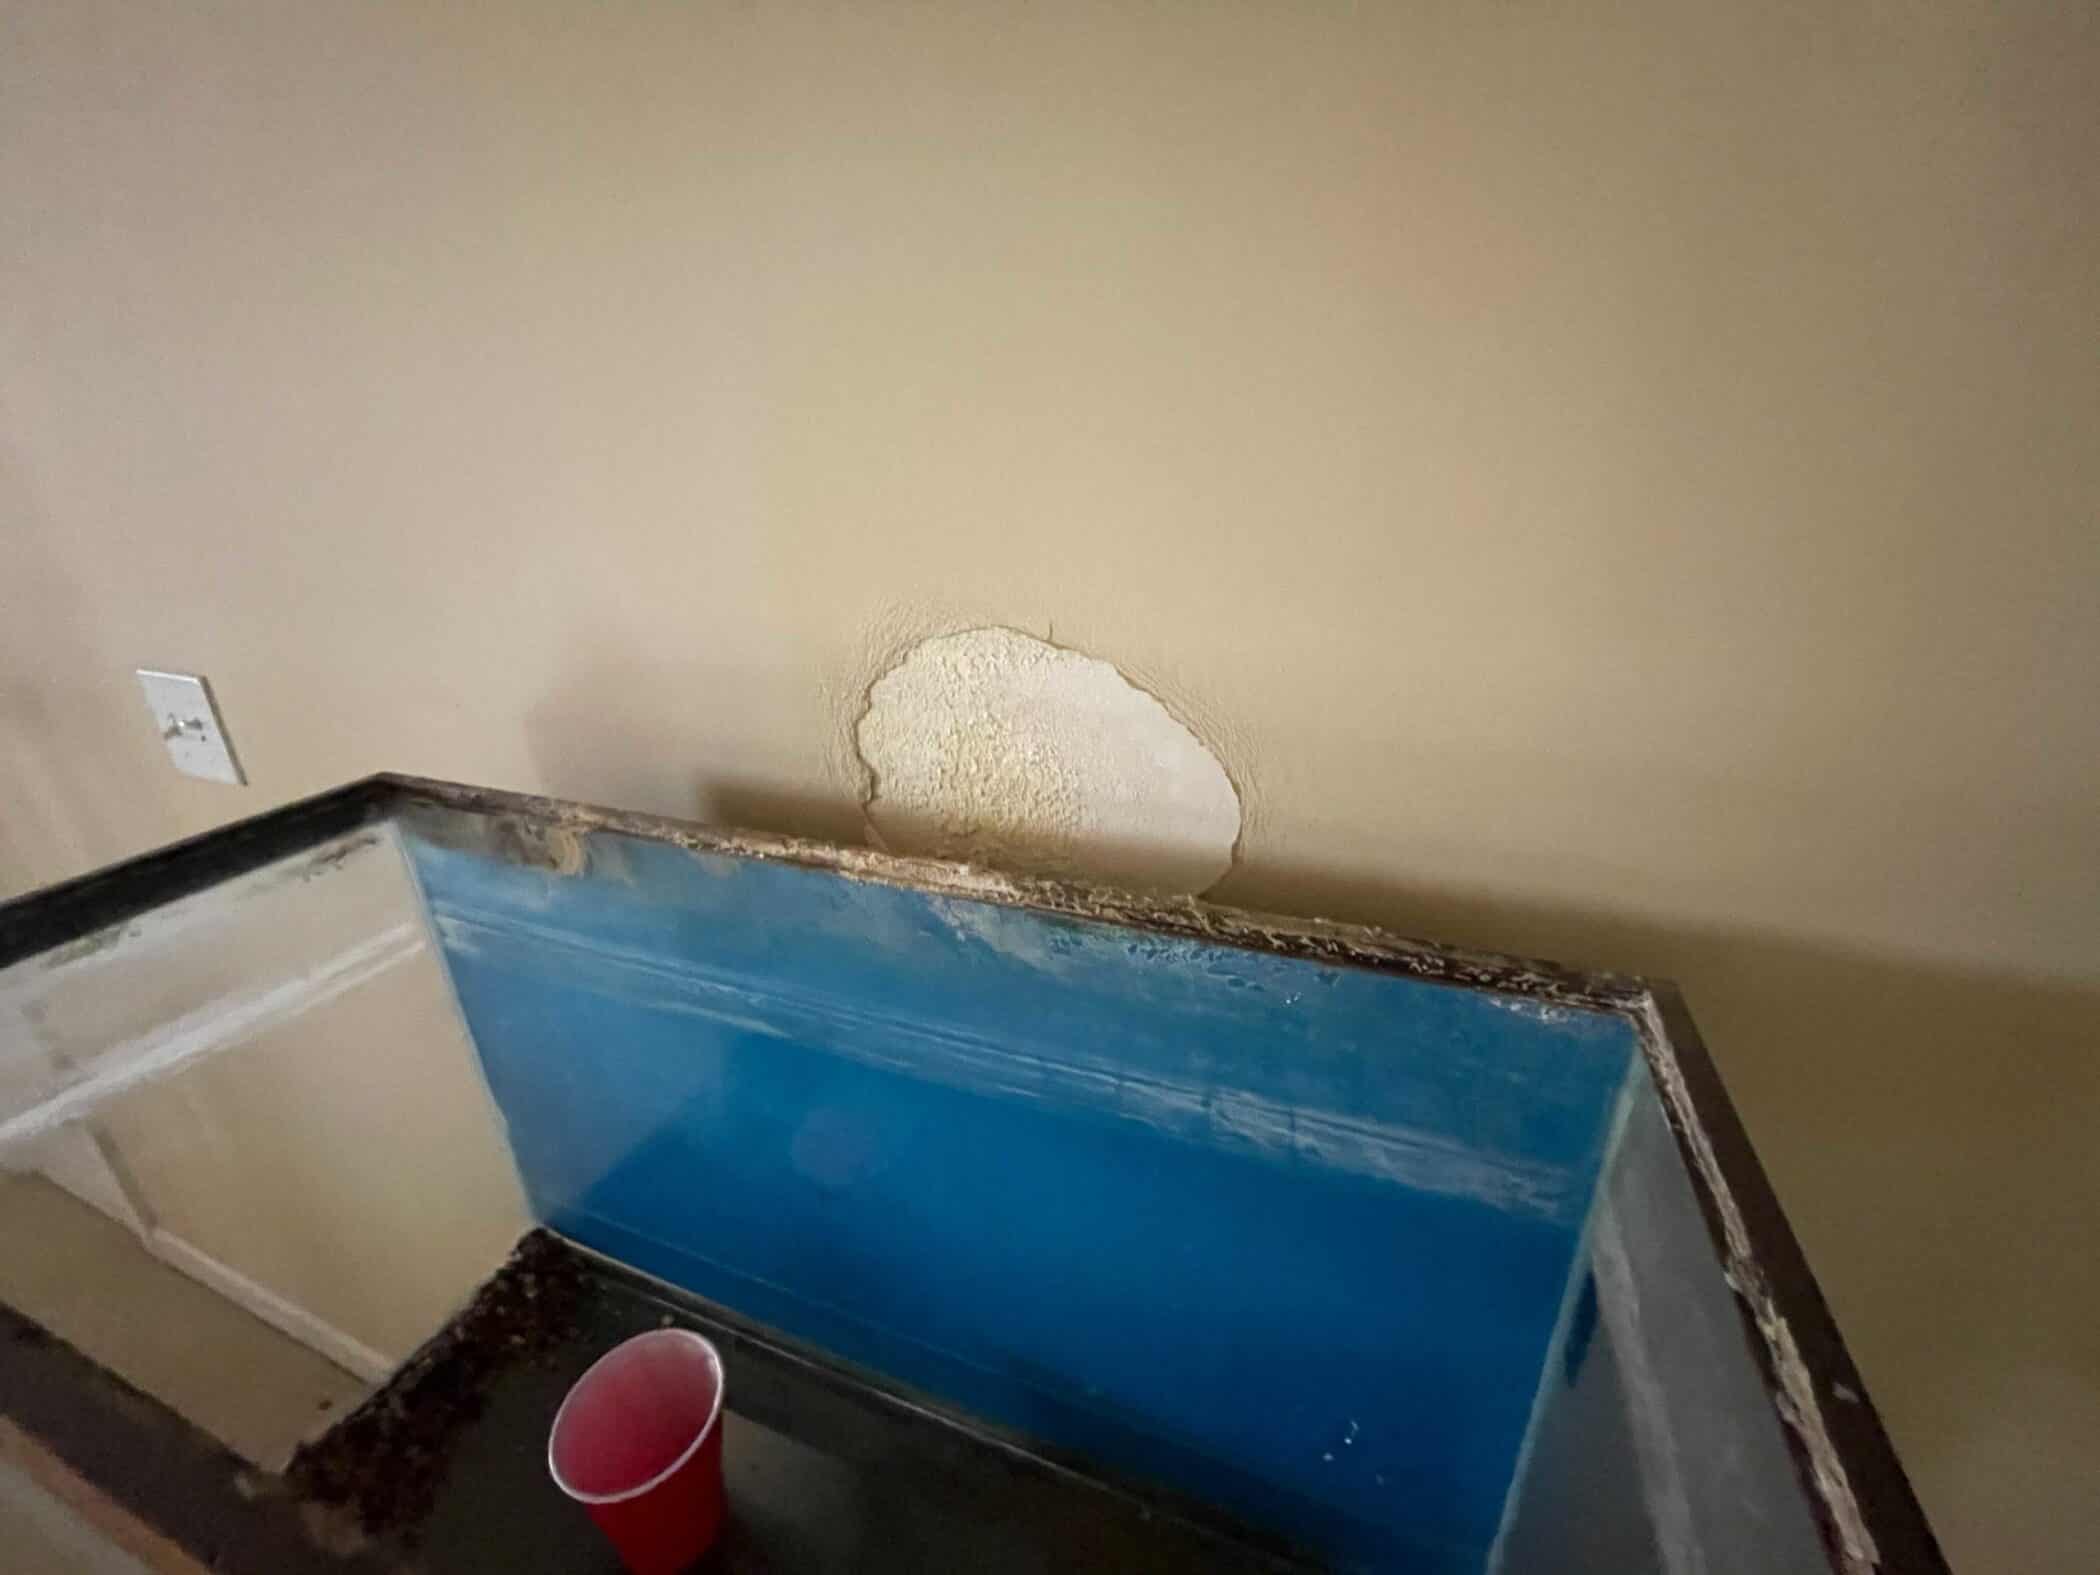
Walls damaged from fish tank water
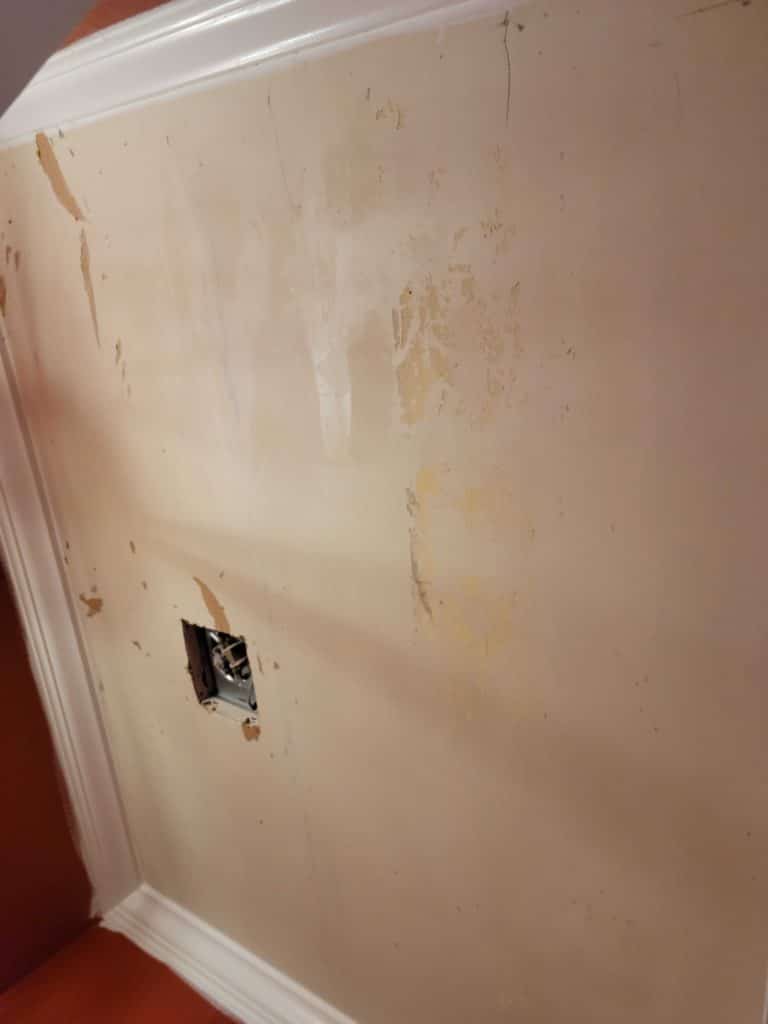
Walls damaged from wallpaper removal
Are you ready to repaint your home?
Not a lot of words in today’s post. Sometimes, pictures just do the work for us. The one question you may ask is how much it will cost to repaint my home. I would love to say here is the cost, but we can’t. Several factors are used to develop estimates on painting homes:
Are we painting walls?
Will the ceilings be painted?
Do you want the doors painted?
Would you like windows or window trim painted?
Does the trim or doors require any repairs?
Changing colors can require three coats to cover older colors.
The type of sheen you want will affect the cost of materials.
Is there some, a lot, or no drywall repairs to be made?
These are most, but not all, considerations considered when we are doing a painting estimate for you.
When you are ready to repaint your home, give us a call to set up a free estimate, most of time we can use online listings of your home to do a virtual estimate for you! Either way, let us know how we can help you love the space you’re in!
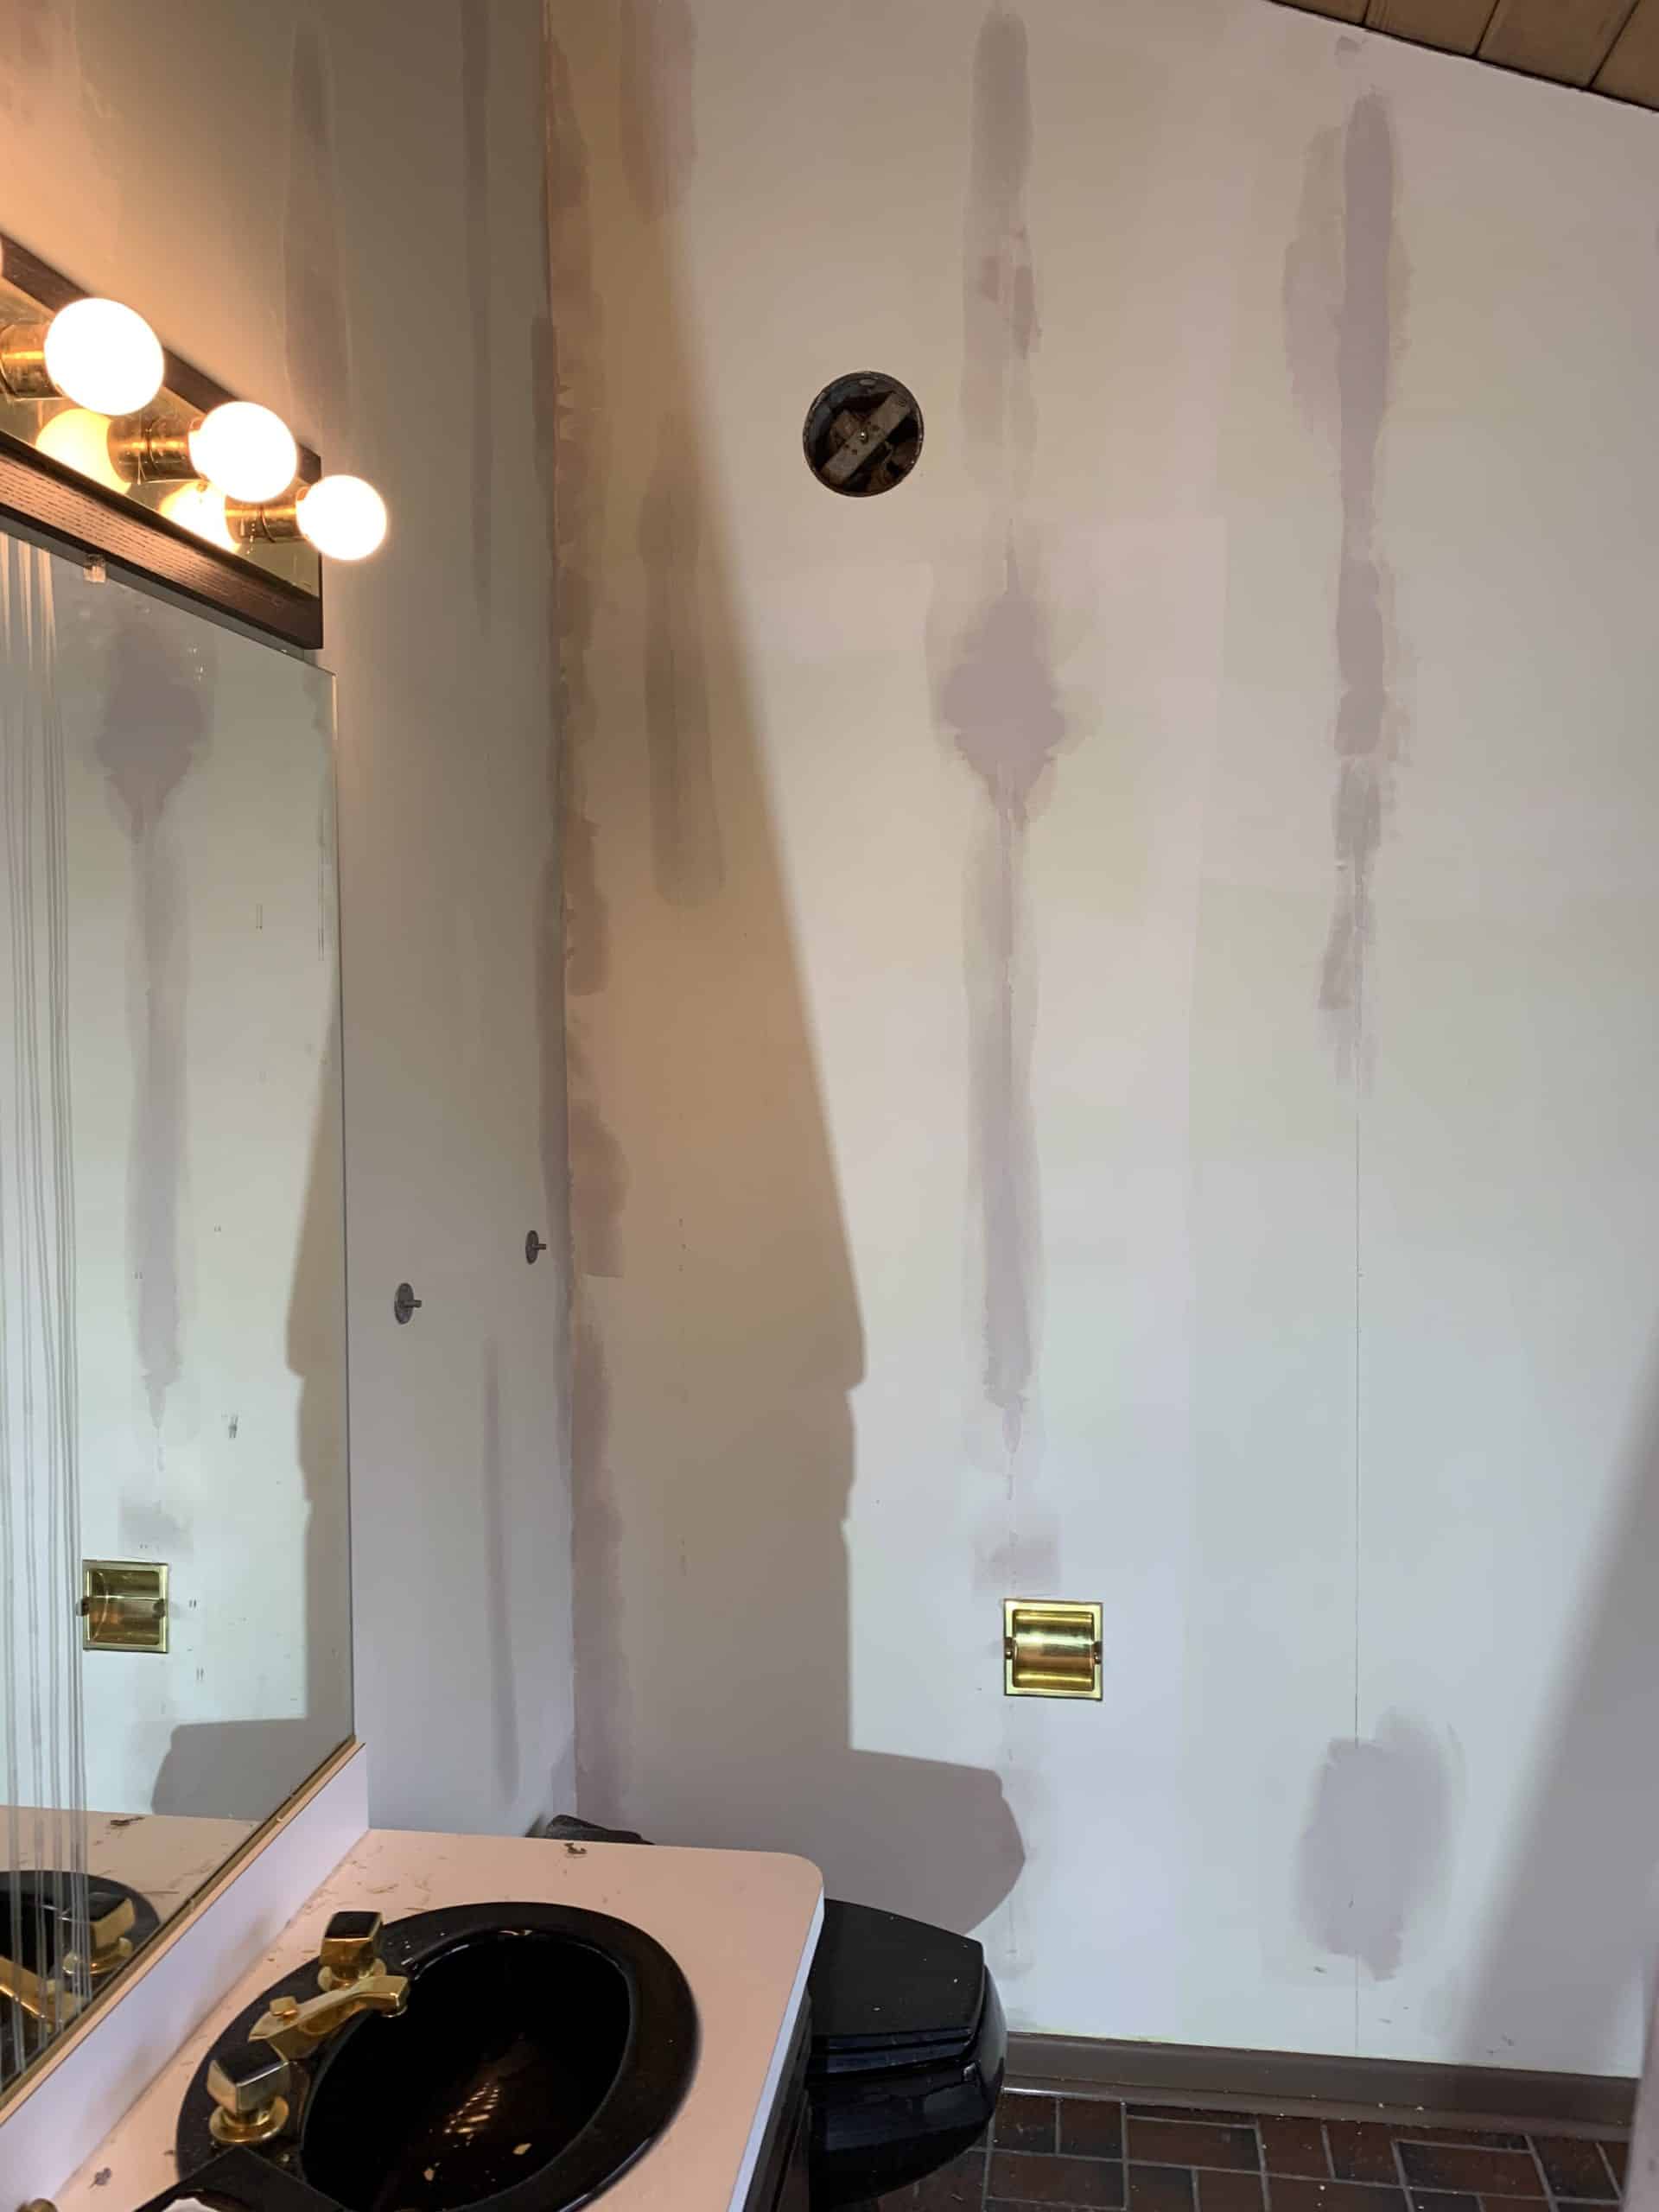
Water Damage Ceilings
It happens to almost every house in the United States -Water Damage!
If you have a house, you have water in it. Water is being introduced to your house from rain, snow, water pipes, and water from showers, sinks and toilets. It is not a question of if you are going to have water damage, it is a matter of where and when. From our position as painters, that water damage most likely will come in the form of water damage ceilings.
For this post we will focus on water damage ceilings, mainly water spots or stains.
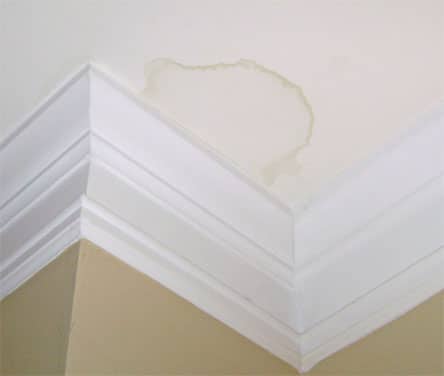
“Our bathtub overflowed and water came through the ceiling in the kitchen, can you fix that?”
Yes, we can. Once the water has dried there will be water stains on your ceiling as seen in the image below.
When you see this, and when we arrive to look at the problem area, there are few things we need to ask:
Is the area still wet?
If the area is still wet you may need a plumber, or roofer depending on the location of the leak. They will determine if there is still a problem that needs to be addressed.
Do you know where the water came from?
This will tie into the above question, it may have been a small one time issue- kids spilled, leaking faucet now fixed etc.
Are we going to have a mold issue?
If the area is closed off, there can be issues of mold between two floors or between inside and outside walls.
When was the last time it was wet and how long has it been dry?
If this happened a year ago and it is still dry we know that a quick repair is what we will do.
Each of these questions is meant to get to the problem and help us make sure it is fixed the right way. In the image above we don’t have to worry about the drywall seams being damaged so it makes our job easy…well, easier.
So the water stain is old and dry – what is next?
As we get ready to repaint the ceiling, we have to make sure we have our checklist of materials needed:
Masking tape
Plastic to cover the walls/trim from not getting paint splatter on these areas
Drop cloths to cover the floors
Roller handle and roller sleeve
Paint brush
Paint tray
extension pole used to reach the ceiling while painting
Ceiling paint
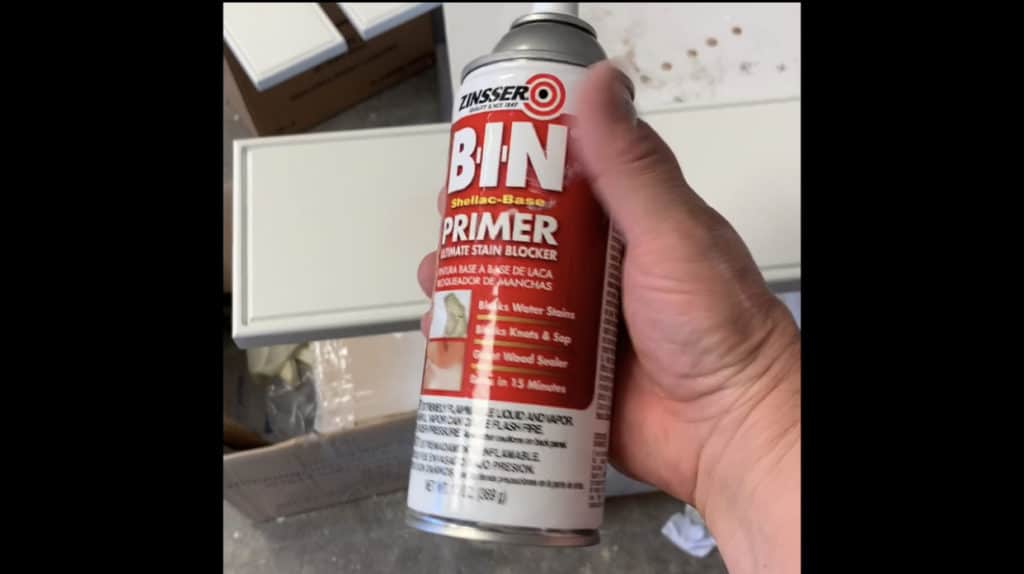
Spray can of oil-based primer such as Kilz or Bin
Once all the materials are in hand, prep work! masking the walls and trim, moving furniture or covering it with plastic, and covering the floors with drop cloths.
Now that your ready to get into paint, get out the spray can of primer and shake well! (2-3 min) Spray the water stained area with the primer and allow to dry. It could be 30 minutes- it could be 2 hours. Once the 1st cost of primer is dry, the stain may come through, but usually it means the stain has bonded to the primer and become part of the primer, and usually it is now encapsulated so it cannot bleed through. However, I don’t like to take the risk, so we recommend a second coat of primer.
here is a spot primer we use
Wait for the primer to dry!
This may seem pretty simple and easy. However, most people paint too fast and don’t allow the primer to dry. Oil primers have to wait for the oils to actually dry out, it is a chemical process. You cannot mechanically force oil paint or primer to dry any faster than it was designed to dry. Water based primers however, get a fan or hair dryer and dry it!
Paint that ceiling.
Your primer is dry. The walls and floors are masked. You have paint ready to apply. So now it is just time to get to it. Cut in the edges with your brush, if you have a fan blowing, you could actually apply the 2nd coat of primer by the time you get to where you are starting and have two coats of primer done right away. Then clean the brush! Roll out the ceiling paint, inspect to make sure you didn’t miss a spot. If it all looks good throw away or wash the roller sleeve, tape and plastic. Pick up drop cloths, move your furniture back and enjoy a spot free ceiling!
Check out some of our paint work we did on HGTV’s 50K three ways.
How to get your walls ready for wallpaper.
Are you having wallpaper installed in your home or installing the wallpaper yourself? If so, then you will want to read how to get your walls ready for wallpaper!
Hello again, this is David from D’franco Painting & Wallpaper, and I just wanted to share a few things to help you in your wallpaper installation so you have a trouble-free installation. Inspecting your walls or using this as a checklist of things to think about before you install wallpaper will make the installation that much better for you. Knowing what to look at will make sure that if you hire someone, you are hiring the right person. In any case, getting your walls ready for wallpaper is not just a nice thought…it is a must!
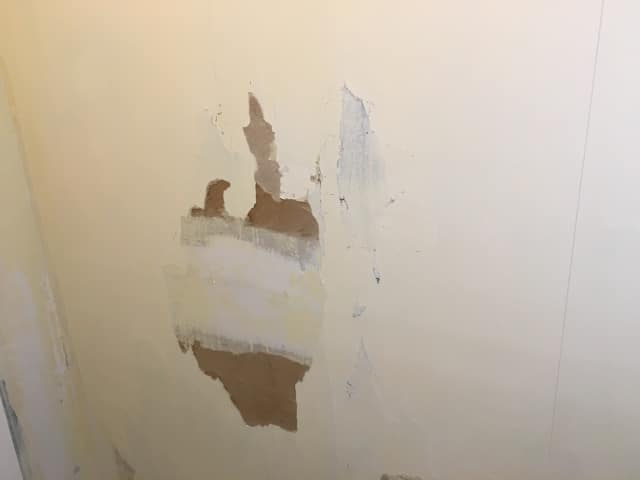
Do your walls need repairs?
In most homes that we inspect, there is little need for wall repairs. If there are any, it is usually from nail holes, old picture hangers, etc. But sometimes…
Drywall damage from baseboard replacement
Drywall damage from wallpaper removal
Here is drywall damage from tile removed from a wall
Each of these issues will need attention before you start installing drywall. These repairs usually take several coats to fill in the holes and make things smooth again. If you don’t know how this is done, it is one of the things you want to hire someone to do, as you will see every single knick, ding, scrape, bubble, uneven spot, or divot in the walls. You want to make sure the walls are ready for wallpaper by being very smooth.
Are you removing wallpaper?
This should be a yes or already done. If you have commercial wallpaper, it is against fire code to install new vinyl or old vinyl wallcovering.
Here is a quick video on one of our guys removing wallpaper: Removal
Are your walls sealed or primed and ready for the wallpaper?
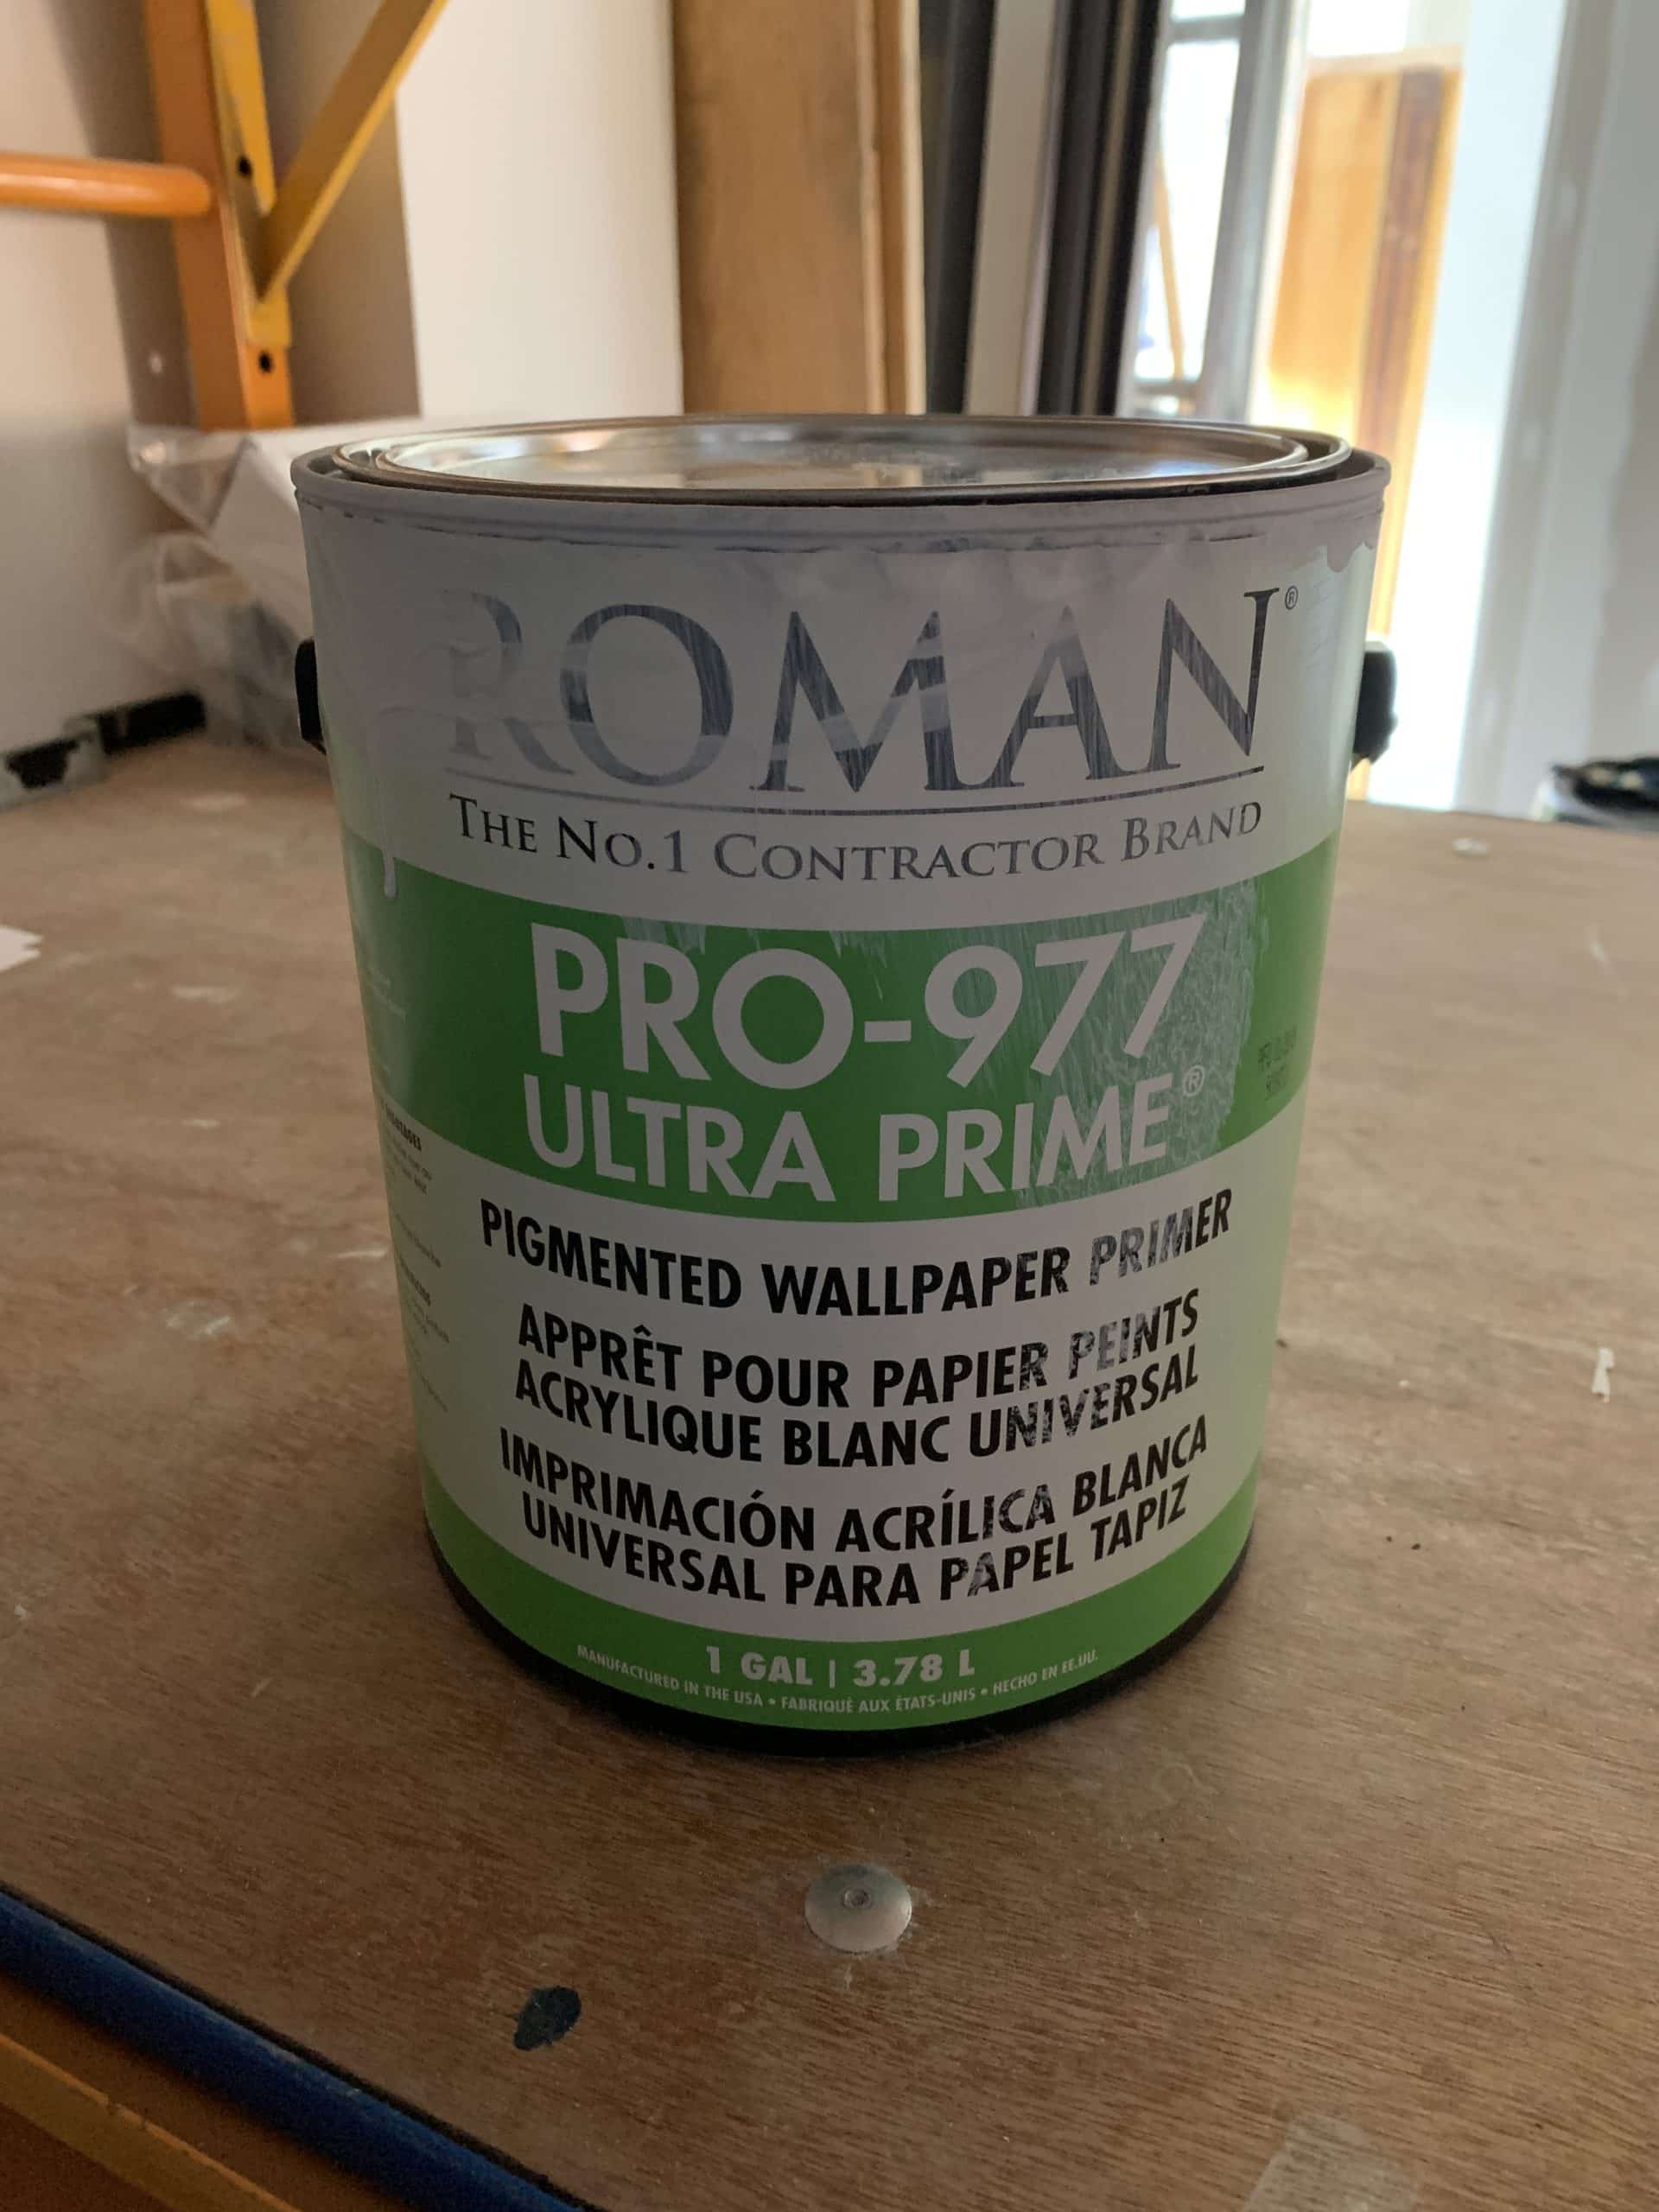
If you have had any drywall repairs made, then you must seal those spots. We have several products we use, but one of the ones we have used more of lately is ROMAN 977 as it is a white pigment and can be tinted.
Make sure that you are using a wallpaper primer, and NOT a drywall primer! There is a difference. Drywall primer does not really soak into the surface. It sits more like paint. Wallpaper primers do a better job, some more than others, of penetrating the wall surface to create a uniform solid surface that the wallpaper adhesive can adhere to. Are you asking or saying, “So what?” GOOD! If you have ever put a piece of tape on the wall, go to remove it and the paint and drywall rip off the wall with the tape? This is the reason we use what we do. The primers penetrate, almost gluing, the surfaces together. When it is time to remove the wallpaper, it comes off like it should, leaving a solid wall surface you can paint or hang new wallpaper.
Be sure of any other work you want done before wallpaper installation begins.
What we mean by that is:
Are you replacing a towel holder?
Getting a new mirror?
Changing your vanity?
Updating your toilet?
Removing the toilet paper holder?
Painting your ceiling or trim?
Wallpaper Removal
Wallpaper removed, trim painted
If there is a “yes” to any of these questions, you need to make sure that you are having it done before wallpaper begins.
What else you should do before starting to install wallpaper?
Aside from the above…
Make sure you have the proper adhesive for the wallpaper you are using.
Have clean water, plenty of space, and READ the instructions one more time.
When done, have fun! Wallpaper can be fun to install. Seeing the transformation take place is worth the time.
If you have questions on wallpaper installation, let us know how we can help you love the space you’re in.
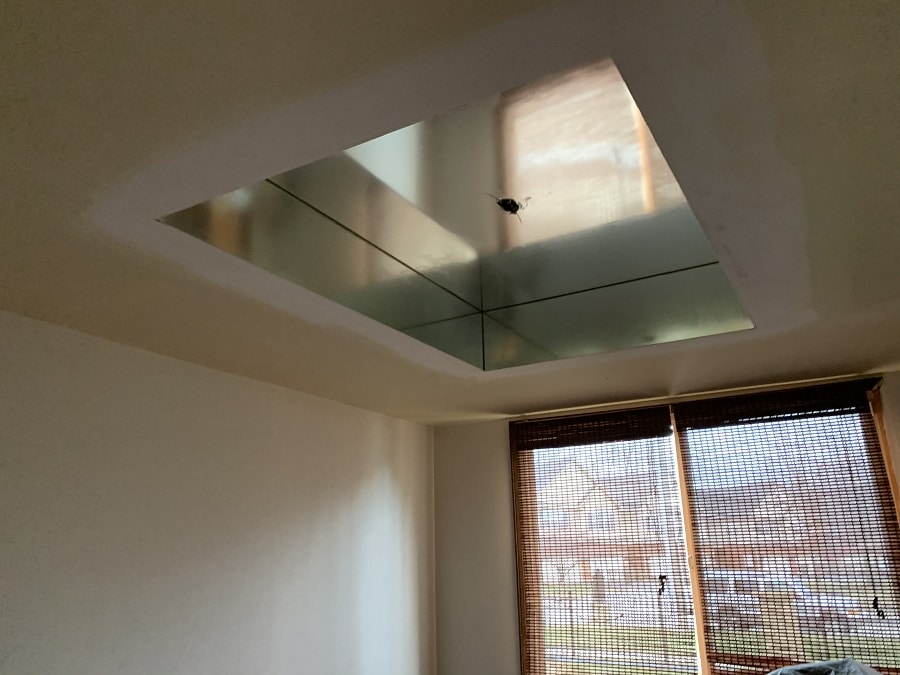
What to do with a mirrored wall in your home.
Do you have a mirror on a wall or ceiling in your home? Do you know what to do with that mirrored wall?
Aside from tearing it out, I had no idea either until 3 weeks ago. We had a customer that hated it, but without ripping apart the wall, what were the options? I am David Cook of D’franco Painting & Wallpaper, and we are glad you are here to ask this question!
Ways to hide mirror walls
I did a google search on this myself and found some interesting ways a mirror can be used. Here is one of the articles I found:
They had some interesting ideas, but they never mentioned putting wallpaper over a mirror!
Removal of a mirror from a wall or ceiling
If you have ever done or been around remodeling a home, there always seems to be a room with a mirror stuck to the wall. I did not have any images of this to show you, but if you close your eyes- and think of this image:
A mirror is glued with high bond adhesive to a wall
It is pressed in place so it sticks to the wall
The glue dries hard as a rock to the wall
When you try to remove hard glue (like paneling) it rips the wall off as the mirror breaks into pieces
Well, now what? Now you have broken mirror all over the place, and a wall that looks like a war zone. The wall needs to be scraped, cleaned, then repaired. Not fun.
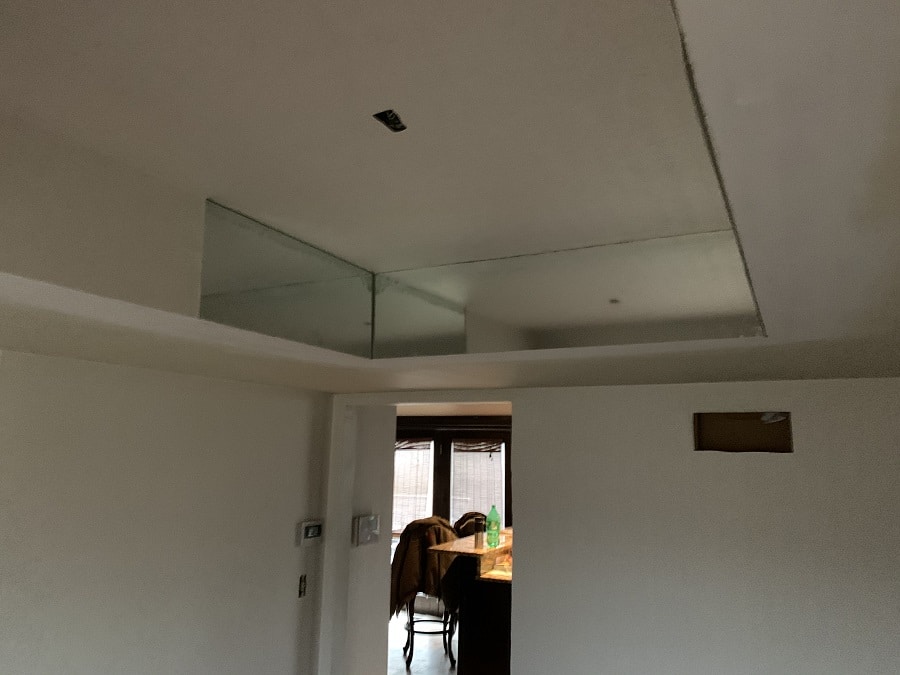
Wallpaper over a mirror!
I honestly never thought about it until a customer asked me if it can be done. So after a few seconds, we have installed wallpaper on glass. There isn’t a difference, so I said YES!
So we took to the prep work.
We cleaned the mirror.
We primed the mirror with Roman Pro 935 adhesive promoting primer.
Here is a video of primer:
Wallpaper installation on a mirror
The prep work really was simple, but that is where most mistakes take place!
After the primer was allowed to dry overnight, we measured the wallpaper and cut into pieces for each section
The wallpaper was then rolled with adhesive and allow to book (set for 3-5 min). Once our timer went off we applied to to the mirror like any other surface. The slight difference- the primer is sticky like masking tape- so you have to really place it well or you have a mess.
We then trimmed the pieces as needed and KABAM! The mirror ceiling looked great. No mess, easy and cheaper than demolition.
Do you need a mirror to be Wallpapered?
Then text, call or email us right now! send us a pic and we can help you get rid of the mirror you don’t want!
Recurring Wall Cracks
Do you have recurring wall cracks in your drywall or plaster?
One of the repairs we often have to make in homes before we paint, is cracks in the walls. Wall cracks happen for a number of reasons:
water damage
stress
improper installation of drywall
age
settling of home
improper previous repair
Hi! I’m David Cook of D’franco Painting & Wallpaper, and I thought I could share one of the most recent and difficult wall crack repairs we have to make. Old plaster.
Identifying wall cracks
It is easy to see cracks in your walls. The type of cracks, may not be easy to determine. For most cases, just call someone to look at your wall cracks to make sure it is not paint cracking, age, or a structural problem. In the video, you can see it is a pretty sizable plaster crack we are dealing with.
The house we were working in had a few issues that had big cracks. There are not a lot of great tools for this but we found a great product-Plaster Magic.
Do not be shocked at the cost for these repairs. You will most likely be dealing with lead paint, with old dusty areas of the house which can take a LOT of dust containment. The process as we used it, was time consuming as well. So again, depending on the type of wall cracks you have, have someone come out to look at to see what you are dealing with.
Here is a pic of the plaster that we are repairing.
Using the Plaster Magic Kit
When we bought this kit, I underestimated how many pieces would be needed to fix the cracks. We still made it work as we were on this site several days.
The 1st thing we did, was clean the cracks. After using a shop vac to get rid of dust, we literally washed with soap and water as they were very dirty!
Next up was cutting the crack away of loose materials. There was enough of the wall that was solid but plenty of spots where the plaster was flaking off the wall.
We then pre-drilled the holes needed so the adhesive could be used in the cracks between the plaster and wood lathe.
After we drilled the holes, we caulked in all of the adhesive in the little holes.
With the adhesive in the holes, we used the provided screws and screw caps to secure the plaster to the wood lathe. This got tricky! It took us 4-5 screws to find the right amount of pressure the plaster/lathe/screw could hole with out one of them “giving” (broken plaster, broken lathe, broken screw) . https://www.youtube.com/watch?v=0wa-7Cb4HHc
As per the the instructions we let things sit for 24 hours.
Once the glue was dry we scraped away the excess, and removed the screws. It worked! Just as advertised.
All that was left was to get some 90 minute DuraBond to smooth out the walls. We sanded, the first coat, did two more, primed the walls and painted.
If we can get our video to load to YouTube we will get that in here.
Other ways to repair plaster
Another method to repair a hole or broken out plaster is to patch the area with drywall. This can be a pain, but it does work. This is another area that you should call a professional to have it looked at. There are different depths of plaster and drywall. Selecting the wrong one can make life a real pain in the butt. Why you ask??
Plaster can be 1/2 inch to 1 inch thick.
Drywall is 1/4, 1/2 or 3/4 inch thick.
If you try and put 1/2 drywall where there is a 3/4 inch depth- you will have to fill in 1/4 deep void of drywall mud. It may sound like it is not a big deal- but when you have thick layer of drywall mud, it will sag, then you have to cut out the droopy stuff to put in new. NOT FUN!
This blog is short- but it is a good one to get you some basics of a plaster repair- not too bad with experince of drywall, but nothing to be tackled by a first time repair. We would love to hear how we can help you with repairs to you walls and or ceiling and help you love the space your in!
Book Your FREE Estimate
Your Free Estimate
To help home and businesses owners during this challenging time, we are offering free virtual estimates.
Fill out the form below and we will schedule a time for a free video call estimate.