Best Ceiling Paint -Elgin, IL

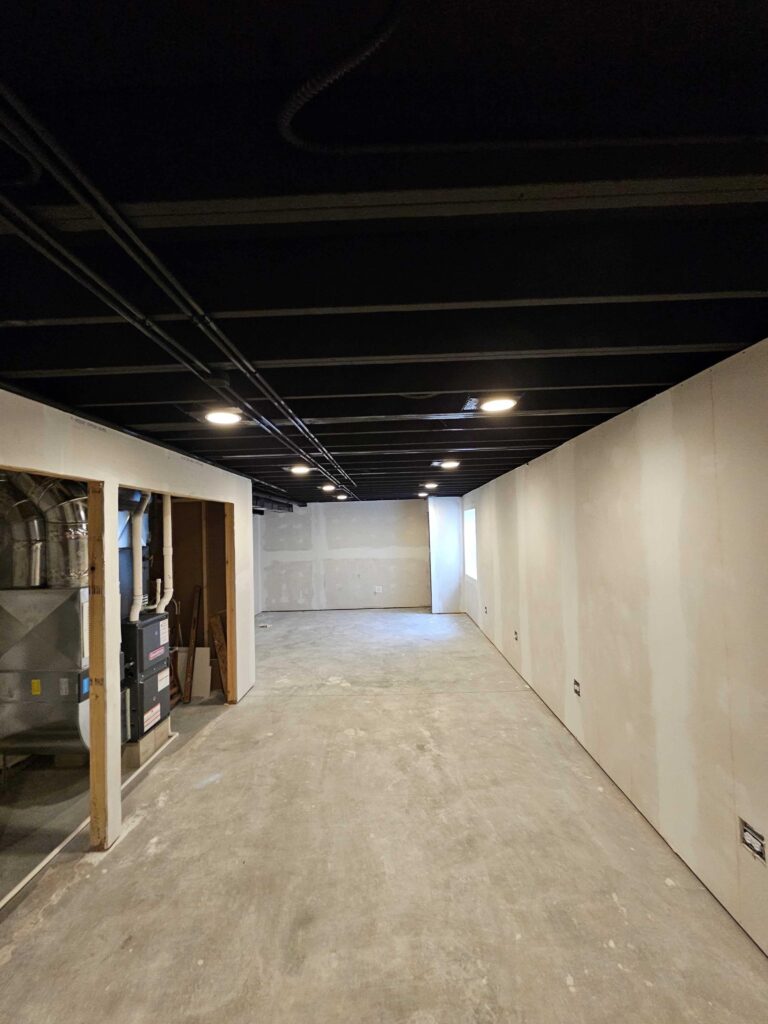
Every area of the county can be unique when it comes to wall finishes. Some areas are smooth, there are textures and popcorn ceilings. Selecting the Best paint for Ceilings is a matter of matching the paint properties to the type of ceiling and the effect you desire. For this article, we are gonna assume you have smooth flat drywall ceilings.

Hello Everyone, David With Dfranco Painitng, here in Huntley,IL. This wekes question is about what paint should I use for my ceilings. SO- Here’s a comprehensive guide to help you make the best choice:

D'franco finishes chicagoland painting for realtors
flat paint on ceilings

What sheen should I use to paint my ceilings?

Most Designers, Painters, Builders, Paint store Reps, and indusrty experts will agree that flat latex paint is the Best paint for painting the ceilings in your home (in general). Yes there are exeptions which I’ll get to in a bit, but a non-reflective finish is preferred in almost all situtations.

Again, we are writng this for homes in around the Pingree grove, Algonquin, Carpentersville, Elgin, St. Charles areas of Chicagoland as they are alll pretty much the same.

Why should I use Flat Paint for ceilings?

We could send a ton of time on this, but at the end of the day, for your interior painting, you want a flat paint to be applied to your ceilings because:

  • it hides issues such as imperfections of the drywall
  • there will be minimun glare or reflection
  • there will be no shine- flat paints in general are the most accurate depiction of the color selected
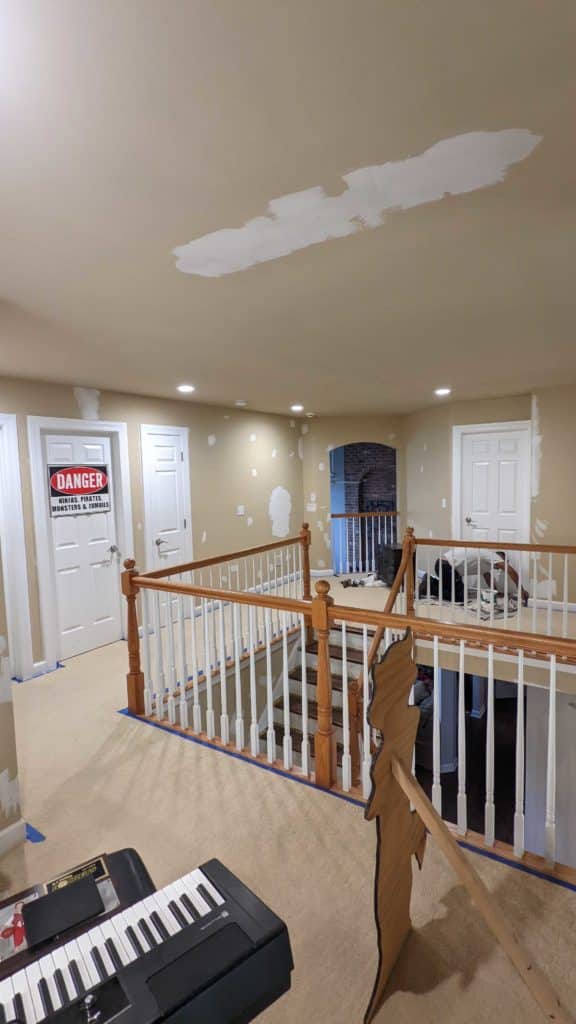
  • flat paint is easy to touch up- if you have water damage, lighting replaced you will apprecaite touching up a ceiling vs reppainting the whole thing

Types of paint to use for Ceilings

There are several brands of paint- how to choose? Here is a list of ceiling paints we have used, and what we like or dislike about them that is best for interior painting in your home. (paints do change over time, so asa of this article post this is what we like best)

  1. Benjamin Moore Waterborne Ceiling Paint – This product is specifically formulated for ceilings and features an ultra-matte finish. It’s known for its slow drying time, which reduces spatter, and its ability to conceal blemishes well​​. We have found that it leaves marks, and didnt really touch up that well, (an electrician added a light, we touch up around it and it left a sheen different from the paintinng we did the previou day) It is also the most exensive.
  2. Harmony Interior Acrylic Latex – If you’re looking for an eco-friendly option, Harmony is UL Greenguard Indoor Air Quality and Gold certified. It includes mold and mildew inhibitors and is particularly effective for kitchen ceilings where you might encounter smoke stains or cooking odors​​. We used this product in a day care, funeral home and senior care facility. We had no issues with it, seemed ok- we only used it because thaat was what we were told to use.
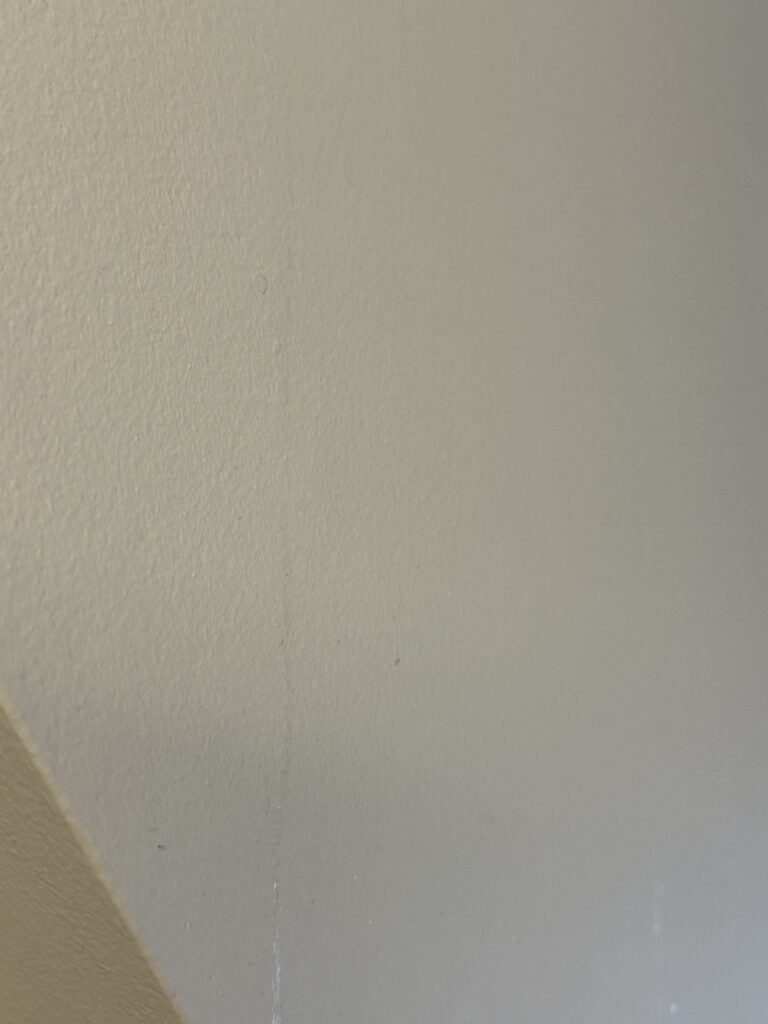
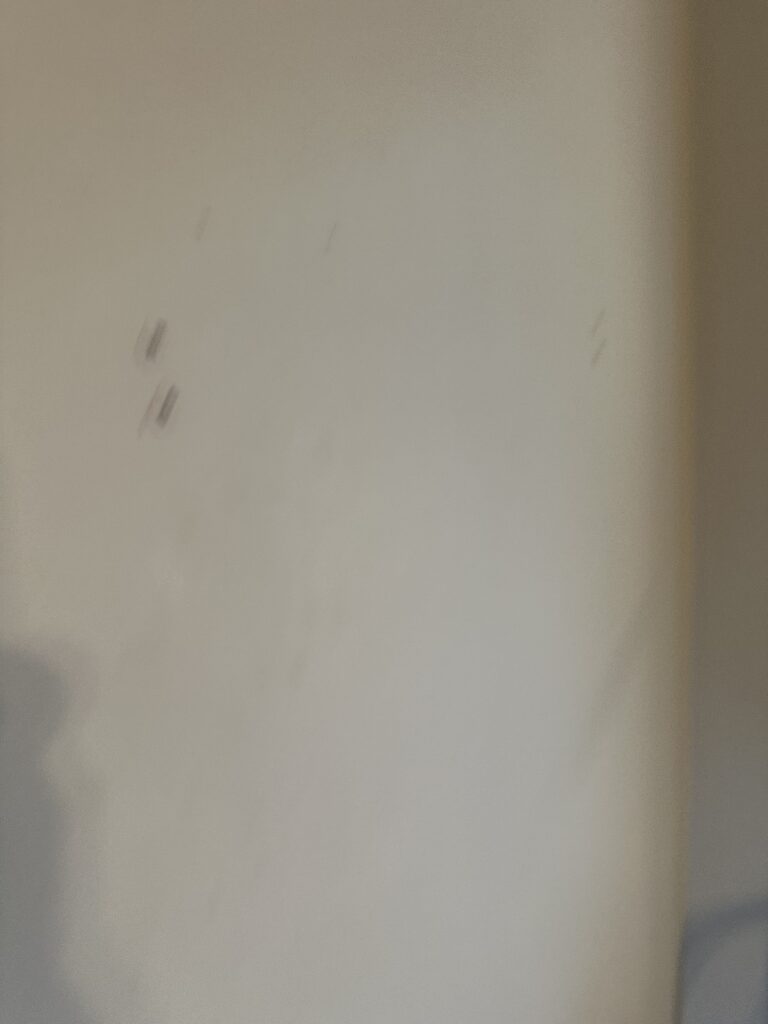
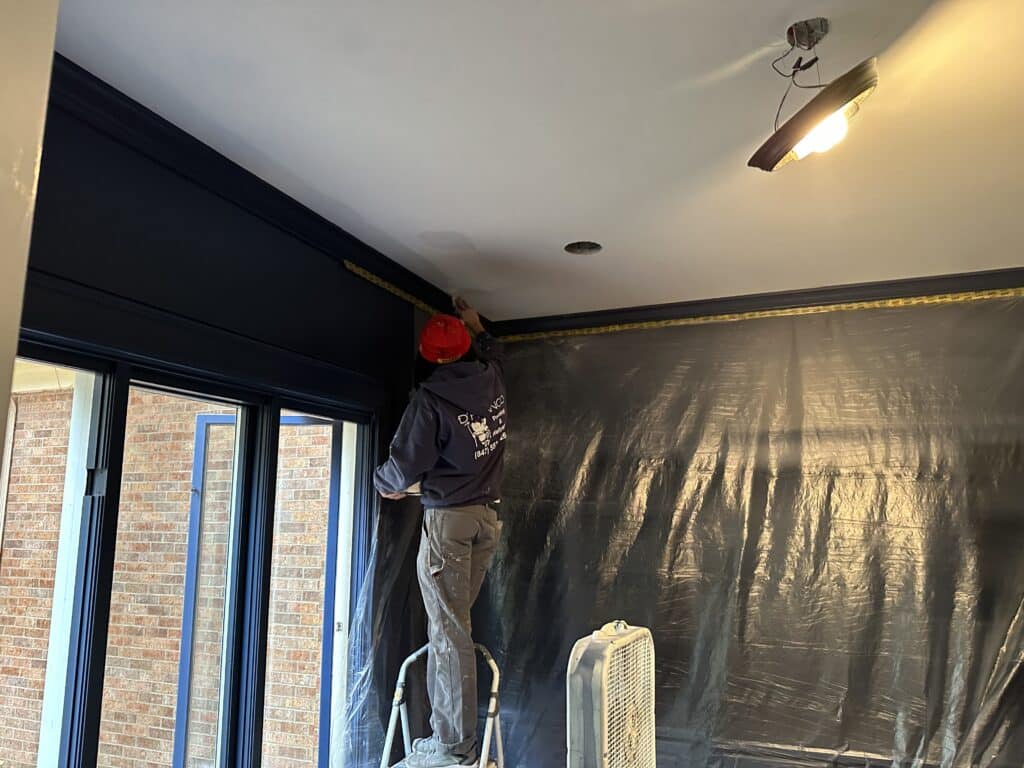
  3. BEHR Ultra Pure – Home Depot says, “this paint is versatile for various ceiling textures, offers stain-blocking capabilities, and is low-odor, though it may require more than one coat for optimal coverage​​”. We say NOT. Great marketing, poor deliverance- from our experience. I thought price was high, and as you can see in this video- I would not call this a flat paint.

4. Sherwin Williams Eminence Ceiling Paint

This paint is newer to the market. We have only used it twice and that was due to the color selected. The can said that “This paint has no sheen and is a true flat”, and overall i think it was. Since it comes in a base color of Bright White, it an excellent choice for bright whites competeting with Behr.

OUR Top pick for Ceiling Paint- Sherwin Williams CHB

This paint is a powerhouse and workhorse. If your in the Chicago market your painters will know it well. It is said to outsell all their other paints. We have been using it since 2005. It has never changed, (that we have seen) the label is the same, smells the same, and works the same. In fact!.. we have gone back to do touch ups on ceilings 5 yrs later! We used the same paint, with a new gallon and you could not see where it was re painted! The Cost is amazing. We personally will only use this stuff unless told otherwise- it is that good. So hands down we feel that is is the BEST Inteior PAINT FOR CEILINGS

Good runner up- JC LICHT MHB ceiling paint. This product is meant to compete with Sherwin Williams CHB. We have used it once, and that was over 8 years ago, so I cant really give much information about it, except to say it is an option.

What is the difference between flat and other sheen levels

Sheen Levels determined how much shine or refelction a paint has. Flat paints, such as the ones mentioned, have the lowest sheen level. Which why it is ideal for ceilings as they diffuse light and reduce reflections. This quality makes imperfections less noticeable.

For wallls we tell people to use a low sheen/matte/ or eggshell. Sheen levels can get confusing!! It can drive us mad as well. Each paint line from each brand has their own sheen level, whichmakes it hard to match paint or do touch ups. The added tint also affects sheen, but alll lof these issues are best for another day.

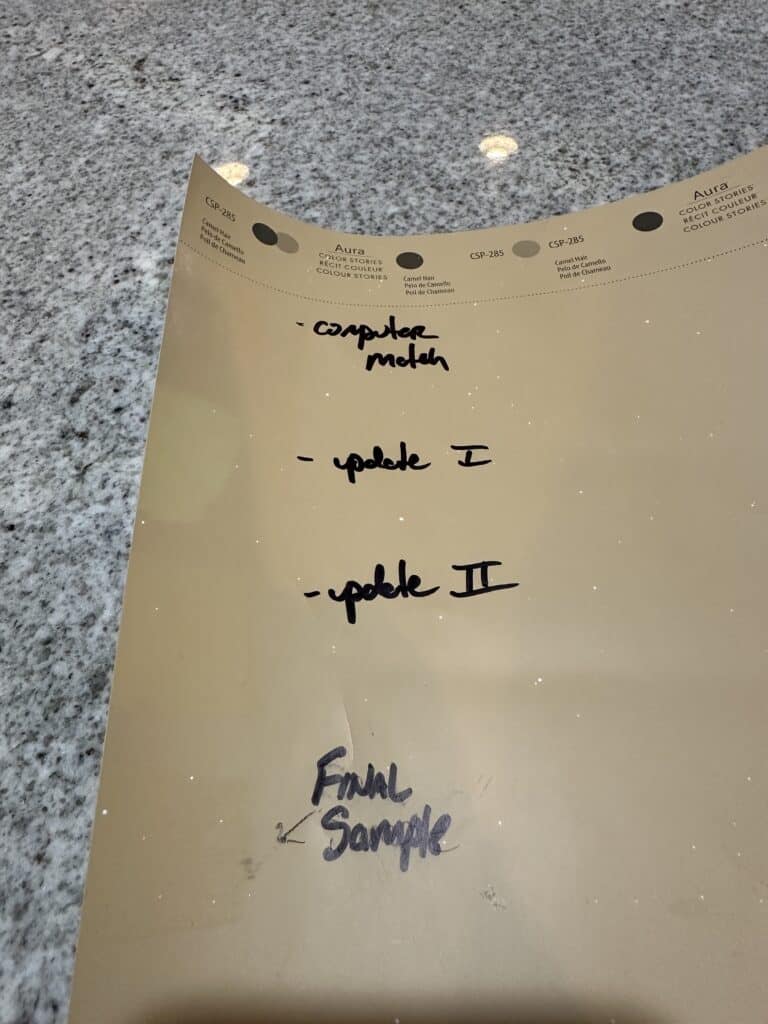
Where can I look at the Flat paint types or sheen?

Images of Flat Paint Brands– For visual reference, images can be very helpful. However, for specific images of flat paint brands mentioned, it would be best to visit the manufacturers’ website. Maybe stop in at a home improvement store to see the color swatches and finishes. On line or digital images may not always accurately reflect the true colors. Which is also true of different cell phone cameras and image viewers.

When considering paint for your ceiling, remember to take into account the color and finish. Then the paint’s ability to cover imperfections, its resistance to mold and mildew, and the room’s specific conditions and usage. This will ensure you choose a paint that is both aesthetically pleasing and long-lasting.

How to Remove Commercial Wallpaper

Remove Commercial Wallpaper at my Office!

Hello Chicagoland!! David Cook with Dfranco Painitng and Wallpaper in Huntley with today’s question!

If are in the midwest, especially in the Schaumburg, Elgin, Wheaton Suburb area, and been to your doctor’s office, dentist office, or hotels, you have seen commercial wallpaper. Most of the commercial wallpaper you see on walls is meant for a 15-25 year life span. But what if you don’t want it on your walls?  If you want to know how to remove the commercial wallpaper where you work, then read on because this post is for you.

Can I just paint over the wallpaper?

How to Remove Commercial Wallpaper - paint over wallpaper

This question is one of the most popular questions we receive. The answer is…maybe.  If you have wallpaper that is installed, usually in your home, that is smooth, and won’t easily come off the wall, then the answer can be a yes. However, the wallpaper that is on walls in hotels or offices is commercial grade wallpaper. What does that mean?

  • This wallpaper is very heavy duty-a very thick material.
  • The wallpaper itself has a texture, usually very course.
  • It is not a very good surface to paint over because it is made of vinyl or other materials that are not intended to be painted over.
  • Commercial wallpaper is intended to be left on the wall until it gets removed.

For wallpaper you have that can be painted over, you can check out a bog post we did about this some time ago:

Can I remove commercial wallpaper myself?

I will not say that you should not remove the wallpaper yourself, you certainly can try to do it. I would recommend that you call a contractor that has experience in removing commercial wallpaper for several reasons:

  • Commercial wallcovering is heavy.
  • The wallpaper itself is 54 inches wide- awkward to work with.
  • Fire alarms, light fixtures, etc. have been installed over the wallpaper itself, so they need to be removed first.
  • Due to the size and weight, you will need a dumpster to dispose of it.
  • Adhesive removal can be tedious but it is also MESSY!

If you want to tackle this job yourself, you will need some tools.

  • Pump sprayer
  • Garbage cans
  • Screwdrivers
  • Gloves
  • Drywall knives (used to apply drywall compound) a 4′” or 6″ blade is perfect
  • Drop cloths
  • Buckets
  • Sponges
  • Access to hot water
  • A vacuum
  • Razor blades and a blade holder or utility knife

Let’s remove some wallpaper!

Make sure you remove all outlet covers, lights, pictures, etc. from the walls, and put them in a safe place.

Lay out your drop cloths on the floor. There will be dust from the dried glue coming off the wall. Have a plan where you will dispose of the old wallpaper.

Are there baseboards that will be coming off too? If so, just peel them from the wall. If not, then you will have to use a razor blade or sharp razor knife to cut along the edge of the baseboards before you remove wallpaper.

Start from the bottom of the wall, use the drywall knife and start to peel the paper from the wall. Because how heavy and durable this wallpaper is, it should come off in full-size sheets (54 inches wide by the height of your walls) you may need 2 people.

IF YOU SEE MOLD BEHIND THE WALLPAPER…STOP! Call a professional to come out. 

Hopefully, the walls were prepared from the previous install and when you remove the paper, the wall is not damaged (we are assuming that for this blog). The glue that remains is very hard. To remove it, get your pump sprayer filled with hot water. Now just spray the walls with hot water. LET THE WATER SIT! It needs time to reactivate the glue. Once the glue is soft, scrape the glue from the walls and throw it in trash bags-NOT down the toilet.  Once you have scraped away as much glue as possible, use a sponge with hot water and wash the walls clean.

After the walls are dry they are ready to paint or install new wallpaper.

If I don’t want to do this myself…

The next most popular question is, “How much will it cost to remove commercial wallpaper?” Our cost to remove is about $0.98 cents per SF. If you read the above, there is a lot of work for commercial wallpaper removal. Our cost includes:

  • Setup and cleanup of walls.
  • Actual removal of wallpaper from walls.
  • Removing all glue from walls.
  • Washing wallpaper paste residue from walls.
  • Minor wall repairs. If the walls have been severely damaged, we will have to evaluate the damage to give you a cost to repair.
  • Disposal of the old wallpaper.

There are always other issues that can affect the cost, such as 2-story walls or mold or water issues. Have questions? As always, you can call us at any time at (847) 349-4112 to get a free estimate for these services.

With wallpaper services for your home and office, we are here to help you love the space you’re in.

How long after painting a bathroom can I shower?

Hello everyone, David Cook with Dfranco Painting and Wallpaper here in Huntley, IL, with today’s you ask we answer – How Long after painting a bathroom can I shower? When we paint a bathroom, this is the top asked question, and most ignored answer.

Making sure the paint cures ensures a successful paint job, so lets dive into today’s question.

How long does it take to paint to dry to the touch?

When you are painting your home, and we are assuming interior painting for the purpose of this blog post, wet paint is never fun to work around. Each paint has its unique properties so you do need to check the lable to make sure you follow their specs- so you dont void the warranty.

new bath paint-make sure its dry before showering

Typically- dry to the touch is a few hours. It can be sped up by using a fan. Keep in mind dry to the touch does not mean cure time- huge difference- see below..

When will the paint be fully cured?

So- great question! The dry time is the touch. The cure time is when it is 100% dry, no more off gassing, can be put to its full use (ie washing)

The cure time is when all of the solids in the paint have fully dried. These solids are in part the tint, the main chemicals that make the paint what it is. They are fluid when applied and need time to dry together to get its full bond, water resistance, UV resistance, etc.

Typically, cure time is 30-45 days. Ok- but How long after painting a bathroom can I shower? You can use it in 24-36 hours, but make sure you avoid excessive moisture by keeping doors open, vents on etc, the last thing you want to see is moisture drips.

Tips to keep paint looking new in bath after painting

Everyone is anxious to start decorating after the paint is up and dry to the touch. But be careful! We have already answer How long to after painting a bathroom can I take a shower is 24-36 hours. The same rule should apply before hanging shower curtains, glueing mirrors, towel holders etc.

Whenever you take a shower- you should always have ventilation. That can be achieved with open windows, open doors and if you have one- using a vent fan.

If you have something on the wall- toothpaste, hairspray, dust, make sure to use care to clean it! We say to use microfibre and water- gently to clean- the more you wipe the higher your chances to make marks on the walls.

Other issues with paint in bathrooms

The number one problem is moisture. Water from showers, dripping from the sides or puddling where the water seaps into the drywall are the biggest issues we are called to fix.

Seap lines- looks like the walls are crying-

running lines on bath paint
running, seaping or crying walls in a bathroom

These typically are due to poor paint quality and or no ventilation while using very hot and steamy showers. Ventilation takes care of most of this- usually.

Have other Paint questions!

Let us know- we are here to try and help you love the space you’re in and take the pain out of painting!

Paint your basement Ceiling Black!

So you’re thinking of what to do for your basement ceiling. Should you drywall, or maybe just hang a drop ceiling? Then someone told you; Paint your Ceiling Black! Now your thinking.. should I – could I- Would I dare- we say yes you should!

Hello Everyone- today’s question- Paint your Basement Ceiling Black is a hot topic for 2024 for us. We have done 4 of these projects now -and so far each time looks just as good as the last. The latest project comes from Gilberts, IL.

What you need before basement rafters black

You can see from the images here and the video above, the difference from wood to black is huge!

There area a few things to keep in mind..

  • this is done by spraying- so there can be a mess to maek this happen
  • if you have a basement full of stuff- your gonna need to move it out of the area being painted
  • you will have to cover water pipes with insulation
  • new HVAC vents will need to be cleaned before painting
  • IF you have alot of loose wires, cables etc- the more that is cleaned up neatly the better things look when they are painted black
basement ceiling ready to paint black

What kind of paint should I use too paint my ceiling black

There are two main type of black paint we have used to paint ceilings. The first is a commercial product, and it is called Black Dryfall. The 2nd is black aqualock primer.

Dryfall is typically used in commercial spaces. It is quite unique. You need to have some open spaces- 14 ft tall or higher for the product to really work its magic. At 14 feet, the product has enough air when falling that it dries out becoming dust! You then sweep it up!

Black Aqualock Primer, is stock black, not tinted- HUGE difference for coverage. When black is tinted it does not cover as well as a pre made black product.

Aqua Lock Primer stock black

Before and after Black painted ceiling

A picture is worth 1,000 words….

How can we help you paint your basement?

it doesn’t matter if what your painting in your home, we can help. Give us call and let us know what we can do to help you love the space your in with painting, wallpaper, cabinet refinishinng- and exterior painting as well!!

Levels of Wall Prep Before Painting

So you have a place your living or working that you are looking to have painted. Your not sure what to expect for what gets fixed or not. There are nail holes in your walls, cracks in the walls and areas that look aweful. How much repair do you want, should you have done. Today we look at Levels of wall prep before painting!

hello Everyone.. David here at Dfranco Painting and Wallpaper in Huntley, IL, and today we talk about wall prep before painting. This is a common and recurring issue that happens while painting homes. Lets see if we can help with this issue!

What is wall prep?

When any surface is going to be painted, there is a level of prep work that needs to be taken. If you are painting a canvas- it may need primer, a base coat or paint and the area around you covered. Painting the exterior of a home need repairs, power washing. Painting the interior of a home means that you need to get those walls ready for paint!

Walls- especially those made with drywall are going to have dents, nics, scrapes, holes, cracks or dirt on them. These issues need to be fixed! To what level you are going to fix is what we are getting into today. If you really want to get into this.. take some time to review Paint Contractors Association in-depth definitions here

Level 1 Standard wall prep

So we are going to review the Levels of wall prep before painting, as described by Dfranco Paintin, and what is in our estimate or scope of work.

Standard Prep-included in basic painting package

WALLS & CEILINGS:
• Cleaning of surfaces (wiping off excessive dust), to create optimal adhesion
• Filling and sanding of any minor knicks, nail holes, or other noticeable imperfections that are smaller than a 1/8 of an inch . (example: nail holes, minor scratches from hands/paws) This process is about 15 min.
• Walls are pole sanded
• Spot-priming of drywall patches
• Taping off and covering items when necessary

small hole repairs are part of basic wall prep included in our standard pricing

TRIMWORK:
• Filling/sanding minor imperfections with woodfiller, or wood putty is not part of the basic pep or repairs
• Caulking open cracks where work is being done, with the excpetion of when staining and/or varnishing. These cracks will most-likely not be flush with the substrate. The purpose is to fill gaps.
• Spot-priming any bare wood areas
• Taping off and covering items when necessary

Intermediate wall prep -Level 2

Level 2 Prep- this is time and material based

WALLS & CEILINGS:
• Standard Prep Included
• Filling & sanding of larger holes (sizes ranging from a quarter dollar to a baseball), excessive nail pops, excessive scratch marks
• Minor repairs onn corner bead, seams etc
• Rough guess is 90 minutes to 2 hours for these type os repairs..

this is a repair that is time and material based

TRIMWORK:
• Standard Prep Included
• Filling minor holes and imperfections with wood filler or wood bondo to create a flush profile with the substrate
• Light sanding with only sanding blocks and paper to all trimwork to create a uniform texture (however, the build-up of previous paint creates ridges too thick to make the profile uniformly smooth, in which case, you will still see the profile of where the old paint meets bare wood or less paint, but the overall texture should be uniform)
• All joint cracks to be caulked

Level 3 – High level wall repairs

WALLS & CEILINGS:
• Standard Prep & Level 2 Prep Included
• Corner bead and inside seam/drywall seam replacement
• Minor skim coating and sanding of uneven areas or uneven profiles
• Fairly labor-intensive figure at least 4-6 hours..

drywall seams and corner bead to be repaired

TRIMWORK:
• Standard Prep & Level 2 Prep Included
• Power sanding the trim to create a uniform profile if needed
• Using bondo to fill minor imperfections – imperfections should end up almost invisible
• Using Bondo to skim over larger profile diferences to create a uniform and smooth profile

Other wall prep Questions?

Im sure you might, but this should get you started.. If you do have other questions.. let us know!

Caulking wood trim before painting?

Do you have wood stained trim in your home? Are you painting your walls? Do you hate the way the wood trim has gaps? Well- these issues and concerns are today’s answered question. Should I be Caulking wood trim before painting?

Hello everyone, thanks for taking the time to read todays question. I am David with Dfranco Painting and Wallpaper in Huntley, IL. This questions comes from a home we are painting in Elgin, IL.

Why is my trim not caulked?

If you have stained trim, 99.9% of the time, the trim is not caulked to the wall. The result is a gap between the wall and trim. I am not a fan of the gap between trim and walls either.

(if you have painted trim and it is not caulked- then someone dropped the ball and did not do their job)

You can caulk stained trim, but it is quite a tedious step by step process. We can go over how, but we just wanted to make sure you know not caulked stained trim is very normal.

If you are getting ready to paint your walls a new color or maybe just doing touch ups, then caulk wood trim before painting may be on your to-do list.

Should I caulk wood trim before painting?

The should question is always a hard question to answer. Should, could or would can be very subjective as they reflect personal choice.

I am not a fan of the gap as I have said earlier. Gaps in trim, if dark can be easily ignored or overseen- as the dark gap kind of goes away, it is not unsightly to the eye for the most part. These gaps can, however, be nasty looking if the trim was not installed correctly.

Gaps between walls and trim can result in dirt/dust/debris getting between the wall and trim. That gap in the trim can be difficult to get clean as a vacuum cannot easily reach between small spaces (think tight spaces in your car when trying to clean it.

Items needed…

So here is the quick and dirty… Items you need to caulk wood trim before painting:

  • clean rags
  • water
  • 5 in 1 tools
  • solid paintable colored caulk- the same color as your wood trim
  • drop cloths or masking paper
  • masking tape

You need clean rags so you can clean the trim before Painting. Damp rag works great, if there is dirt, grease grime etc, then you made need a cleaner so the tape and caulk stick to the wood surface.

We wanted to make sure you see that you need paintable caulk- do not use silicone caulk- as it typically is not paintable, it smells like vinegar and takes a long time to cure.

How to caulk your trim before painting walls

Just to make sure, we are only talking about caulking trim that is stained wood, not painted trim. There is a HUGE diffference.

So 1st thing is cleaning. You need to make sure the wood trim and the floor are clean so tape can stick to the surfaces

once everything is clean.. then you can start taping. We really like blue frog tape. It sticks, and removed easy leaving clean lines. Tape the edge of the trim so you can see the very edge of the wood and leaving the gap to get filled with caulk. We leave the slight edge so there is a place for the caulk to full stick too.

Next caulking.. cut out a small hole- too big and you have a mess to deal with. Just use enough to fill the gap, then wipe smooth with wet rag to get clean line.

Once a area is caulked, then pull the tape. You dont want the caulk to stick to the tape! Once tape is pulled, allow the caulk to dry overnight.

The next day, you will have to re-caulk the area before painting. Dark caulk will either need 3 coats of paint or primer to cover the dark color caulk before painting colors such as white.

What if I have white trim?

We will save this how to for another day, but here is a old video on this…

Got painting questions?

we have answers! let us know if you have a specific question we can help with!

Top 5 Issues with Painting Oak Cabinets

If you have a house that was built in the 1980-2005, odds are you have oak cabinets. Ok, maybe you have maple or cherry.. but most homes have wood cabinets. One of the best ways to update the look and feel of your home is to paint your home. The next best improvement is updating your kitchen cabinets. There are several ways to update your kitchen and cabinets, but the best value is to paint your kitchen cabinets. If you are going to paint kitchen cabients or bathroom vanities then you should know the Top 5 Issues With Painting Oak Cabients!

Thanks for taking the time to read this article and check us out! I am David Cook, with Dranco Painting and Wallpaper, here in Huntley, IL. Today’s title is a question we are asked almost every time we provide an estimate for painting Oak kitchen cabinets. So lets take a peek at a video of a sample oak cabinet door, then look at some issues you may be facing- or asking about.

Will painted cabinets peel?

ok, so this is by far the most popular or common question we are asked hands down. Peel paint on oak cabinets, on walls, on trim is all caused by the exact same issue- Poor preparation.

Water damaged sink panel

When a surface is dirty it is going to be very difficult to get paint to stick to the surface. If you have a painted surface that is very slick-shiney etc, then once more you will have a very difficult time to get paint to stick to that surface.

When we prepare a surface for paint, we clean it, dust it, clean it where needed and then we prime it. Primer gives the surface a uniform appearance and readiness to accept paint. In the case for cabinets, the bonding primer sticks to the wood cabinet, which allows the cabinet paint a surface to bond too, preventing peeling.

Are my painted cabinets going to chip?

This question is a issue and a subject to much frustration. Think of this as when you buy a car- is Honda going to warranty a repair from a rock that chipped your car while driving on the freeway? The same is true for painted wood- blunt force trauma to wood causes paint to chip, there is nothing you can do about it. You cannot prevent paint from chipping either.

You an read more about chips and peeling in an article we wrote some time ago..

Using the wrong paint for cabinets

There are certain paints for certain applications. You don’t use automotive paint in a bathroom. Similar- you don’t use wall paint to paint cabinets.

Cabinets that re going to be painted should use a paint that is made for cabinets. There are several brands and several types. We use hybrid lacquer or Urathanes. Do not use Acrylic or oil-based products. If you want to know why- ask us and we can do another blog post about that!

I can see brush and roller marks on my cabinets

This really isn’t as much of an issue as much as it is a preference. I really do not brush and roll cabinets. I do not like seeing the brush or roller marks. Brush and roller marks happen for several reasons:

  • using bad brushed leave marks
  • cheap rollers leave laps or bubbles
  • rough surfaces give un even surfaces leaving marks
  • if you use a paint not meant to roll, you will leave lines
  • the paint dries to fast
  • leaving wet painted cabinets in a dirty area- dust/bugs

I could probably list a few more of these reasons, but the biggest reason is if you use a brush or roller you will leave brush or roller marks. Duh?-maybe but that is the reality.

I hate the color of my cabinets

this one always kills me. Before you paint- look at the color! If you say I don’t really care- then don’t complain about the color! If it didn’t happen I would not be writing about it. People see a tv show, hear about a color from friends, or someone sends a picture and think I want it!

Every phone takes pics a bit differently which does affect the look and appearance of the photos being taken. The lighting in your home makes a difference in the color of the paint you use. Surrounding accent colors, flooring, drapes, etc also make a difference in the colors in your home.

This is where we find the free interior designer makes a huge difference. They know and will help you make the right choice!

How can we help?

If you are thinking of painting cabinets, please let us know what we can do to help! We want you to enjoy the process and the results!! Although we are in Huntley, we serve all of our surrounding communities such as Pingree Grove, Algonquin, Carpentersville, and Elgin to name a few.

Repainting White Trim!

If you are like many homes in our area, you have white trim in your home. After several years, one thing you will start seeing is gaps, in holes and wear and tear that make that white paint look pretty bad. The question is What do I need to do before Repainting White Trim?

Good day everyone, I am David with Dfranco Painting and Wallpaper here in Huntley, IL, with todays question from a home owner in Elgin, IL where we are repainting the entire home. Someone painted the trim white in my house and it looks like crap- how do you fix it? How do you get the trim ready to repaint it white?

Clean surfaces before you paint them!

The biggest problem with repainting anything is when the surfaces are not cleaned.

We are just going to use a wet rag, to wipe the surfaces down, dusting alone is not enough as there are typically other types of dirt or residue that the vacuum alone will not clean away.

You can use a cleaner, but just use something that is safe to paint. Do not leave oil residue and not leaving it wet! (Vinegar and water are the best)

Recaulking painted trim

For most homes, painted white trim will start to have gaps or crack in them as they wear. The wood trim will also expand and contract depending on the seasons which can affect the seams and appearances of gaps.

If there is caulk there already and it is bulging out or peeling, you need to clean that away, cut it out, pull it out etc. If the caulk is in good condition, not peeling etc, then you may just have an area where it was not caulked very well or it shrank.

Once the old caulk is removed, then you can start re caulking those gaps. We use elastomeric caulk, which has some adhesive properties in it but more importantly, it will expand and contract to help not bring gaps back.

painted white trim-caulked and ready for paint

Filling Nail holes in painted trim

When trim is painted white (or any other color) the nail holes either were filled. Hope fully you do not have a case where someone tried to fill the holes. I say try cause the really bad attempts result in the cracks, gaps or bumps. It is caused from filler coming out, the holes were filled but never sanded, or there will be crescent moon shape gaps in the trim .

What do you do 1st? Clean it. If you have holes to fill fill them using a spackle or wood filler. Just make sure you sand smooth, then spot-prime those areas where you filled holes. Finally, you can paint!

Type of paint to use for painting trim

This can be a loaded question, so I will just answer it as to what we use. We primarily use Sherwin Williams Proclassic semi-gloss paint. We have also used Emerald Urethane paint as well. Both are good, sheen and time is why we pick one product over the other. Each has a different sheen level when dry, and pro classic dries fast!

Should I paint my trim using a brush or spray my trim?

This will be a matter of preference. (for the most part) Sprayed trim just looks awesome. Spraying trim also means you are committed to covering everything in your home, having dust, debris and smell longer. Trim that has been sprayed looks and feels exactly as you think it should- smooth and shiny!

Painting your trim with a brush is fine. More times than not, you will see brush or roller marks, it take a long period of time to do and you typically need 2 coats.

There really is no wrong or right in this. It really comes down to how much time you have, the tools you have, what you want it to look like, and budget. (spraying will cost more)

How can we help you with your painting?

This question was from a job site in Elgin. We are working in Huntley, Algonquin, Crystal Lake, and Pingree Grove over the next few weeks. You may have a question about your Painting project. Let us know how we can help or get your question answered.

There is mold behind my wallpaper!

MOLD?! There is mold behind my wallpaper! What the heck?

This is not only gross looking, but dangerous. Hi! David Cook, owner of D’franco Painting & Wallpaper Here in Huntley, IL, with another quick blog for you with issues and questions we face when in customers’ homes and business locations.

The most common type of mold species that can readily be found under wallpaper is black mold. This mold can be either surface mold or mold that completely penetrates surfaces permeating through the drywall. Black mold is also known as Stachybotrys, and this type of mold can be very toxic to your health if left untreated.

mold behind my wallpaper
Mold behind wallpaper.

Mold that is in your home is DANGEROUS

As you may or may not have seen or heard, toxic mold and indoor air pollution from biological sources seem to always be in the news. This is due to several factors, there is awareness of how much mold, especially toxic mold, can affect your health.

Roughly 35-40% of buildings have some form of mold. These dangerous mold spores are in over 25% of residential homes!

Mycotoxins that are released by mold are more problematic than pesticides or heavy metals because they can affect a more diverse range of biological systems than pesticides and dangerous heavy metals.

The mold most often on walls behind wallpaper (Stachybotrys) emits trichothecene. Concentrations of this dangerous mycotoxin has the ability to inhibit protein synthesis and affect every single organ of your body.

It’s also worth considering that fungi like mold also have a high rate of mutation. This means it is possible for mold to produce novel species that is capable of evading your immune system.

One nasty mold that can be very hazardous is the type of mold known as Cryptococcus. It actually has a mortality rate that’s estimated as high as 30% for those who become infected.

Most indoor mold problems are related to construction defects or home maintenance issues that allow for water intrusion. However, things like localized flooding and certain lifestyle habits can also greatly introduce the chances of mold invading your home to establish a long-term presence.

Don’t blame yourself- it’s not your fault there is mold.

People will always ask- what did I do wrong to get mold? The answer is always the same- you didn’t do anything wrong. So there must be something wrong with the wallpaper!

It is NOT the wallpaper’s fault you have mold!

There are several reasons why mold will show up:

  • Water from leaking pipes, flooding, etc.
  • Walls that were not insulated. Moisture getting in behind the wallpaper through the insulation.
  • Contaminates. Sometimes wallpaper adhesive could have been exposed to mold contaminates.
  • Mold was already on or in the wall before wallpaper was installed.
moldy walls
Moldy Walls, Elgin, IL

If you are living in the North West Suburbs of Chicagoland such as Elgin, Schaumburg, St. Charles, Crystal Lake, or Bartlett, Mold can also happen because of improper ventilation, condensation, and of course water leaks from water pipes or toilets. These calls or mold issues are the most common calls we receive too get help with.

moldy wall behind wallpaper
Moldy wall behind wallpaper, Schaumburg IL

Removing Moldy Wallpaper

If you see that the wallpaper in your home has mold growth, you should remove it. If the problem is significant, you may have to have a professional mold remediation service with the right tools, training, and experience to effectively eliminate the presence of mold from the home or building. Here are the steps you should take to do it safely and effectively:

Step 1:

Wear old clothes that you plan to discard. Wear a respirator mask that is rated for to screen out microbes. Protective eye-wear is also a very good idea, as are latex gloves. Some types of mold can cause severe skin irritation. It’s also a good idea to cover all furniture with plastic in the room and keep the door shut.

Step 2:

Peel away a small strip of wallpaper. Take a close look for signs of mold on the wall or the back of the paper. It might look black, red, orange, grainy, splotchy, or discolored.

Step 3:

Carefully remove all the wallpaper from around the affected area. There are several different types of wallpaper stripper sold in stores. Renting a wallpaper steamer might also be worth the time and money.

Step 4:

Mix 4 parts dimethyl ammonium chloride with 1 part of water in a bucket. Brush the solution over the mold. Then be followed by applying a solution of 3 parts disodium octaborate tetrahydrate with two parts of glycol. Sounds fun, right?

Using these solutions in tandem has proven to be highly effective for killing mold on wallboards. The combination is particularly effective on mold on wallboards. Still, it is best to do multiple applications!

Step 5:

Allow the treated area to thoroughly dry before cleaning it with soap and water to remove the dead mold.

Step 6:

Shower and clean yourself thoroughly. Make sure to bag all the clothes you wore and discard them immediately.

So, what’s next?

Now that the walls are clean, it’s time to let the walls dry out. Use some fans and a dehumidifier. Once dry, use mold killing primer. Block it out, seal the walls. Once the walls are dry and primer is out, you have a fresh slate.

Are you ready for interior paint? Wallpaper? Now that you have fixed the problem, the walls are yours to do what you please! So, let us help you love the space you’re in…the right way!

Common Problems why Paint Does not Match Swatch Colors

You are getting ready to paint your house. On the way home you went to the paint store to get paint swatches of colors you like. To make sure you like the colors, you bought sample quarts and painted your walls. When the paint dries- What the Heck! The Paint does not match the swatch Colors!

Hey Everyone- David at Dfranco Painting and Wallpaper here in Huntley, IL. Helping you with your questions on painting and wallpaper. This question was also our problem last week. As we were painting a house in Huntley, Painting in Pingree grove and Painitng in Barrington, we had 3 separate jobs where the paint and paint swatch were off. So lets look at why and what you can do to make sure it does happen to you! We are takig a peek at the 2 brand we use the most, Sherwin Willliams and Benjamin Moore.

paint color not matching paint swatches

Reasons paint colors may be wrong- Benjamin Moore

Let’s start with Benjamin Moore. We do use this paint, but as needed or when requested. Our reasons have been cost, locations and issues with color. They have great paint and colors. We are just tired of dealing with issues that cost us time and money. So – we have found that:

  • BM colors are printed. (most are) These are printed in different areas of the country. So with different printers come different colors. There doesn’t seem to be any standard color verification process to verify color from location to location, or from different runs/years. Which means you can have color 1 from 3 different printers. They are dispursed at dozens of different stores- giving you a variation in color form store to store.
  • Paint bases and Paint tints change every 2 years or so. If the paint swatches have not been updated or you have old fand decks- the color may be different
  • proprietary colors. Each paint company has colors they pride themselves on. These paints are made by using, a base and tints that other companies do not use. For example, if BEhr uses black tints and SHerwin uses black tint the colors should match. But if one of these do not use black but use other colors to get black- the paint color will never match.
  • matching chips vs computer match. This gets to the paint swatches again- if a swatch is being used to make or have the paint matched too- at store A, but store B uses the computer formula- there will be a difference.
matching color by eye or hand

Problems with wrong colors – Sherwin Williams

By and far the most common problem with paint colors being wrong is older or outdated paint chips. Next would be name or color spelled wrong. Lastly, it is trying to make a competitors color.

There are certain colors, that just cannot be made from one brand to another. Using a swatch to verify the color you want is the best method to make sure this issue does not happen to you! Paint stores with experience and good reps will just tell you that up front. These people will let you know up front- it will not match or be off by “x” percent.

We have been using Sherwin for some time now and we have had very little (zero) issues with colors being wrong due to swatch or color matches. Im not 100% sure why, but they seem to be more systematized which helps reduce these issues taking human error out of the equation. AGAIN.. best way to make sure this does not happen is to have the paint swatch in hand use it to verify color you want.

Other top reasons paint colors do not match

Some of these reasons may be the same as above. We just want to make sure you know what we know to be better informed.

  • To be 100% fair across the board- every paint maker will tell you color from swatch to paint can vary 1-3%.
  • old paint swatches. Paints ae updated often. New tints, new base formulas from year to year change the coloration
  • human error. Did you know that people with blue and brown eyes see color differently? With that in mind- your color may look different because of eye color!
  • lighting affects colors. Different light makes color look different. Time of day the sun will shift color appearance. Fluorescent vs LED will make a difference.
  • Reflection. As you paint, reflection will matter. If you have a lot of green trees outside your window, that green will refect in your home, affecting the color. Have you ever painted red? the red turns white paint colors pint because of reflection!
  • Sheen. the sheen of paint will change how colors appear as well. (this is a issues with swatches more than anything else)

How to make sure your paint colors are correct.

Lets list this one out…

  • give your painter a list of name and number of colors you want
  • if you have paint swatches- take them to store or give them to the painter so the color can be matched
  • make sure you have the most up to date color swatches
  • hire a designer to do the work for you!

HAve other questions about painting- let us know how we can help!

Book Your FREE Estimate
MM slash DD slash YYYY
This field is for validation purposes and should be left unchanged.
close

Your Free Estimate

To help home and businesses owners during this challenging time, we are offering free virtual estimates.

Fill out the form below and we will schedule a time for a free video call estimate.